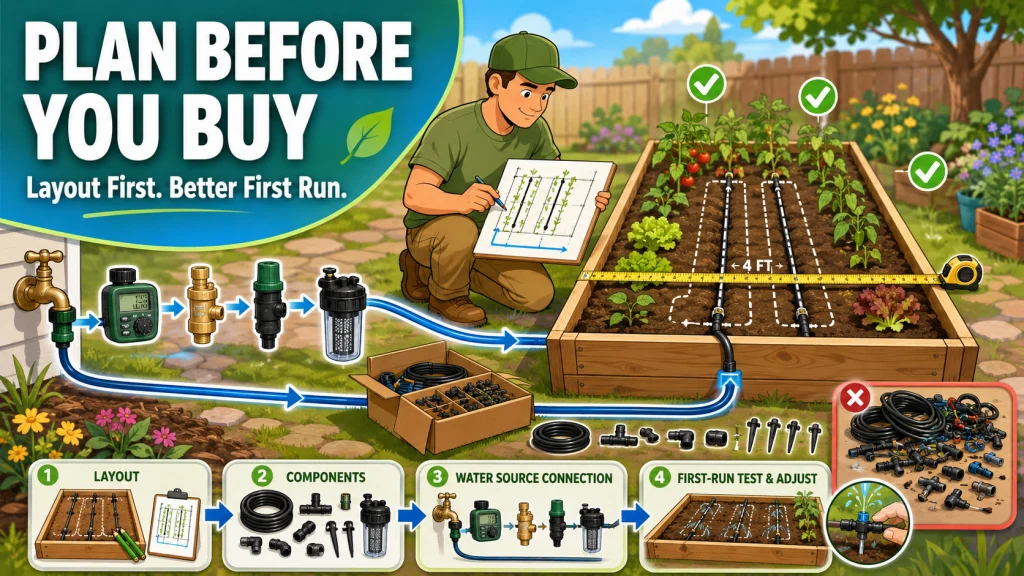
Every raised bed drip setup I have worked on follows the same sequence: plan the layout first, then spec the components, then connect to the water source and expand from there. When that order gets reversed, which it usually does when someone buys a kit before measuring their beds, the system works on paper and causes problems in the ground. This guide maps the full process from first decision to first run, and routes you to the right section when the detail gets specific enough to deserve its own guide.
Why the Sequence Matters Before Anything Else
Most drip irrigation articles for raised beds start with a parts list. That approach makes sense if you already know what you need, but for a first install, it puts the cart before the horse. The parts you need depend on the layout, and the layout depends on what you are growing, how wide the bed is, and how many beds you are connecting. If you skip the planning step, you end up buying the wrong emitter spacing, too little mainline, or a kit designed for one bed when you have four.
The sequence that I follow on a residential raised bed install is straightforward: plan the layout, identify the correct components, connect to the water source, test, and adjust. Each of those steps has real decision points that affect the others. Getting the order right means fewer returns, fewer reinstalls, and a system that actually waters the root zone instead of the path between the beds.
This guide covers each step at the overview level. Where the subject gets specific enough to warrant its own full guide, I will point you there. The goal here is to give you the full picture before you spend money or cut tubing.
Step 1: Plan the Layout Before You Buy a Single Fitting
Layout planning is the step that most first-time installers skip, and it is the reason I see systems get pulled out and redone the following spring. The decisions made at the layout stage, how many driplines run through each bed, how far apart they sit, where the header enters the bed, and what crop spacing they need to match, determine whether the system waters evenly or leaves dry corners that look fine on day one and show up as wilted plants three weeks in.
For a 4-foot-wide vegetable bed, I usually run two parallel driplines spaced about 12 inches from each side wall. That puts emitters within reach of most root zones without asking a single line to cover the whole bed width. A bed planted with tomatoes may need a different spacing than a bed packed with lettuce, because the root depth and canopy spread are different. These are not decisions a kit box will make for you, and none of the labels on the package account for your specific bed dimensions or crop mix.
The layout plan also tells you how much tubing to buy, where fittings go, and whether a single mainline run can feed all your beds without losing enough pressure at the far end to matter. Getting this clear before you buy anything saves a separate trip to the hardware store.
Field Note: The mistake I see most often in first installs is running one dripline down the center of a 4-foot bed like a garden hose substitute. It looks tidy. It does not water the outer 12 inches of the bed consistently once the plants are in and the soil at the edges starts pulling moisture away from the center line.
Full layout guidance, including line count by bed width, emitter spacing by crop type, and header placement options, is covered in the raised bed drip irrigation layout guide.
Step 2: Understand the Components and the Order They Go In
A raised bed drip system is not complicated, but the pieces connect in a specific order, and that order matters more than most kit instructions communicate. The head assembly comes first at the hose bib: timer, backflow preventer if required, pressure regulator, and filter. After the head assembly comes the mainline tubing, which carries water from the hose bib to the beds. From the mainline, dripline branches off into each bed. Fittings connect everything, and they need to be compatible with the tubing diameter you are using.
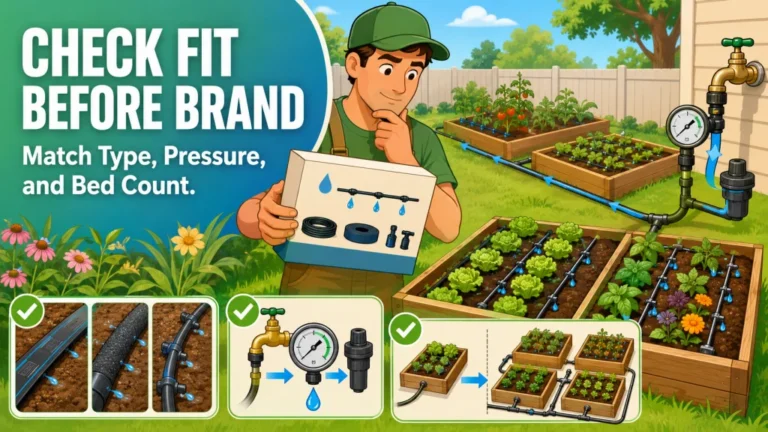
The piece most commonly left out of a first install is the pressure regulator. Hose bib pressure in most residential setups runs between 40 and 80 PSI. Many common raised bed drip components are designed around roughly 15 to 30 PSI. Without a regulator stepping that pressure down, the small fittings in a drip kit are working under more stress than they were built to handle. The system may look fine the first time you turn it on. A few weeks later, a fitting at a weak joint starts weeping. That is a pressure problem, not a fitting problem.
Filters are the other piece that gets skipped. Particulate from a residential water supply, even municipal water, will clog emitters over time. A filter installed upstream of the dripline catches debris before it reaches the small emitter openings. Cleaning a filter takes two minutes. Clearing a clogged emitter line takes longer and often means pulling dripline out of a bed that has already been planted.
| Component | Position in assembly | Why it matters |
|---|---|---|
| Timer | First, at hose bib | Controls run schedule without manual operation |
| Backflow preventer | After timer, before regulator | Prevents irrigation water from re-entering the supply line |
| Pressure regulator | After backflow preventer | Steps hose bib pressure down to drip-safe range (15 to 30 PSI) |
| Filter | After regulator, before mainline | Removes particulate before it reaches emitters |
| Mainline tubing | From head assembly to beds | Carries water from water source to bed entry points |
| Dripline or drip tape | Inside the bed | Delivers water at emitter level to the root zone |
| End caps / flush valves | At end of each dripline | Closes the line; flush valves simplify seasonal maintenance |
The table above covers the standard head-to-bed sequence for a single-zone raised bed setup. Some kits include all of these components; others ship without a pressure regulator or include only a basic inline filter. Knowing the full list before you buy makes it easier to identify what a given kit is missing before it matters at installation time.
The full component breakdown, including tubing diameter choices, emitter flow rates, drip tape versus emitter line comparisons, and filter mesh sizing, is in the raised bed drip irrigation components guide.

This upgraded hose timer features two separate programmable zones, letting you set custom start times and durations for healthier, water-efficient watering. Upgraded valves reduce flow resistance by 40%, and the IP65 waterproof housing has passed 20,000 cycle testing for long-term durability. It offers auto, manual, and rain delay modes with up to 72 hours of rain delay, plus a 2.5 inch LED display showing schedules, power status, and low battery alerts. The 3/4 inch interface fits most standard faucets, and the large button, rotating design makes setup easy for users of any age.
Check On AmazonIf you click this link and buy, we earn a commission at no additional cost to you.
Step 3: Connect to the Water Source and Plan for Expansion
Once the layout is planned and the components are identified, the next question is how the mainline gets from the hose bib to the beds. For a single raised bed sitting close to the house, this is straightforward: a short mainline run, a tee or elbow to split into the bed, and you are done. For three or four beds spread across a yard, the connection question gets more involved.
Mainline length affects pressure at the far end of the system. The longer the run and the more beds connected to a single mainline, the more pressure drops by the time water reaches the last emitters in the last bed. In practice, I have seen 50-foot runs on residential raised bed setups work without meaningful pressure loss when the system is sized correctly. At 100 feet or more, or when a single line is feeding six or more beds, the far-end emitter flow drops enough to create uneven watering. That is the point where splitting into zones, using a two-outlet timer or a manifold, becomes a real option rather than an overcomplicated one.
Running the mainline is also where most people make a routing decision they later regret. Mainline that cuts through a bed instead of running along the outside edge leaves you with a line you cannot dig around, a fitting in the middle of planted soil, and no clean way to disconnect one bed without interrupting the rest. Running mainline along the outside of all the beds, with a dedicated entry point for each dripline branch, takes a few extra feet of tubing and keeps the system easier to maintain.
Note: Most hose-end timers have a single outlet, which means a single mainline zone. If you eventually want to run two zones on different schedules, a two-outlet timer or a basic manifold with separate shut-offs handles that without a separate controller. For a small raised bed setup, that is usually the realistic upper end of what is needed.
Distance limits, zone splitting, manifold options, and mainline routing for multiple beds are covered in detail in the guide to connecting drip irrigation across raised beds.

This pressure regulator lowers incoming water pressure to a preset 20 PSI, ideal for keeping drip system emitters and fittings from popping off under too much force. It installs with a 3/4 inch FPT by 3/4 inch FPT connection, fitting easily into existing irrigation lines, with a directional arrow to ensure correct placement. Made of ABS treated with UV inhibitors, it resists fading and cracking for long-term outdoor durability.
Check On AmazonIf you click this link and buy, we earn a commission at no additional cost to you.
Testing, Adjusting, and Running the System for the First Time
After the head assembly is installed, the mainline is routed, and the driplines are laid in the beds, the first run should be a slow, deliberate check, not a set-and-forget timer cycle. Turn the system on manually at the timer or hose bib and give it five minutes. Walk the full length of mainline first, looking for drips or sprays at any fitting or connection point. After that, check each bed entry point before walking the dripline inside the bed.
What you are checking for on that first run: fittings that are seated but not fully locked, emitters that are putting out noticeably more or less flow than others on the same line, and any section of dripline that has ballooned slightly from pressure that is too high. If a fitting is weeping where the mainline connects, that is usually a barb that needs to be pushed fully in. If an emitter is not flowing, it may be clogged out of the box, which happens occasionally, and can be cleared by pulling it and flushing the hole before reinserting.
- Walk the full mainline run and check every fitting before inspecting dripline
- Look for emitters that are not flowing, then check whether the line is blocked upstream before assuming the emitter is defective
- Check that end caps are fully seated so the line is pressurized and not losing flow out the ends
- After the system looks clean, let it run for a full planned cycle and check soil moisture in each bed at 2 and 4 inches depth an hour later
- Adjust run time based on what the soil is actually doing, not what the kit instructions suggest
Run time is one of the most common points of confusion in a first install. A kit instruction that says “run 20 to 30 minutes daily” is not accounting for your emitter flow rate, your soil mix, your bed depth, your climate, or your crop. A 0.5 GPH emitter puts out half the water in the same time as a 1 GPH emitter. Sandy soil drains faster than a clay-heavy mix. Shallow-rooted greens need different timing than deep-rooted tomatoes. The first-run soil check is how you calibrate run time to the actual conditions in your beds, which is the only setting that matters.
Pro Tip: Flag any emitter that is putting out noticeably different flow than its neighbors on day one. Emitters at the far end of a long dripline run can show lower flow than those at the entry point if the line is near the upper limit of its recommended run length. Shortening the run, splitting the branch, or moving that bed to a shorter branch solves it more reliably than adjusting the timer.
Note: If Your Beds Are Already Planted: Not everyone installs drip before the seeds go in. If your beds are already growing, avoid digging or routing tubing through established root zones. Run the mainline along the outside edge of the beds, and lay dripline on the soil surface or just under a thin layer of mulch. Use a short test cycle first, 5 to 10 minutes, then check soil moisture 30 minutes later before committing to a full schedule. It takes a few adjustments to dial in run time when you cannot see the root zone clearly, but the process is the same: check the soil, not the clock.

This pack of 20 barbed coupling connectors is designed for 1/2 inch drip irrigation tubing with an inside diameter of 0.560 to 0.600 inches, making it easy to connect, repair, or extend your system. Built from durable, UV-resistant material with a one-piece construction, these fittings hold up well in harsh outdoor conditions over time. Installation requires no tools, simply push the tubing into the fitting until it locks into place. They work well across raised garden beds, shrubs, greenhouses, lawns, and other agricultural watering setups.
Check On AmazonIf you click this link and buy, we earn a commission at no additional cost to you.
Seasonal Maintenance: What to Do at the Start and End of the Season
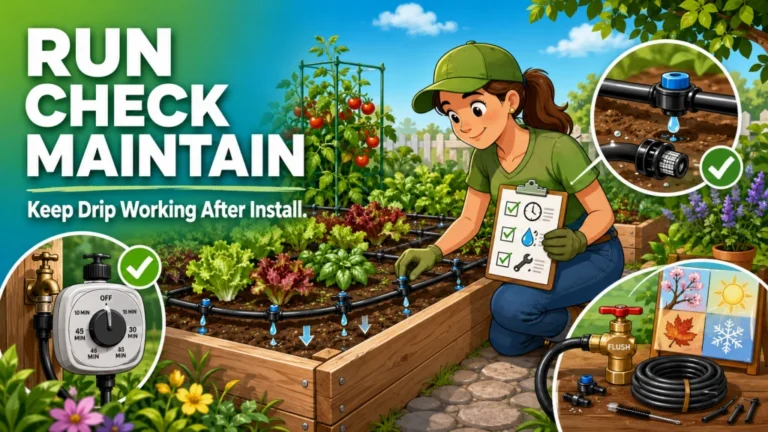
A raised bed drip system does not need constant attention once it is dialed in, but it does need two maintenance moments: one when the season starts and one before freezing weather arrives. Skipping either of those creates problems that are easy to prevent and annoying to fix mid-season.
At the start of the season, flush the filter and check emitters before the first planting goes in. A filter that ran all of last season may have debris caught in the mesh that reduces flow enough to affect the whole system. Flushing it takes two minutes with the cap off at a hose bib. Emitters that were left full of water over winter in a region with hard freezes may have cracked or become partially blocked. Running the system briefly and watching each emitter for even flow is a faster check than waiting to see which plant looks dry in June.
At the end of the season, before a hard freeze, drain the system. Open the flush valves at the end of each dripline or remove end caps and let the lines drain completely. Disconnect the head assembly from the hose bib and store it indoors. Water left in plastic fittings and tubing that freezes overnight will crack fittings and split barbed connections. Most of those failures happen at the joints, which are the parts you want to trust the following spring. A ten-minute drain at the end of the season is cheaper than replacing fittings and dripline in March.
Leave the drip system connected through fall because it is still mild enough to water. Skip the drain because the manufacturer says the tubing is frost-resistant. Find cracked barb fittings and split dripline in spring, then wonder why the emitters are not flowing on the first run of the new season.
Check your local frost dates and drain the system two to three weeks before the first hard freeze expected. Remove and store the timer and pressure regulator indoors. Open flush valves, disconnect at the hose bib, and let the lines sit empty. Reconnect in spring, flush the filter, and check emitters before planting.
Seasonal maintenance is simple when it is built into the rhythm of the garden. The systems I see fail in their second or third season are usually ones where the end-of-season drain was skipped once, a fitting cracked, and the problem compounded from there.
Where to Go Next From Here
Each guide on this site covers one part of the setup process in depth. Go to whichever one matches where you are stuck right now: layout decisions before buying, component selection and assembly order, or running mainline to multiple beds.
| If your question is about | Go here |
|---|---|
| How many driplines per bed, emitter spacing by crop, header placement | Raised Bed Drip Irrigation Layout |
| What each component does, assembly order, drip tape vs emitter line, what kits leave out | Raised Bed Drip Irrigation Components |
| Mainline distance limits, routing for multiple beds, when to split into two zones | Connecting Drip Irrigation to Raised Beds |
If you already have the layout figured out, skip straight to components. If you have the components and are staring at a pile of tubing and multiple beds, the connection guide is the next stop. The sequence is a framework, not a mandatory path.

This kit includes everything needed to water a raised bed up to 4 by 8 feet, with professional-grade components built for repeated seasonal use. It features 35 feet of emitter tubing with 70 built-in, pressure-compensating emitters spaced every 6 inches for even watering near the roots, plus 25 feet of easy-to-handle 1/4 inch distribution tubing. This low-volume design can save up to 80% on water while supporting healthier plants and better yields. Installation is straightforward thanks to an illustrated manual covering multiple layout options, and the system can be automated with a compatible Rain Bird hose-end timer sold separately.
Check On AmazonIf you click this link and buy, we earn a commission at no additional cost to you.
Final Thoughts: Plan First, Buy Second, Adjust After the First Run
The pattern I see in first-time raised bed drip installs is buying before planning. A kit goes in the cart, the instructions get opened in the yard, and the layout gets improvised around whatever tubing length the kit included. That works sometimes. More often, it results in a second trip to the hardware store, a dripline that does not reach the far end of the bed, or a pressure regulator that was not in the kit and would have been an inexpensive part to include from the beginning. Before you buy any kit, match the box contents against your layout, not the other way around.
Once the layout is clear and the components are in the right order, the install itself is straightforward. Test the system on the first run, check soil moisture rather than trusting the timer, and drain everything before a hard freeze. Those three habits keep a simple drip setup running season after season without much intervention. That is the point of doing it right the first time.
FAQs
💧 What do I need for a basic raised bed drip irrigation setup?
At minimum: a timer at the hose bib, a pressure regulator, a filter, mainline tubing, dripline or drip tape, fittings to connect them, and end caps or flush valves to close the lines. Some kits include all of these; others leave out the pressure regulator or ship with a minimal filter. Check the kit contents against that list before buying.
🌱 How many drip lines do I need in a raised bed?
It depends on bed width. A 4-foot-wide bed typically needs two parallel driplines, one running about 12 inches from each side. A narrower 2-foot bed may work with one centered line. A wider bed, 5 feet or more, usually benefits from three lines. The goal is getting emitters within reach of the root zone across the full width of the bed.
🔧 Do I need a pressure regulator for a raised bed drip system?
Yes, in most residential setups. Hose bib pressure typically runs between 40 and 80 PSI, and many common drip components are rated around 15 to 30 PSI. Without a regulator, fittings work under more stress than they are built to handle. The system may look fine at first and start weeping or leaking at connections within a few weeks.
⏱️ How long should I run drip irrigation in a raised bed?
Run time depends on emitter flow rate, soil type, bed depth, climate, and crop. A 0.5 GPH emitter in sandy mix waters faster than in clay-heavy soil. The reliable way to calibrate run time is to check soil moisture at 2 and 4 inches depth an hour after a full cycle, then adjust up or down until the root zone is consistently moist without standing water.
❄️ Do I need to winterize a raised bed drip system?
Yes, anywhere that gets hard freezes. Drain the lines completely before the first hard freeze: open flush valves or remove end caps, disconnect the head assembly at the hose bib, and store the timer and pressure regulator indoors. Water left in fittings and tubing that freezes will crack barb connections and split dripline.
🧱 Can one drip system water multiple raised beds?
Yes. A single mainline run from the hose bib can branch into multiple beds using tees and barb fittings. The practical limit depends on the total number of emitters and mainline length. Long runs or many beds on one line can reduce pressure enough at the far end to affect emitter flow. That is when splitting into two zones, using a two-outlet timer, becomes worth considering.
🍅 Should tomatoes and lettuce be on the same drip schedule?
Ideally not. Lettuce has shallow roots and benefits from shorter, more frequent cycles. Tomatoes root deeper and do better with longer, less frequent runs that push moisture further down. If both crops are on the same timer zone, the compromise usually means the lettuce gets a bit dry or the tomatoes get watered more often than they need. Separating them into two zones is the cleaner fix if your setup allows it.