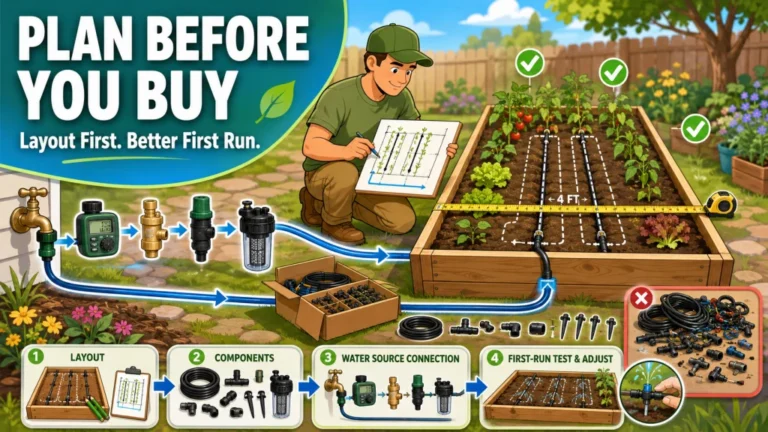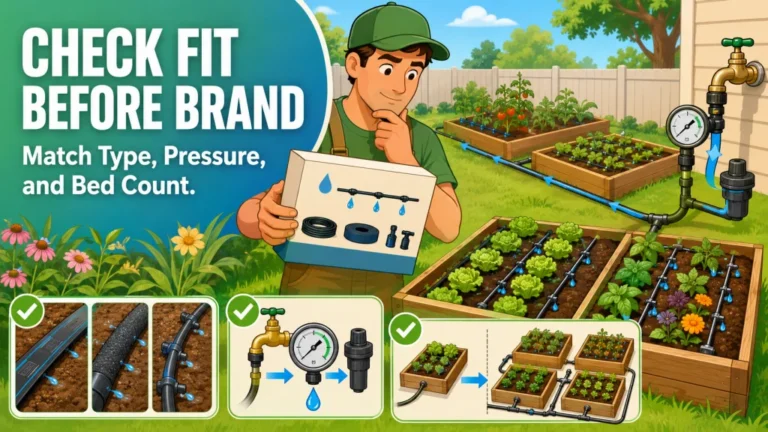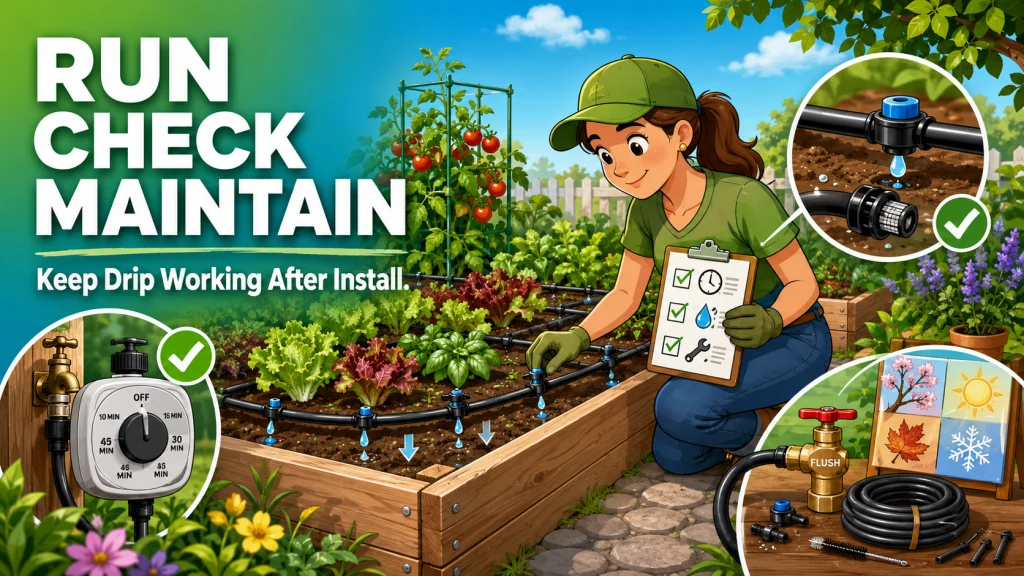
Installing a raised bed drip system is not the finish line, it is the starting point. Once the tubing is in the ground and the first run goes off without a flood or a dry corner, three jobs take over: setting a schedule that actually fits the bed, catching delivery problems before plants show stress, and keeping the hardware itself in working order through the season. This article is the map for those three jobs and points you to the specific guides that go deep on each one.
A Raised Bed Drip System Is Not Finished at Installation
I have walked into more than a few backyards where the homeowner treated the install as the project and everything after it as an afterthought. The tubing goes in, the kit gets connected, the timer gets a number punched into it, and the assumption is that the work is done. It is not. A raised bed drip irrigation system after installation is closer to a new piece of equipment than a finished project. The real work starts after that first run, when the timer has to match the actual bed in front of you, the emitters have to keep delivering water the way they did on day one, and the whole setup has to survive heat, cold, clogging, and a full growing season without you standing over it.
That is what this article covers. Not how to pick a kit, not how to lay out lines or connect fittings, but what happens after the system is running: using advice that actually applies once the tubing is in the ground, recognizing early problems before they hurt a crop, and building a care routine that keeps the system reliable from spring planting through the first fall frost.
The Three Jobs That Start After Installation
Once a system is in the ground and running, everything that matters from that point forward falls into one of three jobs. I think about it this way on every install I walk away from: set the watering schedule, diagnose delivery problems when they show up, and maintain the hardware before small issues turn into plant stress. Skip any one of these and the system eventually lets the gardener down in a way that has nothing to do with how well it was installed in the first place.
Setting the schedule is the job most people think they have already finished once the timer has a number in it. It is really an ongoing calculation built from emitter flow rate, soil drainage, crop type, and season, and it needs revisiting more than once a year. Diagnosing problems is a different skill entirely. A correct schedule can still fail to water a bed properly if a clogged emitter, a pressure shift, or a small leak is quietly changing what the system actually delivers. Maintenance is the job that protects the other two. A system that is not flushed, checked, or winterized correctly will eventually develop the exact clogs, leaks, and pressure problems the troubleshooting job has to chase down later.
- Schedule: how long to run the system, how often, and how to adjust it as crops and seasons change.
- Diagnosis: recognizing when a correct schedule still is not delivering, and why.
- Maintenance: the seasonal upkeep that keeps the first two jobs from becoming a constant fight.
Each of these jobs has its own dedicated coverage on this site, and the rest of this article is a short tour of what each one handles and when you should go looking for it.
Schedule and Timer Settings
The schedule question is usually the first one a new raised bed gardener runs into, and it is rarely a single number that works all season. How long the system should run depends on emitter flow rate and bed size. How often it should run depends mostly on soil type, since a fast-draining mix and a clay-heavy mix do not hold water the same way. On top of both of those, the right answer shifts by crop, since shallow-rooted lettuce and deep-rooted tomatoes do not want the same watering pattern, and it shifts again by season, since a setting that worked in May is rarely correct by the middle of August.
There is also a verification piece that gets skipped more often than it should. A timer running for the correct number of minutes does not guarantee the bed is actually getting watered the way you think it is. Checking soil moisture a few inches down and watching how the plants respond a day or two after a cycle is the only way to confirm the schedule is doing its job, not just running on schedule.
If your system runs but you are unsure whether the timing is right, or you have never actually calculated a run time from your own emitter spec instead of a generic number off a blog post, that is the starting point. setting and adjusting a raised bed drip irrigation schedule covers run time, frequency, seasonal adjustment, crop differences, and how to verify the schedule is actually working.

This multi-function kit connects 1/2 inch drip tubing to any 3/4 inch male threaded faucet or garden hose, helping ensure your drip irrigation system runs properly. It includes a backflow preventer, a 25 PSI pressure regulator, and a 150 mesh filter, along with a compression fitting that creates a leak-proof seal to 1/2 inch tubing. Built from UV and chemical-resistant materials for long-lasting durability, the kit can also be paired with a compatible Rain Bird hose-end timer for automated watering.
Check On AmazonIf you click this link and buy, we earn a commission at no additional cost to you.
Troubleshooting When the Schedule Is Not the Problem
Sometimes the timer is set correctly and the bed still looks wrong. Plants in one corner wilt by afternoon even though the soil nearby feels damp. A patch stays soggy long after the rest of the bed has dried out. The run time has not changed, the frequency has not changed, but what is actually reaching the root zone has. That is when the issue stops being a scheduling problem and becomes a delivery problem.
The usual suspects are clogged emitters, a pressure change at the hose bib, a small leak in a fitting, or a line that was laid through the bed instead of along the outside where roots do not interfere with it. None of these show up on a timer display. They show up in the bed itself, as dry corners, uneven coverage, or a section that never seems to dry between cycles. I usually check the filter and the pressure before I assume the timer needs adjusting, because a perfect schedule cannot fix a system that is not delivering what it was designed to deliver.
If plants look stressed even though the schedule should be correct, the next stop is diagnosing raised bed drip irrigation problems, which walks through how to tell a clog from a pressure issue from a leak, and what to check first.

This robust hose-end timer works with sprinklers, drip irrigation, and soaker hoses, offering simple automatic programming with full 7 day scheduling for worry-free watering. An extra-large dial and readout screen make setup and schedule review easy, while one-touch buttons allow quick cancellation, a rain delay of up to 96 hours, or manual watering on demand. The display also shows the next scheduled cycle and time remaining on the current one.
Check On AmazonIf you click this link and buy, we earn a commission at no additional cost to you.
Maintenance Across the Season
A system that gets installed correctly and scheduled correctly can still fail months later if nobody is keeping up with basic upkeep. Filters need checking so they are not feeding clogs into the line. Lines benefit from an occasional flush to clear sediment before it settles into the emitters. Mulch shifting over a bed can bury or expose tubing in ways that change how evenly water reaches the soil. And in any climate that sees a hard freeze, a system left full of water over winter is one of the most common ways tubing and fittings end up cracked by spring.
None of this is complicated, but it is easy to forget once the system has been running fine for a few months. The gardeners who get the most consistent results are usually the ones doing a handful of small checks through the season rather than a single big fix after something already broke.
- End-of-season drain before a hard freeze, in climates where that applies.
- Spring startup flush before the first watering cycle of the new season.
- Mid-season filter and pressure checks, especially after a long dry stretch.
- A look at mulch and soil settling around the lines once or twice a season.
If you have not looked at any of this since the system went in, or you are heading into your first winter or first spring with a raised bed drip system, maintaining a raised bed drip irrigation system through the seasons covers the winterizing, startup, and monthly checks that keep the other two jobs from becoming a constant source of frustration.

This filter prevents clogging of downstream drip irrigation components with a pre-installed 200 mesh, 75 micron stainless steel screen that catches debris. It features 3/4 inch male pipe thread inlet and outlet connections, making it compatible with all types and brands of 3/4 inch irrigation valves and pressure regulators. The cap unthreads quickly for easy access to clean the filter element, and the body is built from glass filled polypropylene rated for 150 psi, ensuring reliable, long-lasting performance.
Check On AmazonIf you click this link and buy, we earn a commission at no additional cost to you.
The First Ten Minutes After a Drip Cycle
Before any of the three jobs above matter long-term, it helps to know what your system looks like when it is working correctly. I tell every homeowner the same thing after a new install: walk the bed during or right after a cycle, once, and pay attention. That short walk gives you a baseline to compare against later, instead of guessing whether something has changed.
- Walk the mainline and bed lines while the system runs and look for water at any fitting that should be dry.
- Check whether moisture across the bed feels reasonably even rather than concentrated in one or two spots.
- Pick one or two representative spots in the bed and check moisture a few inches down, not just on the surface.
- Note how the bed looks and feels right now, while you know the system is running as intended, so you have something to compare to later.
This is not a substitute for the deeper checks in schedule verification or troubleshooting. It is the baseline that makes those later checks meaningful, because you will actually know what changed.
A system that needs constant timer changes may not have a timing problem first. It may have an emitter, pressure, or layout mismatch that a schedule adjustment cannot fix on its own. Keeping a few basic repair parts on hand only matters once you know which part of your own setup tends to give you trouble. The goal early on is not to buy more hardware, but to know which part of the system is actually limiting performance.

A 300-piece assortment of barbed connectors for 1/4-inch drip irrigation tubing, including straight barbs, tees, elbows, end plugs, four-way connectors, and single barbs for building, extending, or repairing garden watering layouts.
Check On AmazonIf you click this link and buy, we earn a commission at no additional cost to you.
Where to Start Based on What Is Actually Happening
Most readers land here with one of three situations in front of them, and the right next step depends on which one it is. If the system runs and you are simply unsure whether the timing is correct for your bed, start with the schedule coverage and work through the run time and frequency calculation for your own emitter setup. If the timer runs on schedule but plants are showing dry corners, wilting, or uneven results, the problem has moved past scheduling and belongs in troubleshooting. And if the system has been running fine but you are heading into a season change, a freeze, or you simply have not checked filters and connections in a while, that is a maintenance task, not a schedule or diagnosis issue.
Note: This page does not calculate run times, diagnose specific symptoms, or walk through winterizing steps directly. Each of those jobs has its own dedicated coverage, and trying to compress all three into one article would leave every reader with a shallower answer than the one they actually need.

This kit includes everything needed to water a raised bed up to 4 by 8 feet, with professional-grade components built for repeated seasonal use. It features 35 feet of emitter tubing with 70 built-in, pressure-compensating emitters spaced every 6 inches for even watering near the roots, plus 25 feet of easy-to-handle 1/4 inch distribution tubing. This low-volume design can save up to 80% on water while supporting healthier plants and better yields. Installation is straightforward thanks to an illustrated manual covering multiple layout options, and the system can be automated with a compatible Rain Bird hose-end timer sold separately.
Check On AmazonIf you click this link and buy, we earn a commission at no additional cost to you.
Final Thoughts: Good Drip Irrigation Is Not Set-and-Forget
A raised bed drip system that gets installed and then ignored will eventually let a gardener down, not because the hardware failed on its own, but because nobody adjusted the schedule, caught a developing clog, or drained the lines before a freeze. None of that takes a lot of time once it becomes a habit. It is set, checked, adjusted, and maintained, in that order, on a loop that repeats every season.
If you only remember one thing from this, let it be this: whichever of the three jobs is giving you trouble right now, that is the one to start with. The schedule, the troubleshooting, and the maintenance guides linked above each go deep enough to actually fix what is in front of you.
Pick Your Next Step
Match what is actually happening in your bed to the right guide instead of guessing where to start.
| What you are seeing | Where to go |
|---|---|
| The system runs, but you are not sure the timing fits your bed | Raised Bed Drip Irrigation Schedule |
| The timer runs on schedule, but plants still look wrong | Raised Bed Drip Irrigation Troubleshooting |
| The system has been fine, but a season change or freeze is coming, or you have not checked it in a while | Raised Bed Drip Irrigation Maintenance |
Whichever one matches your situation today, the other two are worth bookmarking, since most raised bed systems eventually need all three.
FAQs
💧 What should I do after installing a raised bed drip system?
Watch the first few cycles closely, then set a schedule based on your emitter flow rate and soil type rather than a generic number. From there, check the bed periodically for delivery problems and build in seasonal maintenance from the start.
🌱 Why does my raised bed drip system seem to stop working after a few months?
Usually a clog, a pressure change, or simple neglect of filters and connections. A system that was correct at installation will drift if nobody checks it periodically, which is why maintenance is its own ongoing job, not a one-time task.
🧱 How do I know if my raised bed drip irrigation problem is the schedule or the system?
If the timer setting has not changed but plants suddenly look wrong, check delivery first: clogged emitters, pressure shifts, and leaks can all change what reaches the bed without changing what the timer reports.
⏱️ How often should I check on my raised bed drip system once it is running?
A quick look every couple of weeks during the growing season catches most problems early. Add a more thorough check at the start and end of each season, especially before a hard freeze or right before spring planting.
🚿 Do I need to adjust my raised bed drip irrigation schedule during the season?
Yes. Heat, crop growth, and changing soil conditions all shift what a bed needs over the course of a season, so a schedule set in spring is rarely still correct by mid-summer.
🧼 What raised bed drip irrigation problems are most common after the first season?
Clogged emitters from sediment, pressure changes from seasonal water use, and tubing damage from freezing are the most common issues gardeners run into once a system has been in place for a while.
❄️ Does a raised bed drip system need winter care?
In any climate with a hard freeze, yes. Lines left full of water before winter are a common cause of cracked tubing and fittings that show up as leaks the following spring.