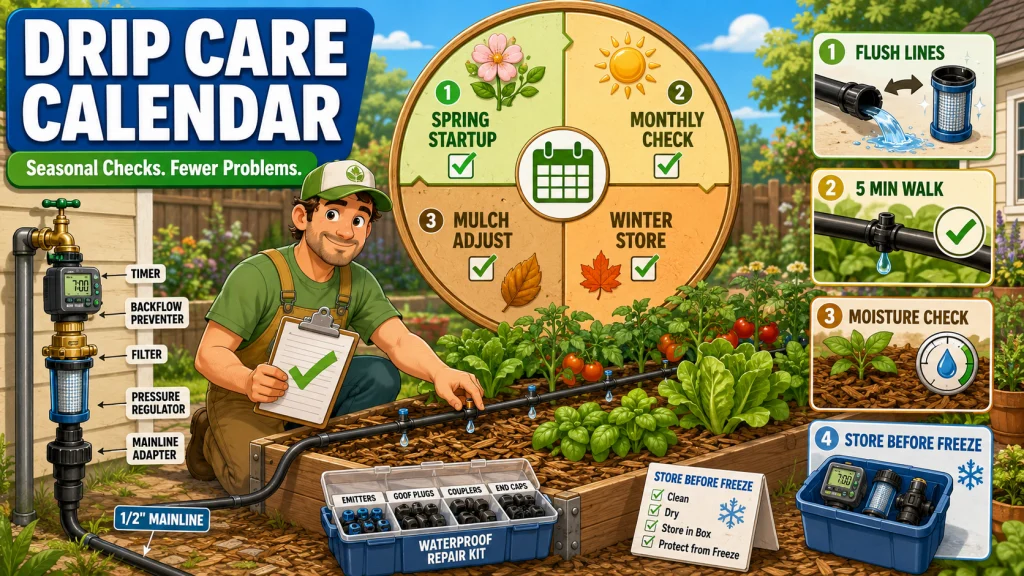
Raised bed drip irrigation maintenance is not complicated, but the window between “fine” and “failed” closes faster than most gardeners expect. The four failures I see most often in residential raised bed setups are clogged emitters, cracked fittings, corroded timer contacts, and freeze damage, and every one of them is preventable. This guide covers the full maintenance calendar: what to do at the end of the season, what to check before the first spring run, what to look for once a month during the growing season, how mulch changes run time requirements, and what spare parts to keep within reach. If a problem has already shown up in your system, this guide handles the proactive work that keeps those problems from repeating every few weeks.
Why Raised Bed Drip Irrigation Maintenance Follows a Predictable Pattern
The raised bed drip irrigation maintenance tasks that matter most are not random. They follow the same sequence every season: the system runs through summer, the weather turns, someone either puts the system away correctly or leaves it connected, and by spring the evidence is obvious. A cracked fitting near the hose bib, a timer that no longer holds a schedule, emitters that drip on one side of the bed and nothing on the other. I have walked up to enough of these setups to know that the failure usually happened in October, not April.
The good news is that none of these failures require a long maintenance session to prevent. End-of-season storage takes 10 to 20 minutes depending on how many beds are connected. The spring startup check takes about 15 minutes. The monthly observation walk during the growing season takes 5 minutes if you know what to look for. What makes drip irrigation maintenance manageable is that it is almost entirely about timing: doing the right task at the right point in the season, not scrambling to figure out why the tomatoes look stressed in July.
The five sections below lay out each maintenance area in the order you will encounter it across a full growing cycle. Use it as a reference calendar and follow the linked guides for the full task detail in each area.
Field Note: The most common maintenance mistake I see is not skipping a task entirely. It is doing tasks in the wrong order. Gardeners who flush the lines in spring before replacing the timer battery end up flushing again after the timer resets. Small sequencing errors like that turn a 15-minute startup into an hour of repeat work. The order matters almost as much as the task itself.
End of Season: Drain, Disconnect, and Store
The end-of-season task is the one with the highest stakes. Water left in drip tubing, fittings, filters, or the pressure regulator body will expand when it freezes, and the damage it causes is rarely dramatic enough to notice until spring. That is exactly the problem. A fitting that looks fine in November may have a hairline crack that starts weeping the first time water pressure returns in March. A timer may have a swollen washer or corroded battery contacts that only show up when you try to set a schedule six months later.
The core of end-of-season work is three steps: shut off the water source, drain everything from the hose bib down to the last end cap, then remove and store anything that cannot handle a freeze. In mild climates where overnight temperatures stay above freezing all winter, some gardeners leave the tubing in place and only remove the timer and filter assembly. In climates with hard freezes, the full system needs to come in. Where the line is between those two approaches depends on your zone, your setup, and how much you want to risk replacing fittings in April.
For the full breakdown of end-of-season tasks by climate zone, including what to remove, what can stay, and how to drain the mainline before the first hard freeze, the complete walkthrough is in the guide on how to winterize raised bed drip irrigation.

This robust hose-end timer works with sprinklers, drip irrigation, and soaker hoses, offering simple automatic programming with full 7 day scheduling for worry-free watering. An extra-large dial and readout screen make setup and schedule review easy, while one-touch buttons allow quick cancellation, a rain delay of up to 96 hours, or manual watering on demand. The display also shows the next scheduled cycle and time remaining on the current one.
Check On AmazonIf you click this link and buy, we earn a commission at no additional cost to you.
Spring Startup: The 15-Minute Check Before the First Run
Spring startup is where you find out what end-of-season maintenance either caught or missed. Even in climates where the system came through winter intact, there is always a short inspection sequence worth running before turning the water on for the first time. Reconnecting the system and setting a watering schedule without checking anything first is how you end up with a slow leak running for three weeks behind the mulch before the plants show any stress.
The startup check covers four things in sequence: inspect fittings and tubing for visible damage, replace the timer battery before setting the schedule, check the filter screen and rinse if needed, then flush the lines before the first full run. The flush step is the one people skip most often, and it is also the one that prevents the most emitter clogging early in the season. Debris that settled in the tubing over winter needs somewhere to go before it reaches the emitter heads.
If the system was stored correctly in fall, startup usually takes about 15 minutes across one or two beds. More beds add time, but the sequence is the same. The full spring startup checklist, including what to look for in each fitting type, when to replace washers rather than just inspect them, and how to run the flush correctly without losing emitters in the process, is covered in the guide on raised bed drip irrigation spring startup.
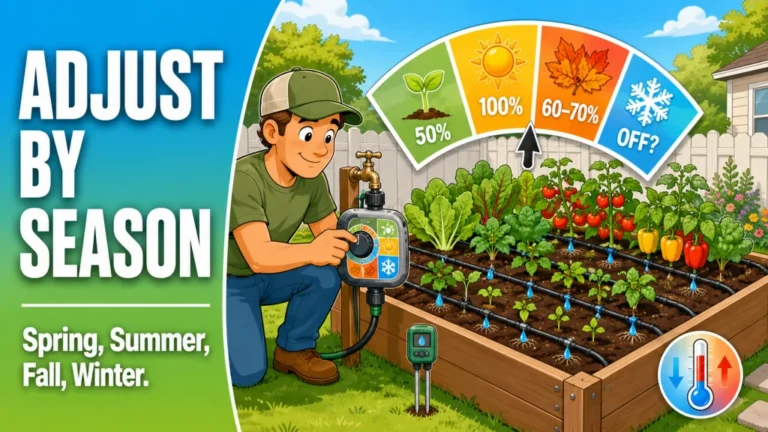
Note: If you are adjusting your watering schedule for the new season at the same time as startup, keep those two tasks separate. Run the startup check and flush first, confirm the system is working correctly, then set or adjust the timer. Running startup and schedule adjustment together makes it harder to identify whether a dry spot is a system problem or a timing problem.

This kit includes everything needed to water a raised bed up to 4 by 8 feet, with professional-grade components built for repeated seasonal use. It features 35 feet of emitter tubing with 70 built-in, pressure-compensating emitters spaced every 6 inches for even watering near the roots, plus 25 feet of easy-to-handle 1/4 inch distribution tubing. This low-volume design can save up to 80% on water while supporting healthier plants and better yields. Installation is straightforward thanks to an illustrated manual covering multiple layout options, and the system can be automated with a compatible Rain Bird hose-end timer sold separately.
Check On AmazonIf you click this link and buy, we earn a commission at no additional cost to you.
Monthly During the Growing Season: The Observation Walk
Once the system is running, the job shifts from setup to observation. A drip system that was set up correctly and flushed at startup will usually run without adjustment for weeks at a time, but “usually” is not “always.” A clogged emitter, damp fitting, or shifted line can start quietly before the plant shows obvious stress. A monthly observation walk during the growing season is enough to stay ahead of most problems without turning maintenance into another chore.
The walk is simple: turn the system on manually and watch it run for 5 to 10 minutes. In a 4×8 bed, that takes about 2 minutes of actual looking. If you have four beds connected to a single mainline, budget 10 minutes to get eyes on all of them. What you are watching for:
- Emitters that are not dripping or dripping slower than the others nearby
- Fittings that are damp on the outside when they were dry last month
- Tubing that has shifted away from the root zone, especially after heavy rain
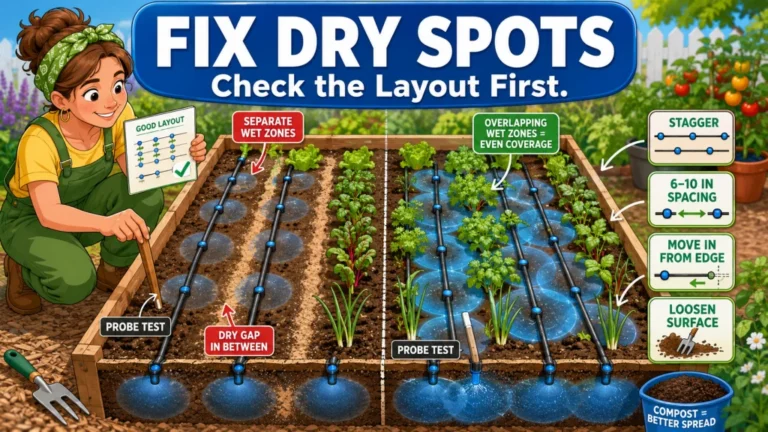
- Pooling at one end of the bed that suggests a blocked line or a pressure imbalance downstream
- Dry strips in the soil that were not there during the previous check
Those are 5-minute fixes when you catch them during a monthly walk. They are half a day of troubleshooting if they run for another two months. If the system has moved past early signs into an active problem, the guide on raised bed drip irrigation troubleshooting covers how to diagnose what went wrong and how to fix it by symptom. For the full monthly maintenance checklist, including how to test emitter flow without specialized equipment and what to do with a clogged filter mid-season, the detailed guide is at raised bed drip irrigation monthly maintenance.
Mulch Over the Drip Lines: Why the Run Time Needs Adjusting
Mulching a raised bed with drip lines underneath it is worth doing. It slows surface evaporation, keeps the soil temperature more stable, and reduces weed pressure without touching the irrigation setup. The part most gardeners do not account for is that mulch changes how water moves through the soil profile, and that directly affects how long the system needs to run to reach the root zone consistently.
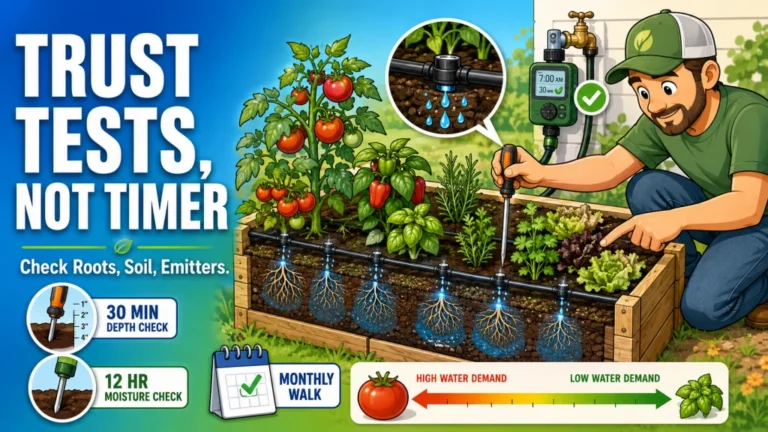
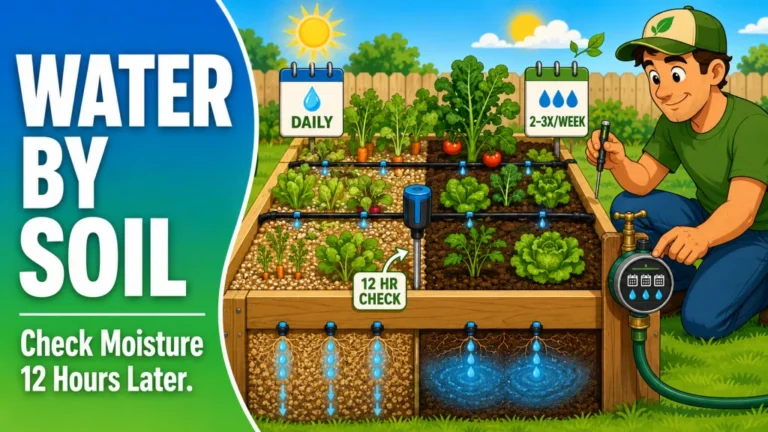
A bed running 20-minute cycles on sandy-leaning soil without mulch may not behave the same way after a 2-inch layer of wood chip mulch is added. Sometimes the same run time still works. Sometimes the bed needs a longer soak, a less frequent schedule, or a small timing adjustment because the surface stays damp while the root zone is not receiving water evenly. I usually check soil moisture 4 to 6 inches down about 30 minutes after a run when mulch is new, just to confirm the timing is still doing its job.
There is also the question of emitter placement when mulch is thick enough to partially bury the tubing. Emitters should not be packed tightly under wet mulch where the outlet can be blocked or buried. A thick layer of mulch pressed directly over an emitter head can restrict flow or cause uneven output. The fix is usually pulling the mulch back a few inches around each emitter, not removing it from the bed. For the full walkthrough on mulch depth, run time adjustment, and emitter clearance, the guide on mulch and drip irrigation in a raised bed covers all three in detail.

This multi-function kit connects 1/2 inch drip tubing to any 3/4 inch male threaded faucet or garden hose, helping ensure your drip irrigation system runs properly. It includes a backflow preventer, a 25 PSI pressure regulator, and a 150 mesh filter, along with a compression fitting that creates a leak-proof seal to 1/2 inch tubing. Built from UV and chemical-resistant materials for long-lasting durability, the kit can also be paired with a compatible Rain Bird hose-end timer for automated watering.
Check On AmazonIf you click this link and buy, we earn a commission at no additional cost to you.
What to Keep on Hand for a Quick Fix
The difference between a 5-minute repair and a 45-minute repair is usually not the skill level. It is whether the right part is within arm’s reach. A fitting failure during a heat wave is not the moment to discover that the nearest hardware store is out of the barb size you need. The repairs that come up most often in raised bed setups are not complex: a fitting that popped loose under pressure, an emitter that clogged or cracked, a short section of tubing that needs to be cut and re-spliced, an end cap that blew off when the hose bib pressure ran high.
Every one of those repairs takes under 5 minutes with the right parts on hand. The short list:
- Spare emitters in the flow rate your system uses, typically 0.5 GPH or 1 GPH
- Barbed couplings in the tubing diameter you are running, 1/4-inch or 1/2-inch
- Goof plugs for capping unused emitter holes in the drip line
- A tubing punch for adding emitter positions without cutting the line
- A few spare end caps and barbed tees in the matching tubing size
A small waterproof container keeps these organized and keeps the barbs from getting knocked out of shape at the bottom of a tool bag. For the full component list, including how to identify the flow rate of your current emitters, which fittings work across common tubing brands, and when to replace an emitter versus try cleaning it first, the guide on drip irrigation repair kit for raised beds covers all of it.
| Maintenance Area | When | Time Required | What Gets Prevented |
|---|---|---|---|
| End-of-season storage | Before first hard freeze | 10 to 20 minutes | Cracked fittings, split tubing, frozen regulator bodies |
| Spring startup check | Before first run of the season | 15 minutes | Missed winter damage, early-season clogs, timer failure |
| Monthly observation walk | Once per month during growing season | 5 to 10 minutes | Undetected clogs, dry zones, slow leaks behind mulch |
| Mulch adjustment check | After mulching, once per season | 5 minutes | Underwatering at root depth, emitter flow restriction |
| Repair kit inventory | Spring startup and midsummer | 2 minutes | Long delays when a common fitting fails mid-season |
The table above gives a rough picture of the time commitment across a full season. None of these sessions run long, but they do require showing up at the right moment. The end-of-season window is the easiest to miss: the garden is winding down, the weather is still mild, and the first freeze feels far away until it is not.
Quick Priority Check: If you only have one raised bed, the most important tasks are spring flushing, monthly emitter observation, and end-of-season timer storage. If you run several beds from one mainline, add a midseason fitting check and keep extra couplings, tees, and end caps nearby. If your water leaves mineral buildup on fixtures, check the filter screen more often and treat weak emitter flow as an early maintenance signal, not just a watering issue.

This portable kit packs 100 feet of self-dispensing quarter-inch blank distribution tubing alongside 40 pressure-compensating emitters in three flow rates, 0.5, 1.0, and 2.0 gallons per hour, plus 20 barbed couplers, 20 barbed tees, 10 tubing stakes with bug caps, and 10 tubing plugs. Rain Bird's patented emitter installation and removal tool is included, making it easy to punch in or swap out emitters and quarter-inch fittings. Everything stores in a compact plastic pouch with individually organized bags.
Check On AmazonIf you click this link and buy, we earn a commission at no additional cost to you.
Final Thoughts: Maintenance Is Part of How the System Works
Raised bed drip irrigation care is not a separate task from running the system. It is the reason the system stays worth running. A schedule that was set correctly in spring does not automatically stay correct in August when the plants are larger, the mulch has settled, and one emitter has been running at half flow for three weeks. The monthly observation walk catches that before the plants announce it with yellow leaves or wilted fruit.
The same thinking applies at the end of the season. The 15 minutes spent draining and storing the system in October is directly connected to whether spring startup takes 15 minutes or two hours of tracking down where the water is going. Maintenance on schedule is fast. Maintenance catching up to deferred problems is not.
If you are still working out the right run time and frequency for your beds, the guide on raised bed drip irrigation scheduling covers seasonal adjustment, crop-based timing, and soil-type differences. For the full overview of drip irrigation setup for raised beds, including pressure, layout, and component selection, the starting point is raised bed drip irrigation tips and setup. And if a problem has already appeared in your system, the guide on raised bed drip irrigation troubleshooting covers diagnosis and repair by symptom so you are not guessing at the cause.
Explore More in This Section
Each of the five maintenance areas above has a dedicated guide covering the full task detail, component specifics, and conditions that change the approach. Use the table below to go deeper on whichever area matches where you are in the season right now.
| Guide | What it helps with |
|---|---|
| How to Winterize Raised Bed Drip Irrigation | Step-by-step end-of-season shutdown by climate zone, including what to remove versus what can stay through a mild winter |
| Raised Bed Drip Irrigation Spring Startup | The pre-season inspection sequence, battery and washer replacement timing, and how to flush lines before the first full run |
| Raised Bed Drip Irrigation Monthly Maintenance | What to check during the growing-season observation walk, including emitter flow testing and mid-season filter cleaning |
| Mulch and Drip Irrigation in a Raised Bed | How mulch depth affects run time, emitter clearance requirements, and soil moisture distribution at root depth |
| Drip Irrigation Repair Kit for Raised Beds | The short parts list that turns any common raised bed drip repair into a 5-minute job instead of a hardware store trip mid-season |
All five guides are specific to raised bed drip irrigation for home vegetable and herb gardens. If the system has been running without any maintenance for more than a season, the spring startup guide is the right place to begin.
FAQs
💧 How often should I check my raised bed drip system during the growing season?
Once a month is usually enough if the system was set up correctly and flushed at startup. Turn it on manually and watch it run for 5 to 10 minutes. You are looking for slow or stopped emitters, damp fittings, and any dry zones in the soil that were not there the previous month.
❄️ Do I need to winterize raised bed drip irrigation?
Yes, in any climate where overnight temperatures drop below freezing. Water left in drip tubing, filters, pressure regulators, and timer heads can freeze and crack components without showing visible damage until spring. In mild climates that stay above freezing all winter, removing the timer and filter assembly and draining the lines is usually the minimum needed.
🌱 When should I flush my drip lines?
Flush before the first run of the season in spring, and again if you notice uneven emitter output during the growing season. Spring flushing clears debris that settled in the tubing over winter. Mid-season flushing helps when a partial clog is slowing one section of the line without stopping flow entirely.
🍂 Should I adjust my drip timer when I add mulch to the raised bed?
Check soil moisture 4 to 6 inches down about 30 minutes after a regular cycle once the mulch is in place. If the soil is dry at that depth, extend run time by 20 to 30 percent and recheck. Mulch slows surface evaporation, but it also changes how moisture distributes through the soil profile, which can leave the root zone drier than the surface suggests.
🔧 What spare parts should I keep for a raised bed drip system?
Keep spare emitters in the flow rate your system uses, barbed couplings in your tubing diameter, goof plugs to cap unused emitter holes, a tubing punch, and a few spare end caps. These cover the repairs that come up most often in raised bed setups without requiring a hardware store trip in the middle of a heat wave.
⏱️ How much time does raised bed drip maintenance take across a full season?
For a one-to-four-bed setup, total maintenance time across a full season runs roughly 1 to 2 hours: 15 minutes for spring startup, 5 to 10 minutes per monthly observation walk over four to five months, and 10 to 20 minutes for end-of-season storage. The sessions are short. The key is keeping each check tied to the season instead of waiting for visible plant stress.