Adding mulch over a raised bed drip system does two things at once: it reduces how much water the bed needs per cycle, and it hides the emitters from easy view. Both changes are manageable, but only if you account for them. This article covers the run time adjustment after mulching, which mulch materials work best with a running drip system, how to keep monthly emitter checks useful when you cannot see the emitters from above, and why depth matters more than most gardeners expect.
What Actually Changes When You Mulch Over a Drip System
Most raised bed gardeners add mulch for one reason: they want to stop the soil from drying out so fast between waterings. What catches a lot of people off guard is that mulch also changes how much work the drip system has to do, and it changes what a routine monthly check looks like once the line is buried.
The water retention benefit is real enough to move your timer. A 2 to 3 inch mulch layer reduces surface evaporation by roughly 25 to 50 percent, depending on the material, ambient temperature, and how much direct sun the bed gets each day. That reduction means the soil is holding onto moisture longer after each cycle, and the next cycle does not need to replace as much. Running the same schedule you used before mulching usually means the bed is getting more water than it needs. I have seen this play out more than once: a gardener adds a solid straw layer in late spring, keeps the timer set from April, and by June the bed is staying wetter than expected and the plants are not performing the way they should. The fix is straightforward, but it requires knowing the adjustment needs to happen at all.
The second change is the emitter visibility problem. Once the dripline runs under mulch, you cannot observe individual emitter output from above during a system run. That is not a reason to skip mulching. It does require a different check technique during the monthly walk-through. Both adjustments are covered in detail below.
Adjusting Your Run Time After Mulching
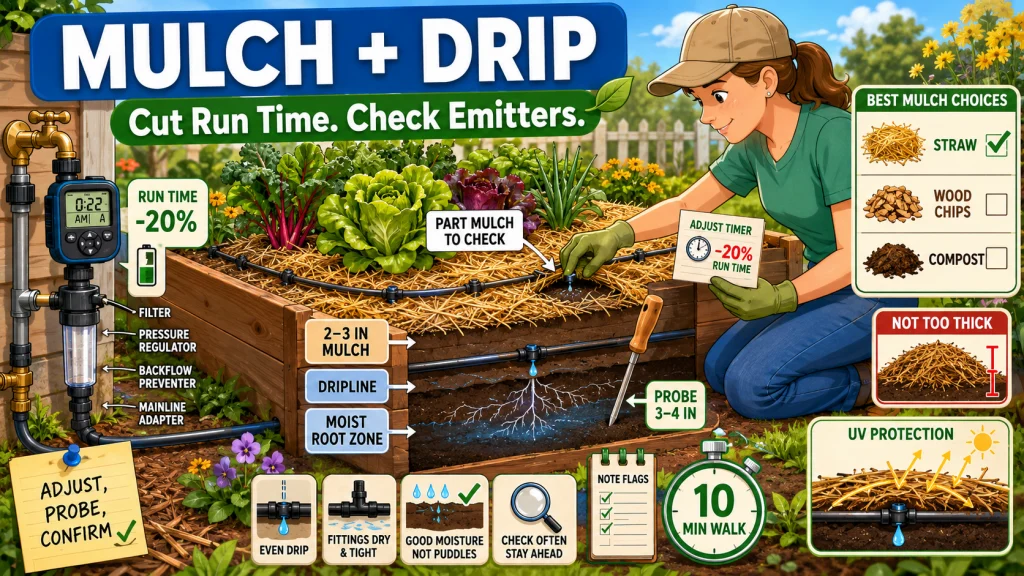
After adding mulch at 2 to 3 inches, reduce your drip run time by 20 to 25 percent and wait two or three days before checking soil conditions. That is the starting adjustment. Whether it is the right adjustment for your setup depends on your soil type, the mulch material, and how much sun the bed gets during the day.
The screwdriver test is the most direct way to verify the new schedule. Push a standard screwdriver 3 to 4 inches into the soil at two or three spots across the bed after a cycle. If it slides in with minimal resistance and comes out with damp soil on the blade, the moisture level is where it should be. If it meets firm resistance or comes out dry, add a few minutes back and re-test after the next cycle. A 4×8 tomato and pepper bed that ran 20 minutes three times per week before mulching often settles at 14 to 16 minutes at the same frequency after a 2 to 3 inch straw layer. That is a rough starting point, not a rule that holds across all soil types and seasons.
The timing of the adjustment matters too. Add mulch in early spring when soil temperatures are still cool, and the evaporation rate is already lower, so the schedule change may be modest. Add the same mulch layer during a July heat stretch and the run time difference is more pronounced. When in doubt, reduce and verify rather than leaving the old schedule in place and waiting to see if problems show up in the plants.
- Reduce run time by 20 to 25 percent immediately after adding 2 to 3 inches of mulch.
- Wait 2 to 3 days, then use the screwdriver test at multiple spots in the bed to check soil moisture at 3 to 4 inch depth.
- If soil is dry after a cycle, add 2 to 3 minutes back and re-test. If soil stays wet longer than expected, reduce by another 10 percent.
- Re-check whenever mulch depth increases significantly or when the season shifts from spring to peak summer heat.
For most home raised bed setups, a consistent screwdriver check after each schedule adjustment tells you what you need to know. The goal is not a precise formula. It is a feedback loop: adjust, probe, confirm, and leave it alone until the next variable changes.

This robust hose-end timer works with sprinklers, drip irrigation, and soaker hoses, offering simple automatic programming with full 7 day scheduling for worry-free watering. An extra-large dial and readout screen make setup and schedule review easy, while one-touch buttons allow quick cancellation, a rain delay of up to 96 hours, or manual watering on demand. The display also shows the next scheduled cycle and time remaining on the current one.
Check On AmazonIf you click this link and buy, we earn a commission at no additional cost to you.
What Mulch Does for the Dripline Itself
UV radiation breaks down 1/4-inch polyethylene dripline faster than most gardeners expect. Exposed tubing running along the top of a sunny raised bed can show brittleness and surface cracking within two or three seasons. The emitter bodies are more UV-resistant, but the tubing connecting them is not. Agricultural drip tape systems are mulched by default for this reason: keeping the line covered eliminates UV exposure along the entire run and extends the system’s useful life significantly.
For a home raised bed, a straw or light wood chip layer over the dripline does the same job. The tubing stays more flexible through seasonal temperature cycles, the fittings at either end are under less thermal stress, and the whole line runs in a more stable environment under the mulch surface. If you are running the same dripline across multiple growing seasons, the lifespan benefit from mulching is worth accounting for even if the water retention effect alone did not sell you on adding mulch.
Field Note: The most common dripline failure I see outside of fitting problems is UV-related brittleness in exposed tubing. A run of 1/4-inch line on a south-facing raised bed that gets full afternoon sun becomes noticeably stiffer by fall. By the second or third season, the tubing near the emitter barb connections starts cracking when you flex it to remove an emitter for cleaning. A 2 to 3 inch straw layer over the tubing prevents most of that. It is one of the lower-effort things you can do to extend the working life of a drip system that is already set up and running.
The protection benefit applies to dripline run under mulch, not over it. If the line runs over the mulch surface to make observation easier, UV exposure continues. Most raised bed setups are better served by running the line under a light mulch layer and adjusting the emitter check method, rather than leaving the tubing exposed all season to preserve sightlines.

This 200-foot coil of half-inch poly tubing serves as main supply line or feeder line in drip irrigation systems, with an outside diameter of 0.620 inches and inside diameter of 0.520 inches for compatibility with standard drip fittings and emitters. Multi-layer construction uses 100% virgin poly on the inner and outer layers for UV and water resistance, with a recycled-content core for added strength. Suitable for trees, shrubs, raised beds, containers, and hanging baskets.
Check On AmazonIf you click this link and buy, we earn a commission at no additional cost to you.
How to Check Emitters You Cannot See From Above
On an exposed dripline, the monthly emitter check is quick: run the system for a minute and walk the bed watching for emitters that are not dripping. Under mulch, that approach does not work. A clogged emitter under a straw layer gives no visible signal at the surface, and a slow emitter looks the same from above as a functioning one.
The adjustment is straightforward. During the monthly check, part the mulch at each emitter location before running the system for about 60 seconds. Watch the emitter directly: you are looking for the steady drip or trickle that indicates normal flow at that emitter’s rated GPH. A clogged emitter shows nothing or a very weak seep that does not match what the neighboring emitters are doing. After checking, replace the mulch. This adds a few minutes compared to a visual check from above, but the information is the same.
On a bed with 10 or more emitters, checking all of them in a single system run gets unwieldy. I usually work through three or four at a time, moving along the line while the system is running. After the emitter checks, I finish with a screwdriver probe at two or three spots across the bed to confirm the moisture pattern. Between direct emitter observation and the soil probe, you catch most problems before they show up as dry strips or waterlogged zones in the crop.
This emitter check is one piece of a broader routine for a running raised bed drip system. If you want a full monthly and seasonal schedule that includes filter flushing, fitting inspection, pressure checks, and end-of-season steps, the raised bed drip system maintenance guide covers the complete sequence in one place.
Which Mulch Types Work With Drip Lines and Which Need More Attention
Mulch material matters more than most people expect when a drip system is running underneath. The differences show up in how water moves through each material to the soil, how the mulch interacts with emitter heads during a watering cycle, and how the surface behaves during dry stretches between waterings.
Straw
Straw is the most compatible option for raised beds with active drip systems. It lies flat without clumping around emitter heads, allows water and rainfall to filter through to the soil without creating a surface barrier, and parts easily when you need to reach an emitter for the monthly check. At 2 to 3 inches, it delivers solid evaporation reduction without the depth problems that thicker or denser materials create. If someone asks me what to use over a raised bed drip system and they do not have a strong preference for a specific material, I point them toward straw. It causes the fewest compatibility issues and requires the least ongoing adjustment to manage around the drip line.
Coarse Wood Chips and Bark
Coarse wood chips and bark nuggets are a workable option if placed with some attention around the emitters. The issue with larger chip material is that a piece can settle directly against an emitter head and redirect or partially block flow. This is not a common failure, but it is more likely with wood chips than with straw. When using wood chips, avoid compressing them tightly around the dripline and leave a small cleared zone around each emitter location. Check those spots first during monthly maintenance, since chips shift with watering and rainfall across a full season.
Fine Compost as a Surface Mulch Layer
Fine compost applied as a surface mulch behaves differently from coarser materials. In dry conditions, a layer of fine compost can form a crust that becomes hydrophobic: water from rainfall beads on the surface rather than filtering through. If the dripline under a crusted compost layer runs a cycle, water still delivers to the emitter and saturates the soil at the emitter location, but the compost layer between emitters can stay dry and partially sealed. Fine compost is excellent worked into a raised bed as a soil amendment. As a standalone mulch layer over an active drip system, it needs more monitoring than straw or wood chips, particularly during extended dry spells.
| Mulch Type | Works Over Dripline | Emitter Access | Main Consideration |
|---|---|---|---|
| Straw | Yes, best overall choice | Easy to part for checks | Fewest compatibility issues with emitters and dripline |
| Coarse wood chips or bark | Yes, with attention at emitter locations | Moderate, chips can shift | Keep a clear zone around each emitter head |
| Fine compost | Yes, with monitoring | Easy | Can crust and become hydrophobic in dry conditions |
Any of these materials can work in a raised bed drip setup, but the table above reflects how much management each one requires. Straw stays the lowest-maintenance choice when the drip system is the primary water delivery method and monthly emitter checks are part of the routine.
Mulch Depth and Where Drip Performance Starts to Drop
Two to three inches is the functional range for mulch over a raised bed drip system. Below 2 inches, the evaporation reduction is modest and the UV protection for the dripline is limited. Above 4 inches, a different problem appears: the mulch layer develops a dry internal zone that surface rainfall has to saturate before any benefit reaches the soil underneath. In dry conditions, a thick mulch layer can draw moisture upward from the soil as the dry upper portion seeks equilibrium, working against the system rather than helping it.
In practice, mulch depth tends to creep upward over a season because most gardeners top off the layer rather than replacing it. A bed that started at 2 inches in May can reach 4 to 5 inches of settled material by August. At that depth, the screwdriver test matters more, not less. You want to confirm whether moisture is reaching the root zone after each cycle, not just whether the mulch surface feels damp after rainfall.
If the screwdriver meets dry, firm soil even after a drip cycle, consider mulch depth before assuming the run time is too short. A layer that is too thick can absorb enough water from each cycle that the soil below does not get its full delivery. Running a longer cycle to compensate tends to create wet zones directly at each emitter while the spaces in between stay dry. Reducing mulch depth is usually the better fix.
For a broader look at how to manage the drip schedule across the full growing season, including how to think about run time in spring versus peak summer versus fall, the drip irrigation tips for raised beds section covers those seasonal adjustments alongside the rest of the setup picture.
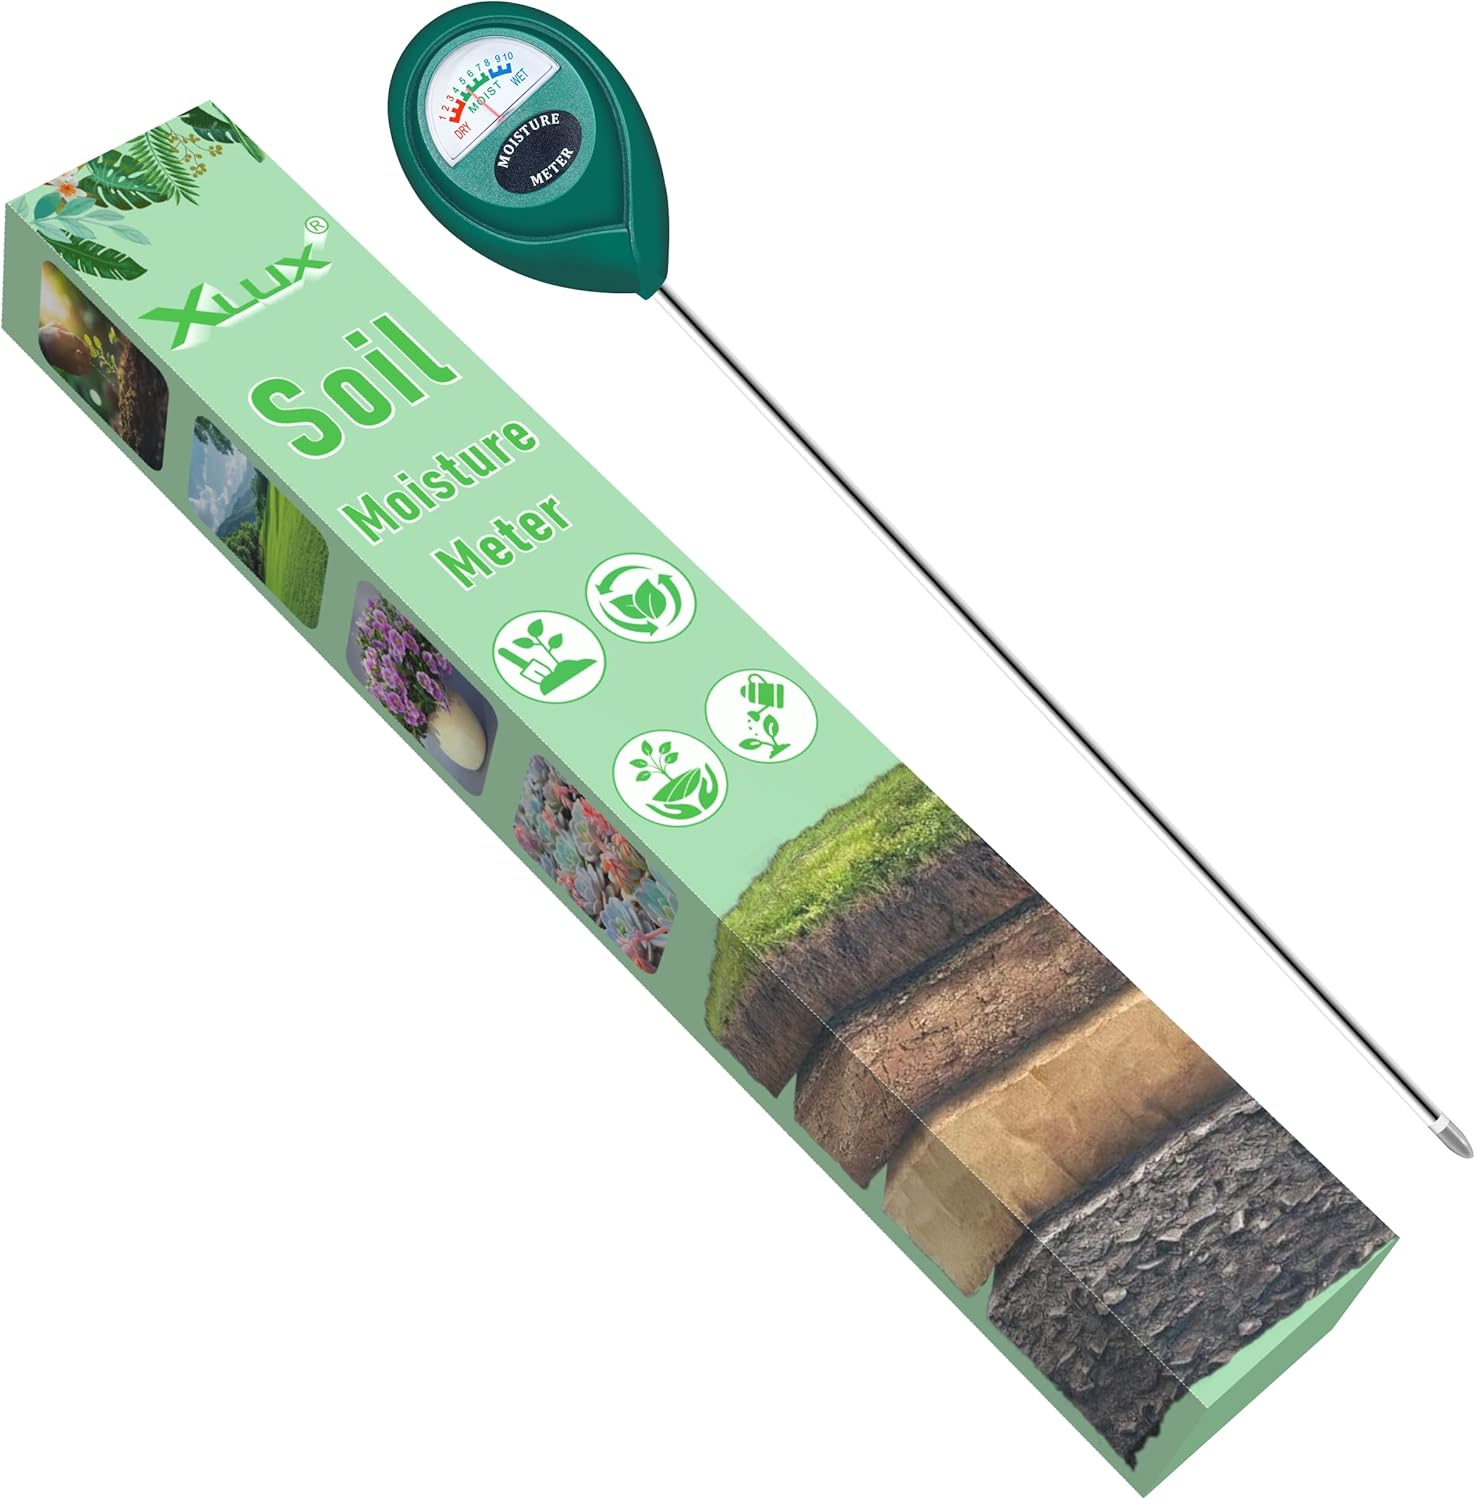
This moisture meter measures soil conditions deep inside pots and gardens with a probe 5.5 inches longer than standard styles, ideal for larger or deeper containers. Simply insert it into the soil for an immediate reading on the large, easy-to-read dial, which shows three zones across ten scales. Its single probe design causes less root disturbance than double or multiple probe meters. For best results, avoid testing hard soil or liquids, and remove the probe within 5 minutes to prevent corrosion of the metal tip.
Check On AmazonIf you click this link and buy, we earn a commission at no additional cost to you.
Final Thoughts: Make the Adjustment Early, Not After the Plants Tell You
Mulch and drip irrigation work well together. The combination gives you better water retention between cycles, a longer-lived dripline, and a bed that needs less attention during summer heat. The part that requires actual adjustment is the run time, and that adjustment needs to happen when the mulch goes down, not weeks later when the plants are showing symptoms of overwatering or the soil is staying soggy longer than it should.
Straw at 2 to 3 inches is the most straightforward setup for most raised beds: solid evaporation reduction, easy emitter access for monthly checks, and minimal compatibility friction with the dripline. Whatever mulch you use, keep the depth in the 2 to 3 inch range, cut the timer after mulching, verify with the screwdriver test, and adjust the emitter check to account for what you can no longer see from above. Those four steps cover most of what changes when mulch enters the drip irrigation picture.

This kit includes everything needed to water a raised bed up to 4 by 8 feet, with professional-grade components built for repeated seasonal use. It features 35 feet of emitter tubing with 70 built-in, pressure-compensating emitters spaced every 6 inches for even watering near the roots, plus 25 feet of easy-to-handle 1/4 inch distribution tubing. This low-volume design can save up to 80% on water while supporting healthier plants and better yields. Installation is straightforward thanks to an illustrated manual covering multiple layout options, and the system can be automated with a compatible Rain Bird hose-end timer sold separately.
Check On AmazonIf you click this link and buy, we earn a commission at no additional cost to you.
FAQs
💧 How much should I reduce drip run time after adding mulch to a raised bed?
Start with a 20 to 25 percent reduction. A bed that ran 20 minutes before mulching is a reasonable starting point at 15 minutes after adding 2 to 3 inches of mulch. Use the screwdriver test 2 to 3 days later to check soil moisture at 3 to 4 inch depth and adjust from there. Sandy soil in full sun will lose moisture faster than a clay-heavy mix in partial shade, so the right number depends on your specific conditions.
🌾 Is straw the best mulch to use over drip lines in a raised bed?
For most raised bed drip setups, yes. Straw lies flat without clumping around emitter heads, filters water through without forming a surface crust, and parts easily when you need to check individual emitters during the monthly walk. Coarse wood chips and fine compost both work, but each requires more attention at the emitter level.
🔍 How do I check drip emitters that are covered by mulch?
Part the mulch at each emitter location and run the system for about 60 seconds while watching the emitter directly. You are looking for steady drip or trickle flow at the emitter’s rated GPH. A clogged emitter shows little or no output. Replace the mulch after each check. On beds with many emitters, check three or four at a time rather than trying to observe all of them in a single run.
📏 How deep should mulch be over a raised bed drip system?
Keep mulch depth between 2 and 3 inches over an active drip system. Below 2 inches, the evaporation reduction is limited and UV protection for the dripline is minimal. Above 4 inches, the mulch layer can develop a dry internal zone that intercepts water before it reaches the soil, which works against what the drip system is trying to deliver.
🪵 Can wood chip mulch cause problems with drip emitters?
Not usually, but a chip or bark piece settling directly against an emitter head can redirect or partially block flow. Keep wood chip mulch clear around each emitter location and check those spots first during monthly maintenance. Wood chips shift with watering cycles and rainfall over a season, so a zone that was clear in May may need attention by July.
☀️ Does running dripline under mulch actually help it last longer?
Yes, and the effect is meaningful over multiple seasons. UV radiation degrades exposed 1/4-inch polyethylene dripline, causing brittleness and cracking at fitting connections within two or three years on a sunny raised bed. Running the dripline under 2 to 3 inches of mulch eliminates that UV exposure entirely and reduces the thermal cycling that stresses fittings over time.