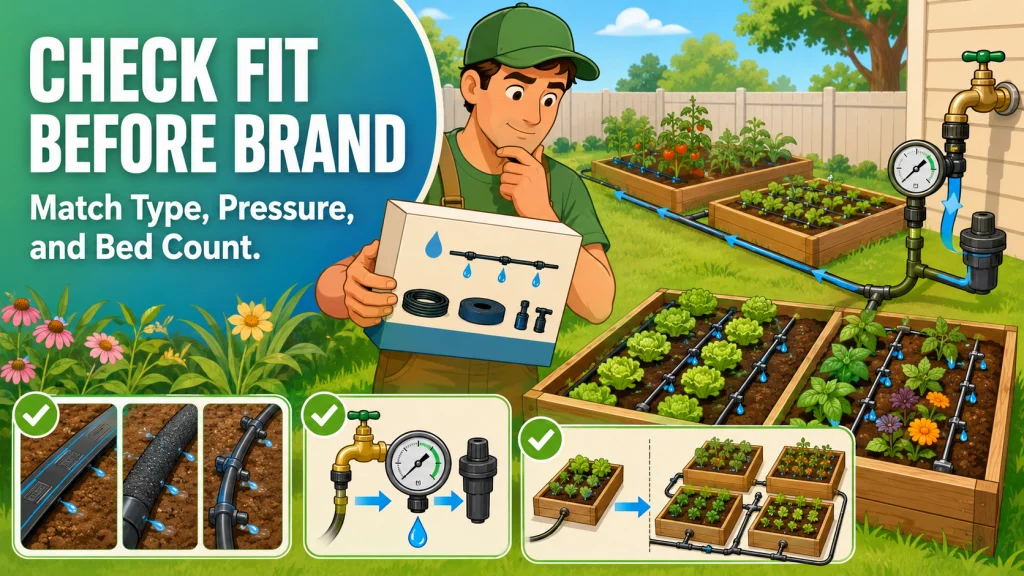
The search for the best raised bed drip irrigation kit usually starts with the wrong question. Most gardeners go straight to brand and price before knowing which system type fits their beds, whether their water pressure falls within the kit’s rated range, or how many beds the kit is actually sized to run. Three setup decisions, taken in the right order, remove most of the guesswork: system type, pressure compatibility, and emitter spacing matched to the crops being grown. This is an overview of those three decisions and a map to where each one gets answered in full.
The Three Mistakes That Show Up in Almost Every New Raised Bed Install
Searching for the best raised bed drip irrigation kit sounds like a brand research problem. In my experience, it is usually a setup sequencing problem. The gardeners who end up calling about dry spots, leaking fittings, or uneven beds often made the same three decisions in the wrong order before they ever opened the box.
System type is where many first setups go sideways. Drip tape, soaker hose, and emitter dripline are not interchangeable, and a kit built around one will not behave the way a different system would in the same bed. A kit designed around flat drip tape works well for crops spaced in consistent rows. Run it through a bed of mixed greens, basil, and a few pepper plants, and the delivery points may not line up with the root zones of half of what you planted.
A missing pressure regulator is harder to spot at first because the system still runs without one. Most hose bibs put out 40 to 70 PSI. Most drip components are rated for 15 to 30 PSI. The system runs, but the fittings operate above their pressure ceiling. Weeks later, the weakest connector starts weeping, or a drip tape splice blows apart at a joint. By that point, the homeowner has already decided the kit was defective. In most of these cases, it was not.
Scaling a single-bed kit across three or four beds is the third pattern. Single-bed kits are sized for one standard bed. Running them across more creates a pressure drop that shows up as dry corners and uneven output across the run, not as a component failure. Swapping emitters or adjusting the timer does not fix a mainline that was never designed to carry that load.
Field Note: When I look at a raised bed drip system that is not performing, two of these three problems are usually present at the same time. The setup looked fine during installation. The issues emerged over weeks as pressure, flow, and coverage played out in real conditions. Getting all three right before purchase is what separates a system that runs consistently from one that gets pulled after the first season.

This kit includes everything needed to water a raised bed up to 4 by 8 feet, with professional-grade components built for repeated seasonal use. It features 35 feet of emitter tubing with 70 built-in, pressure-compensating emitters spaced every 6 inches for even watering near the roots, plus 25 feet of easy-to-handle 1/4 inch distribution tubing. This low-volume design can save up to 80% on water while supporting healthier plants and better yields. Installation is straightforward thanks to an illustrated manual covering multiple layout options, and the system can be automated with a compatible Rain Bird hose-end timer sold separately.
Check On AmazonIf you click this link and buy, we earn a commission at no additional cost to you.
The Three Setup Factors That Determine Whether a Kit Will Work
After working through enough raised bed installs to see the pattern, I keep coming back to three variables. Everything else on the kit package, how many pieces are included, what the fittings look like, or how many labeled bags the tubing comes sorted into, is secondary until these three are settled.
Bed count and distance from the spigot
The number of beds you are running and how far they sit from the hose bib determine the mainline diameter and total tubing length the system needs to deliver consistent pressure to every emitter. A single 4×8 bed sitting 10 feet from the spigot is a different setup from four beds in a row running 50 feet away. Most packaged kits are sized for one bed. That is fine if that is what you have. It becomes a pressure and coverage problem when the same kit is stretched beyond the setup it was designed to serve.
A 1/2-inch mainline handles multi-bed runs better than 1/4-inch supply tubing. Budget single-bed kits often rely on 1/4-inch tubing throughout, which works within the intended setup. Each additional bed adds emitters, and each additional emitter draws from the same line. Running the timer longer may add water, but it does not fix uneven distribution from a line undersized for the load it is carrying.
Water source pressure
Checking the hose bib pressure before selecting a kit prevents one of the most common failure modes in a residential drip setup. Most household bibs run between 40 and 80 PSI. Most residential drip components are rated for 15 to 30 PSI. A pressure regulator brings the supply into range. It is typically a small add-on part, and some kits include one. Checking whether it is included, and at what PSI it outputs, is one of the fastest ways to see whether a kit was built with real field conditions in mind.
Well water and gravity-fed tanks can create the opposite problem: pressure that may be too low to push water evenly through longer runs of standard emitter line. If the supply pressure sits below 20 PSI, some emitter lines may not deliver as rated. This is less common in most residential hose-bib setups, but if it applies to yours, it changes the kit selection before brand ever enters the conversation.
Emitter type and maintenance expectation
The delivery method built into a kit determines how often you will be back at the bed adjusting, flushing, or replacing components. Drip tape is efficient and inexpensive, but the small delivery orifices clog when water quality is marginal or the system runs without an upstream filter. Emitter dripline with button drippers handles more seasons with proper filtration, costs more per foot, and does not lay as flat in a narrow raised bed. Soaker hose sweats water along its full length, which is simple to install but less consistent in longer runs or fast-draining soil mixes.
None of these is the universal right answer. A gardener who breaks down the system every fall, cleans the components, and replants from scratch each spring has a different maintenance tolerance from one who tucks the lines in place and checks them twice a season. The emitter type in the kit should match the maintenance schedule you will actually keep, not the one that sounded reasonable at purchase.
| Setup factor | What it affects | What to check in the kit specs |
|---|---|---|
| Bed count and run length | Mainline diameter, pressure drop across beds, emitter output uniformity | Maximum bed count and maximum mainline footage the kit is designed for |
| Water source pressure | Fitting durability, emitter delivery consistency, system lifespan at the connections | Whether a pressure regulator is included and its rated PSI output |
| Emitter type | Clogging frequency, seasonal maintenance needs, crop spacing compatibility | Emitter spacing intervals, flow rate in GPH, whether a filter is required or included |
Viewed this way, kit selection becomes less about guessing which box is best and more about checking whether the package matches the actual garden. When these three factors line up, the rest of the setup becomes much easier to get right.

This multi-function kit connects 1/2 inch drip tubing to any 3/4 inch male threaded faucet or garden hose, helping ensure your drip irrigation system runs properly. It includes a backflow preventer, a 25 PSI pressure regulator, and a 150 mesh filter, along with a compression fitting that creates a leak-proof seal to 1/2 inch tubing. Built from UV and chemical-resistant materials for long-lasting durability, the kit can also be paired with a compatible Rain Bird hose-end timer for automated watering.
Check On AmazonIf you click this link and buy, we earn a commission at no additional cost to you.
System Type Is a Bigger Decision Than the Brand
A kit comparison does not make sense until the delivery system is settled. Drip tape, soaker hose, and emitter dripline behave differently in raised bed soil, cost differently per foot, and require different levels of filtration and seasonal care. Buying a well-reviewed kit built around the wrong delivery method still produces an underperforming system, because the problem is not the brand.
Drip tape is thin and flat, runs at low pressure, and delivers water at evenly spaced intervals along a row. Soaker hose seeps water along its full length, is easy to lay and reposition, but loses consistency in longer runs or in loose, fast-draining soil mixes. Emitter dripline places a measured drip at preset intervals, often every 6, 9, or 12 inches, and holds up over multiple seasons when a filter is upstream. Each choice changes how the kit fits the crops, the bed layout, and the amount of maintenance the gardener is willing to do.
The full breakdown of how each system performs by bed width, crop type, soil mix, and seasonal conditions is in the raised bed drip system type comparison. If there is any uncertainty about which delivery method fits the beds being watered, that comparison belongs before a kit search, not after.
What to Look for in a Drip Irrigation Kit for Raised Beds
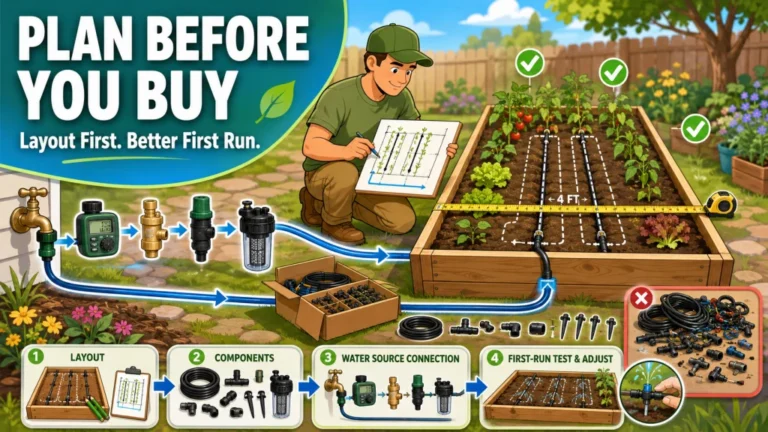
Most raised bed drip kits include some combination of mainline tubing, drip line or tape, fittings, stakes, and a filter or pressure regulator. What separates a kit that works from one that frustrates is usually what gets left out of the package, not what goes in. Reviewing the component list before purchase takes a few minutes and prevents many of the problems that show up in the first month of running a new system.
Single-bed kits are designed for one standard raised bed, typically 4×4 or 4×8. They include enough tubing to run that bed and a basic set of fittings. These kits are a reasonable starting point when the setup stays at one or two beds and the hose bib pressure falls within range. Where they run into trouble is expansion: the fittings and tubing sizes in budget single-bed kits are not always compatible with components from other brands, which limits how cleanly the system can grow if more beds get added later.
Multi-bed kits, or kits sold with extended mainline footage, use heavier-gauge supply tubing and more fitting options. The upfront cost is higher, but the setup is better prepared for a second or third bed without rebuilding the mainline run. The trade-off is that more components also mean more decisions at installation: where the mainline runs, how the branch lines split across beds, and whether the included pressure regulator is rated for the combined emitter load.
- Pressure regulator: Check whether it is included and at what PSI it outputs. A kit connected to a 60 PSI hose bib without a regulator operates above component ratings and can start leaking at fittings within one season.
- Filter: An inline filter upstream of the drip line catches debris before it reaches the emitters. Without one, sediment can clog button drippers or drip tape delivery points after regular use.
- Mainline diameter: A 1/2-inch mainline handles longer runs and multiple beds. The 1/4-inch tubing common in single-bed kits works within that scope but does not stretch cleanly to additional beds without pressure loss at the emitters farthest from the supply.
- Emitter spacing: A kit configured for 12-inch emitter intervals does not fit a bed planted at 6-inch spacing without modification. Check the spacing in the specs against the crop layout before assuming the kit fits the planting plan.
- Fitting type: Barbed fittings tend to hold better through seasonal tubing movement and UV hardening. Push-fit fittings are convenient at installation, but they can become leak points later as the tubing stiffens from sun exposure.
A detailed look at drip irrigation kit configurations for vegetable garden setups, with specifics on emitter flow rates, coverage by bed count, and what distinguishes kits sized for vegetables from general garden drip sets, is in the raised bed drip kit comparison by bed count and crop type. That is the place to go once the system type is settled and the goal is matching a kit to a specific setup.

This professional-grade kit covers up to 18 raised beds (4 by 8 feet each) and includes a 250 foot roll of 3/4 inch mainline tubing, two 100 foot rolls of 1/4 inch micro tubing, a 100 foot soaker dripline with 12 inch spacing, plus fittings, connectors, a filter, and a 30 PSI pressure regulator. Built from UV and chemical-resistant materials, it delivers slow, steady water directly to the root zone and works with Bluetooth-enabled timers for automated scheduling. Installation requires no digging, glue, or special tools, just a simple three-step setup from faucet to emitter.
Check On AmazonIf you click this link and buy, we earn a commission at no additional cost to you.
When a Timer Turns the Drip System Into Automatic Watering
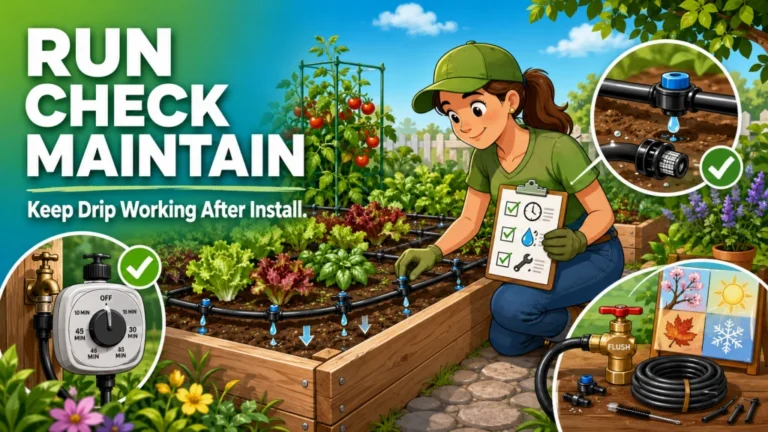
A drip system without a timer relies on someone turning the hose bib on and off at the right interval. That works until it does not. Most raised bed gardeners I talk to add a timer after the first summer of missed watering, heat-stressed plants, or a week of overwatering while trying to make up for a few dry days they missed.
A basic hose-end timer connects between the hose bib and the drip system. Dial-based models run for a set number of minutes on a set frequency, which is enough for a single-bed setup with consistent crops. Digital timers allow multiple start times per day, which matters when different beds have different water needs, or when a second early-morning cycle helps shallow-rooted greens through a heat stretch without running the full daily timer again. Neither type requires an app or a control hub, and both are affordable enough to replace mid-season if they fail at a bad time.
The full breakdown of how to choose a timer for a raised bed setup, including which timer features matter and how automation changes daily watering habits, is in the drip irrigation timer selection guide for raised beds. If automation is part of the initial plan, that guide is worth reading before finalizing the kit, because some kits include a timer and some are priced assuming the gardener already has one.
How to Use This Site From Here
This site is organized around the decisions a raised bed gardener needs to make before buying and installing a drip system. System type comes first, because it determines whether the kit’s delivery method fits the bed. Kit configuration comes next, because bed count, run length, and pressure decide whether the parts in the box can support the setup. Automation comes after that, because a timer only helps once the system itself is matched to the garden.
The path forward depends on where the uncertainty is. For questions about which delivery method fits the crops and bed layout, start with the system type comparison. For questions about which kit configuration fits a specific number of beds, use the kit comparison guide. For questions about adding a timer, use the timer guide. The goal is to choose around the actual beds being watered, not to adjust the garden later around a kit that was never quite right.

This single outlet hose timer turns any faucet into an automatic watering system, letting you program consistent irrigation schedules with adjustable duration for lawns, gardens, and landscapes. A clear LCD screen makes programming simple, while the water-resistant, battery-powered design includes a built-in rain delay to pause watering during wet weather. It's backed by a six-year limited warranty for private use, reflecting Orbit's reputation for dependable, water-saving performance.
Check On AmazonIf you click this link and buy, we earn a commission at no additional cost to you.
Final Thoughts: The Setup Sequence Matters More Than the Brand
Most of the drip kits I have seen pulled after one season were not failures of the product. They were mismatches: the wrong system type, a missing pressure regulator, or a single-bed kit asked to cover a garden that had grown to four beds. The brand was not the problem at any of those sites.
Getting the system type right, confirming the pressure is regulated, and sizing the mainline for the actual number of beds covers most of what determines whether a drip kit performs as expected. None of that requires a complicated setup. It requires making three decisions in the right order before anything is purchased, which is what the rest of this site is built to help with.

This robust hose-end timer works with sprinklers, drip irrigation, and soaker hoses, offering simple automatic programming with full 7 day scheduling for worry-free watering. An extra-large dial and readout screen make setup and schedule review easy, while one-touch buttons allow quick cancellation, a rain delay of up to 96 hours, or manual watering on demand. The display also shows the next scheduled cycle and time remaining on the current one.
Check On AmazonIf you click this link and buy, we earn a commission at no additional cost to you.
Explore More Raised Bed Drip Irrigation Guides
Each guide below covers a specific decision in the raised bed drip irrigation process. This overview is the starting point; the guides below are where the decisions get made. Start with the one that matches where the uncertainty is right now.
| Guide | What it helps with |
|---|---|
| Drip tape vs soaker hose for raised beds | Compares drip tape, soaker hose, and emitter dripline side by side: how each performs by soil type, crop spacing, and bed width, with a practical look at the maintenance and seasonal storage differences. |
| Raised bed drip kit comparison by bed count | Breaks down kit configurations by number of beds, emitter flow rates by crop type, and what changes in the kit spec when the setup scales from one bed to four. |
| Drip irrigation timer selection for raised beds | Covers how to choose a hose-end timer for a raised bed setup, how timer features affect daily use, and what to look for if the goal is consistent automated watering through a full growing season. |
Working through system type first, kit configuration second, and automation third builds a setup around the actual beds being watered rather than one adjusted later to fit a kit that was not quite right from the start.
FAQs
💧 What should I look for in a raised bed drip irrigation kit?
Check three things before the brand: whether a pressure regulator is included and at what PSI it outputs, whether the mainline is sized for the number of beds you are running, and whether the emitter spacing matches the crop layout in the bed. A kit that covers all three is a better fit than a more expensive one that skips any of them.
🌱 How many raised beds can a standard drip kit handle?
Most standard kits are sized for one bed, typically 4×4 or 4×8. Running a second bed off the same kit is often possible if the beds are close to the spigot and the combined emitter count stays within the mainline’s capacity. Three or more beds usually call for a larger mainline diameter and a configuration built for that scale from the start.
🚿 Do I need a pressure regulator with a raised bed drip kit?
In most residential setups, yes. Standard hose bibs run 40 to 80 PSI, and most drip components are rated for 15 to 30 PSI. Without a regulator, fittings and drip tape operate above their rated pressure. The system may run fine at first and start leaking at the weakest connection point within a few weeks. If the kit does not include a regulator, add one before connecting to the hose bib.
🧱 What is the difference between drip tape, soaker hose, and emitter line for raised beds?
Drip tape is flat, runs at low pressure, and delivers water at spaced intervals along a row, which suits crops planted in consistent spacing. Soaker hose seeps water along its full length, is easy to reposition, but loses consistency in longer runs or fast-draining soil mixes. Emitter line delivers a measured drip at set intervals and lasts longer with proper filtration upstream. The right choice depends on crop spacing, soil mix, and how much end-of-season maintenance makes sense for the setup.
⏱️ Do I need a timer for a raised bed drip system?
Not technically, but a timer is what makes a drip system run consistently without daily attention. Hand-turning the bib on a schedule works until travel, heat, or a busy week breaks the routine. A basic hose-end timer handles the schedule automatically, which matters most during heat stretches, vacation, or any stretch of the season where the garden is not the first priority.
🔧 Why does my raised bed drip system have dry spots?
Dry spots usually trace to one of three causes: clogged emitters from unfiltered water, emitter spacing that does not reach the root zones of plants in that section of the bed, or pressure drop from running more beds than the mainline was designed to supply. If the rest of the system is working and only specific areas are dry, a clogged emitter or a mainline run that is too long for the available pressure are the first two things to check.
❄️ Do I need to winterize a drip system in raised beds?
Yes, in any climate where temperatures fall below freezing. Water left in drip lines, pressure regulators, filters, and timers expands when it freezes and splits fittings or cracks plastic housings. Draining the system before the first hard frost, removing the timer and filter, and storing them indoors adds at least a full season of life to most kit components.
🍅 Can I run tomatoes and lettuce on the same drip line?
You can run them on the same line if they share a bed. The challenge is that their needs differ: tomatoes are deeper-rooted and tolerate longer intervals between cycles, while lettuce roots are shallow and dry out faster in loose raised bed soil. If they share a line, size the run time to the crop that needs more frequent watering and accept that the other receives slightly more than it strictly needs. In a bed with both, I would rather run slightly more water than risk the lettuce drying out in the top inch of soil.