Most raised bed drip irrigation problems trace back to one thing: nobody planned the layout before buying parts. In this guide I walk through the design decisions that actually determine how a system waters, line spacing, how many driplines a bed needs, how layout looks different for a grid planting versus parallel rows, and when to plan for drip lines during bed construction instead of after. None of this requires an engineering background. It requires knowing what to decide before the tubing gets cut.
Why Raised Bed Drip Irrigation Layout Comes Before Component Shopping
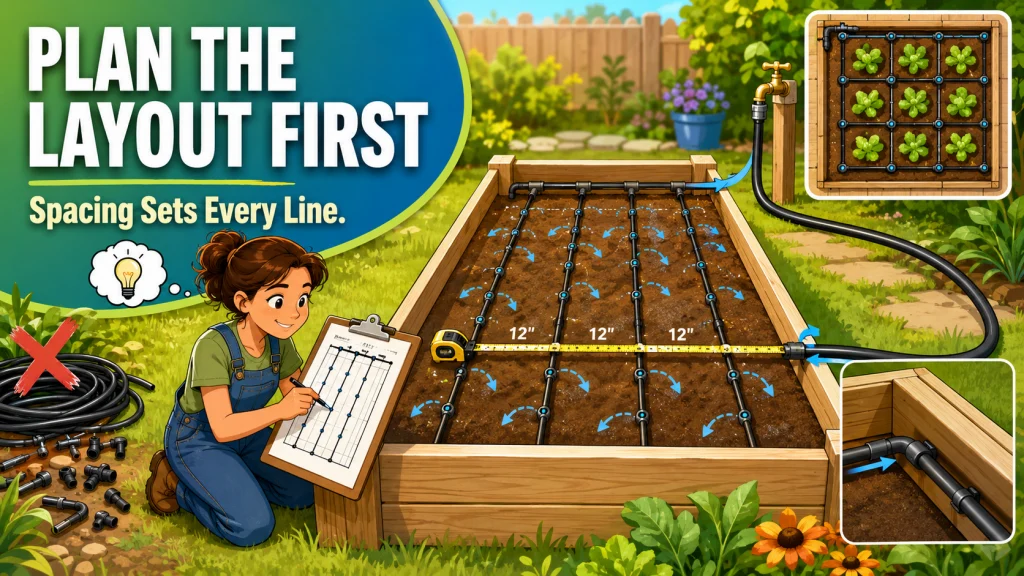
The most fixable installation mistake I see happens before a single fitting gets touched. The layout was never planned. A homeowner buys a kit, walks out to the bed, and starts laying tubing in whatever pattern looks reasonable that afternoon. By midsummer there are dry corners, a soggy patch near the header, and a string of plants that never quite filled in the way the others did. None of that is a defective kit. It is a raised bed drip irrigation layout that was decided on the fly instead of on paper first.
Here is the framework I use before quoting any raised bed drip install, and it is the same one this hub works through. Spacing comes first because it sets how many lines you need. Line count comes from spacing and bed width together. Layout pattern, parallel rows or a grid, depends on what is planted. And timing matters too: a bed that is still just lumber and screws gives you a routing option that disappears the moment soil goes in. Get those four decisions made before you open a kit box, and the rest of the install goes faster and holds up longer.
What This Hub Covers, and What It Does Not
This page is a planning map, not a parts list. I am talking here about the physical design decisions that decide how a raised bed drip irrigation system performs once it is buried under mulch and growing tomatoes: dripline spacing across the bed, how many lines a given bed width actually needs, what a properly planned layout looks like on paper versus what most first installs end up looking like, the grid pattern for densely planted beds, and the narrow window you get to route a mainline if the bed is still under construction.
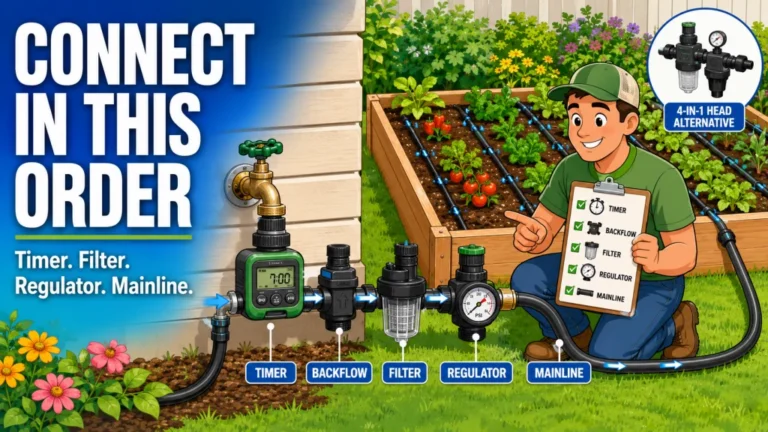
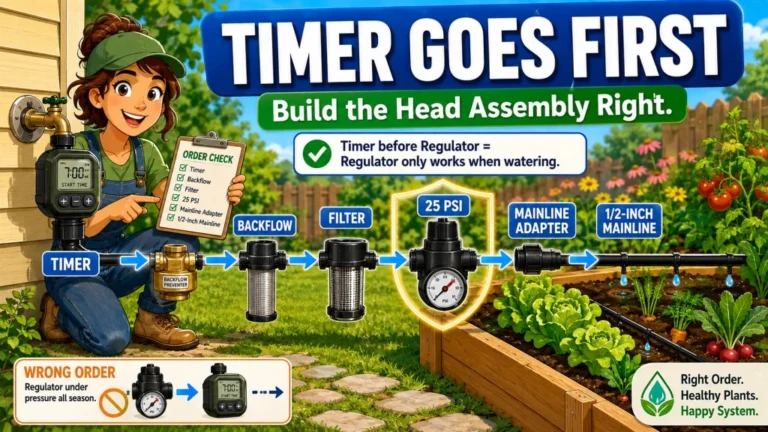
What this hub does not get into is which specific drip tape, emitter line, or fitting brand to buy. That is a separate decision tree covered in component selection, and it only makes sense once the layout is settled. This page also is not where I talk about connecting your layout to a hose bib, a timer, or a pressure regulator. Water source connection is its own topic with its own pressure and filtration considerations. If you came here trying to figure out which kit to order, finish the layout first. A kit chosen before layout is decided is usually a kit that gets modified, returned, or quietly lived with despite the dry spots.
Note: I am not talking about lawn zones or in-ground irrigation here. Everything on this page assumes a contained raised bed, not a buried lawn line or a row crop field. The numbers and patterns below do not transfer directly to container gardens either; a 12-inch pot has very different coverage needs than a 4-foot-wide bed.
Key point: Before You Buy Parts: 5 Layout Answers to Write Down
- Bed width and length, measured, not estimated from memory.
- Spacing target: 12 inches, 8 to 10 inches, or a 6-inch grid.
- Approximate line count per bed based on that spacing.
- Header side and entry point: which end or side of the bed the mainline feeds in from.
- Whether the bed is already filled and planted, or still under construction.
That entry point decision is easy to skip because it feels minor next to spacing and line count, but it decides where every line in the bed starts. I usually run the header along the shorter end of the bed so each parallel line travels the longer dimension in one straight run, rather than feeding from the side and forcing lines to bend around a corner. Write these five answers down before you open a kit box. They turn into the exact spec sheet you need once you move on to component selection.
Dripline Spacing: The Number That Decides Everything Else
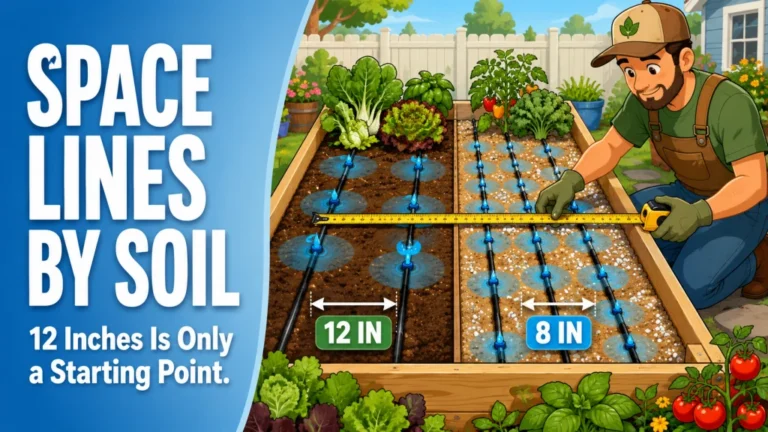
The distance between parallel driplines across the width of the bed is the single number that determines whether water actually reaches every plant’s root zone or leaves dry strips between the lines. As a general range, 12 inches apart is the loose end of acceptable spacing for vegetable beds, and 8 to 10 inches between lines gives noticeably more even coverage in beds packed with closely spaced crops like lettuce, spinach, or carrots. The tighter the planting, the tighter the line spacing needs to be, because the water has less lateral soil movement to rely on before the next root zone shows up dry.
I usually see homeowners go too wide rather than too tight. A 12-inch gap feels generous when you are standing over an empty bed in spring, but once the canopy fills in by July, that gap is exactly where the soil dries out first and nobody notices until the plants in between start lagging. With clay-heavy mix, water spreads sideways a bit more and 12-inch spacing can work fine. With a sandier raised bed mix, which drains straight down rather than sideways, I would rather see 8 to 10 inches, especially under shallow-rooted crops like lettuce.
This page is the planning overview. The full spacing breakdown by bed size and crop depth, including how spacing should shift between a 4×4 herb bed and a 4×8 mixed vegetable bed, lives in the dedicated spacing guide for raised bed drip irrigation. If you only take one thing from this section, take this: decide spacing before you decide line count, because line count is just spacing divided into bed width.
How Many Driplines a Raised Bed Actually Needs
Once spacing is set, line count is mostly arithmetic. A 4-foot-wide bed typically needs 3 to 4 driplines depending on which spacing you landed on. At 12-inch spacing you are closer to 3 lines across a 4-foot bed. At 8 to 10-inch spacing, you are closer to 4. The math by itself is simple, and most kit instructions stop right there. What they skip is the emitter stagger question, and it is where I see the most dry-patch complaints once a bed is a season or two old.
Here is the issue. If every line in the bed has emitters placed at the same interval and those emitters line up in straight rows across the bed, width-wise, you get columns of wet soil running parallel to the lines and rows of comparatively drier soil running perpendicular between them. It looks fine on day one because the surface is wet everywhere right after a run cycle. It shows up two or three weeks later as a faint striping pattern in plant size, the kind of thing that looks like a soil problem until you trace it back to the emitter layout.
Staggering the emitter spacing between adjacent lines, so that line two’s emitters sit roughly halfway between line one’s emitter points, closes most of that gap without changing your overall spacing or line count. It is a five-minute decision on paper that is much harder to fix once the tubing is mulched over. The full line-count guide, with the stagger pattern laid out for different bed widths, is covered in the dripline count guide for raised garden beds.
| Bed width | Spacing used | Approximate line count |
|---|---|---|
| 4 feet | 12 inches | 3 lines |
| 4 feet | 8 to 10 inches | 4 lines |
| 4-foot width, 8-foot length | 8 to 10 inches | 4 lines per 4-foot run, 8 lines total |
Treat that table as a starting point, not a rule. A 4×8 bed planted heavily with tomatoes and peppers does not need the same line density as the same footprint packed with lettuce, and I would rather adjust line count before planting than try to patch dry strips once the canopy closes in.

This kit includes everything needed to water a raised bed up to 4 by 8 feet, with professional-grade components built for repeated seasonal use. It features 35 feet of emitter tubing with 70 built-in, pressure-compensating emitters spaced every 6 inches for even watering near the roots, plus 25 feet of easy-to-handle 1/4 inch distribution tubing. This low-volume design can save up to 80% on water while supporting healthier plants and better yields. Installation is straightforward thanks to an illustrated manual covering multiple layout options, and the system can be automated with a compatible Rain Bird hose-end timer sold separately.
Check On AmazonIf you click this link and buy, we earn a commission at no additional cost to you.
What a Correctly Planned Layout Looks Like on Paper
Most first-time raised bed drip installs follow the same shape: a single line snaked back and forth through the bed in a loose zigzag, because it uses less tubing and looks tidy coiled up before planting. The maze pattern looks efficient on day one. It rarely waters evenly once plants fill in, because the turns bunch emitters closer together at the bends and stretch them farther apart along the straight runs. In 4-foot-wide vegetable beds, I usually see noticeably better consistency from three or four parallel straight lines running the length of the bed than from one line snaked through it corner to corner.
A correctly planned layout, sketched before any tubing gets cut, marks where the mainline enters the bed, where each parallel line runs, and where the emitters fall along each line, staggered as described above. Sketching it on paper first, even a rough one with bed dimensions and line spacing written in, catches problems that are obvious on paper and easy to miss once you are standing in the bed holding a coil of tubing. The visual side of this, including side-by-side examples of a planned grid versus a typical first-attempt zigzag, is covered with diagrams in the raised bed drip irrigation layout diagram guide.
One line snaked back and forth through the bed to minimize tubing length, with emitters spaced evenly along the single run regardless of how the turns bunch them up.
Three or four parallel straight lines run the length of the bed, fed from a header at one end, with emitter spacing staggered between adjacent lines.
The parallel approach uses a bit more tubing than the zigzag. That is the tradeoff, and it is a small one against a season of uneven growth.
Grid Layout for Square Foot and Intensively Planted Beds
Parallel rows work well for beds planted in traditional rows with some breathing room between plants. They work less well for square foot gardening or any bed where the planting is intensive enough that there is barely visible soil between mature plants. In that situation, a grid pattern, where driplines run in both directions or emitters are placed on a tighter, more uniform grid rather than along a handful of long parallel runs, tends to hold up better.
The tighter spacing option here usually lands around 6 inches between emitter points in both directions, which is noticeably denser than the 8 to 10-inch spacing used for standard row plantings. That density makes sense in a bed where nearly every square foot has a different crop with a shallow, compact root system competing for the same limited soil volume. It does not make sense in a 4×8 tomato and pepper bed where each plant has 2 feet of space and a deeper root system that can pull moisture laterally on its own.
I would not default to a grid layout for every raised bed. It uses more tubing, more emitters, and more time to lay out correctly, and a bed with widely spaced, deep-rooted plants does not benefit enough to justify it. Where it earns its complexity is dense, intensively planted beds where the plant spacing itself is already tight. The full grid pattern guide, with the 6-inch spacing option mapped out for square foot beds, is in the grid layout guide for raised bed drip irrigation.

This preassembled watering grid sets up in about a minute and connects to any standard garden hose, delivering 16 even streams of water per square for consistent coverage across a 4x4 raised bed. Unlike narrow drip lines or soaker hoses, it waters every plant at soil level with no dry spots or repositioning needed. Made in the USA from UV-resistant, water-safe materials, it includes a built-in mesh filter and is built to outlast traditional drip systems by 5 to 10 times, with original units from 2013 still in use today.
Check On AmazonIf you click this link and buy, we earn a commission at no additional cost to you.
Planning Layout During Bed Construction vs Adding It Later
If the bed already exists and has had a season or two of plants in it, your layout options are basically what fits on top of the existing soil. If the bed is still just lumber, screws, and an empty footprint, there is a short window where you can route a mainline differently than you could after the fact, hidden along the inside edge of the frame or run underneath before backfilling, rather than laid across the top of the soil where it competes for space with plant stems and mulch.
This is the one decision on this page that is genuinely easier to get right the first time than to fix later. Once a bed is filled with soil and planted, lifting the mainline to reroute it means disturbing root zones you do not want to disturb. Planning the route during construction costs nothing extra in materials, just a few minutes of deciding where the line enters the bed and which direction it runs before the frame is filled.
Field Note: The mistake I see most with new raised beds is treating drip irrigation as a step that happens after the garden is built and planted. By the time the irrigation question comes up, the soil is in, the layout choices are narrower, and the mainline ends up running across the surface instead of tucked along the frame where it belongs.
If you are building new beds this season, this is worth deciding before the first board goes in the ground, not after. The full breakdown of what to plan for during construction, including where to leave access for the mainline, is in the guide to building a raised garden bed with drip irrigation in mind.

This self-contained drip irrigation kit includes everything needed to water raised beds sized in multiples of 4 by 8 feet, with options ranging from 2 beds up to 10 beds. It connects to any standard outdoor faucet or garden hose using 3/4 inch threaded fittings that only require hand tightening, no tools needed. The tubing can be trimmed easily with household scissors, and the modular design lets you mix and match additional parts as your garden grows. Detailed printable installation instructions are included to make setup straightforward.
Check On AmazonIf you click this link and buy, we earn a commission at no additional cost to you.
Final Thoughts: Decide the Layout Before You Decide the Parts
None of the four decisions on this page, spacing, line count, pattern, and construction timing, require special tools or technical training. They require sitting down with the bed’s actual dimensions and crop plan before any tubing gets ordered. The gardeners I see with the fewest dry spots and clogging headaches are not the ones with the most expensive kit. They are the ones who sketched the layout first and bought parts to match it, instead of buying a kit and trying to make the layout fit whatever came in the box.
If you take one decision from this page and act on it today, make it spacing. Everything else, line count, pattern, even how much tubing to buy, follows from that one number. Once the layout is settled on paper, the next step is picking the actual driplines, fittings, and header components to build it, which is where component selection for raised bed drip irrigation picks up. For the full system overview tying layout, components, and water source connection together, see the complete raised bed drip irrigation setup guide.

This complete kit includes 10 vortex emitters, 20 spray emitters, 50 feet of 5/16 inch mainline tubing, 50 feet of 1/4 inch drip tubing, plus couplers, splitters, end plugs, and a water connector, enough to cover up to 3 raised garden beds. It runs on 20 to 45 PSI with adjustable, detachable emitter heads that resist clogging and rotate for precise watering at each plant's roots. The UV-resistant tubing holds up year-round above or below ground, and 7.5 inch bubbler stakes anchor securely even in loose soil. A printed instruction guide and digital growing guide are included.
Check On AmazonIf you click this link and buy, we earn a commission at no additional cost to you.
Explore More in This Section
Each guide below breaks down one layout decision in more depth than this overview covers. Start with whichever matches the decision you are stuck on right now.
| Guide | What it helps with |
|---|---|
| Raised Bed Drip Irrigation Spacing | Full spacing numbers by bed size, soil type, and crop, including when to tighten spacing below 8 inches. |
| Drip Irrigation Lines Per Raised Bed | Line count math for common bed widths plus the emitter stagger pattern that prevents dry striping. |
| Raised Bed Drip Irrigation Layout Diagram | Visual side-by-side of a planned parallel layout against a typical first-attempt zigzag. |
| Raised Bed Drip Irrigation Grid | The 6-inch grid spacing pattern for square foot gardening and intensively planted beds. |
| How to Build a Raised Garden Bed With Drip Irrigation | Routing the mainline during construction instead of retrofitting it into a planted bed. |
Once you have worked through the layout decision that applies to your bed, the next logical stop is component selection, where the spacing and line count from this page turn into an actual parts list.
FAQs
📏 How far apart should drip lines be in a raised bed?
12 inches apart is the loose end of acceptable spacing for most vegetable beds, while 8 to 10 inches gives more even coverage for densely planted crops like lettuce or spinach. Sandier soil drains straight down rather than sideways, so tighter spacing helps there too.
🌱 How many drip lines do I need for a 4-foot-wide raised bed?
A 4-foot-wide bed typically needs 3 lines at 12-inch spacing or 4 lines at 8 to 10-inch spacing. The right number depends on how densely the bed is planted and what soil type you are working with.
🧩 What is emitter stagger and why does it matter?
Emitter stagger means offsetting emitter points between adjacent lines instead of lining them up in straight rows. Without it, you can end up with parallel wet columns and drier strips between them that show up as uneven plant growth a few weeks into the season.
🔲 Do I need a grid layout for a raised bed, or are parallel lines enough?
Parallel lines are enough for most beds, especially with widely spaced, deeper-rooted crops. A grid layout, usually around 6-inch spacing in both directions, makes more sense for square foot gardening or any bed planted intensively enough that there is little visible soil between plants.
🪵 Should I plan drip irrigation before or after building a raised bed?
Before, if at all possible. Planning during construction lets you route the mainline along the inside of the frame or underneath before backfilling. Once a bed is filled with soil and planted, rerouting the mainline usually means disturbing root zones you would rather leave alone.
🍅 Does a tomato and pepper bed need the same layout as a lettuce bed?
No. Tomatoes and peppers are spaced wider with deeper roots, so they tolerate looser line spacing. A lettuce or salad green bed is planted tighter with shallow roots, which usually calls for closer line spacing or a grid pattern to avoid dry patches between plants.
🧵 Why does my drip layout look fine at planting but uneven by midsummer?
This usually points to spacing that was too wide or emitters that were not staggered between lines. The surface looks wet right after a run cycle regardless of layout, but the unevenness shows up underground first, then in plant size as the season goes on.