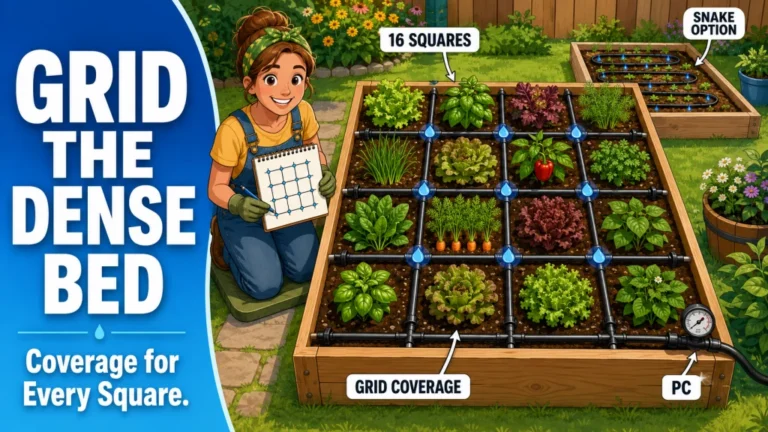
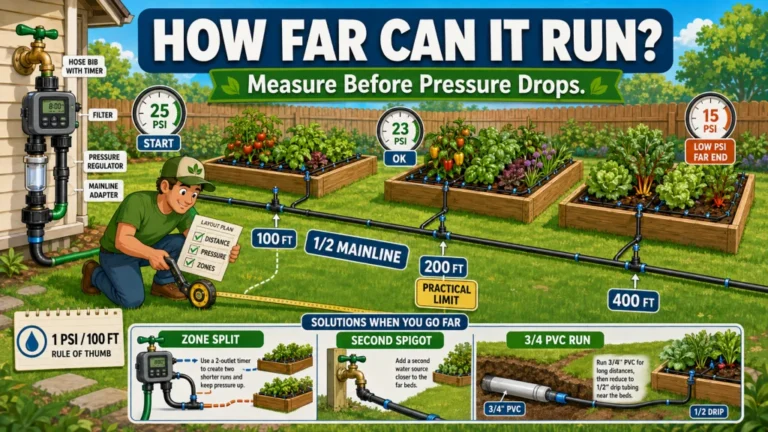
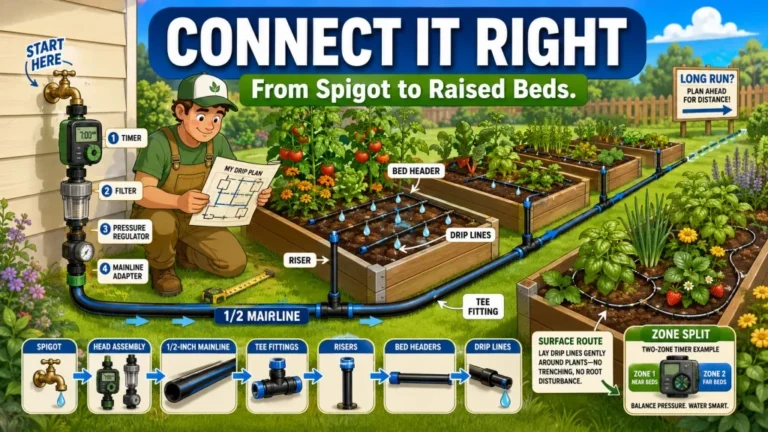
The easiest time to plan drip irrigation for a raised bed is before you add a single shovelful of soil. Once the bed is built and planted, every routing decision gets harder: mainline has to go over the frame, riser fittings have to be added after the fact, and running line between multiple beds means working around established plants. This article covers the specific decisions that are much easier to make during construction, what to route or notch before filling, and where the real mistakes happen for gardeners who skip this window.
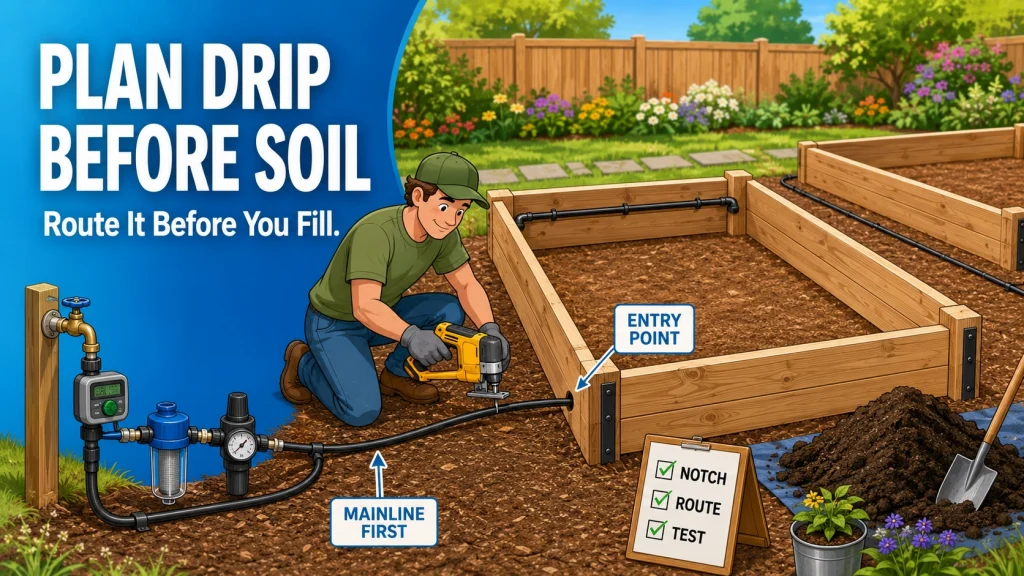
Why the Construction Window Is the One You Want
When I walk through a garden where the drip system was added after the beds were already full of plants, the first thing I notice is the mainline. It goes over the top of the frame, down the inside wall, across the soil surface, and often gets buried under mulch partway through the season. The fittings where it bends over the frame edge are usually the first place a slow leak develops. None of that is catastrophic, but all of it was avoidable.
Before a raised bed is filled, the frame is just a box. The mainline can be routed through a notch or a drilled hole in the frame at ground level, which keeps it low, protected, and out of the way. Between beds, tubing can be run under or along the ground before the second frame goes down, making the connection between beds completely invisible once everything is in place. That window lasts exactly as long as the bed construction takes. Once the soil goes in, you are retrofitting.
This article is specifically about that window: what to do during bed construction to make the drip system easier, cleaner, and more durable. It is not a full component guide or a layout deep-dive. If you are working with beds that are already built and planted, that is a different situation handled separately. For beds you are starting from scratch right now, the decisions below are worth taking ten minutes to think through before you fill.
The First Decision: Where the Mainline Enters the Bed
Before any soil goes in, decide where the mainline will enter the bed. This single decision affects how clean the finished system looks, how well the fittings hold, and whether the entry point survives a season of being stepped around, hosed off, and covered with mulch.
The entry point is typically at one of the short ends of the bed, close to the corner nearest the water source. For a 4×8 bed, that puts the entry within a foot or two of where the mainline is coming from, which keeps the exposed run short. The fitting that connects the mainline to the drip header inside the bed needs clearance on both sides: enough room outside the frame to attach a hose or mainline fitting, and enough room inside to connect to the header tubing. Two inches from the nearest corner post or structural joint is usually enough. Tighter than that and the fitting does not seat properly, which is the kind of thing that leaks slowly all season before anyone notices.
The entry itself is a notch or a drilled hole through the frame wall. A notch at the bottom edge of the frame lets the mainline run at ground level, which is my preference for most single-bed setups. A drilled hole about 2 inches up from the bottom edge works just as well and keeps the tubing from sitting directly on soil. Either way, the critical step during construction is making this opening before the bed is filled. Trying to notch a frame board after it has 300 pounds of soil against it is possible but unpleasant, and trying to drill through the frame once the bed is planted means working around stems and roots to get a clean hole.
Field Note: The most common mistake I see with riser placement is putting it at the long side of the bed instead of the short end. The long side looks intuitive when you are standing next to the hose bib, but it puts the mainline entry in the middle of the bed wall rather than at a corner. The header that runs the width of the bed then has to start from the middle and branch both directions, which is harder to balance and harder to cap cleanly. Short-end entry, near the corner, keeps the header layout simple.
Notch or Drill: Which to Use
For most lumber or composite frame beds, a notch cut at the bottom of the end board is the fastest option during construction because the frame boards are usually not yet assembled when you make the cut. A jigsaw or a drill with a hole saw handles this in under two minutes on a standard 2×10 or 2×12 board. The notch should be just wide enough for the 1/2-inch mainline to pass through with a little clearance, roughly 3/4 inch across. You do not need a tight fit because the tubing is flexible and the soil weight on the inside will keep everything in place once the bed is filled.
A drilled hole gives a cleaner look if the frame will be visible and you care about aesthetics. A 7/8-inch spade bit or a 1-inch hole saw leaves a clean opening for 1/2-inch mainline without much slop. The tradeoff is that you need to drill while the board is accessible, which means planning ahead before the frame is fully assembled. Either option works. The only wrong move is skipping the step entirely and planning to figure it out later, because later means after the soil is in and the window is gone.
Whether to Pre-Install the Header Before Filling
Once the entry point is notched or drilled, you have two choices: install the 1/2-inch header inside the bed now, before the soil goes in, or leave the entry point open and install the header after filling. Both work. The difference is mostly about what is easier in the moment.
Pre-installing the header before filling lets the soil settle around the tubing naturally, which means the header sits at a consistent depth along the short wall without needing to be pushed into already-compacted soil later. For a 4×8 bed, the header is a short length of 1/2-inch tubing, maybe 30 inches long, running along the inside of the short-end frame wall. It feeds the lengthwise drip lines that will run down the bed. Installing it now takes about five minutes and means one less step after the soil is in.
The argument for waiting until after filling is simpler: you might change your mind about the layout. I have had gardeners decide partway through filling that they want to shift the crop plan, which changes how many drip lines they need and where the header connections should land. If the header is already installed, those changes require pulling the tubing out of settled soil. If the entry point is notched and the header goes in after filling, adjustments are still easy. Either approach is fine. What matters is that the entry point is made now, during construction, so the header can go in cleanly whenever you are ready.
Pro Tips: If you are filling the bed in stages over a few days, install the header after the first layer of soil is in but before the bed is full. That way the tubing sits at a predictable depth in loose soil and gets covered by the remaining fill, which holds it in place without any additional anchoring.

This 20-piece kit includes 4 barbed tees, 3 switch valves, 4 three-way half-inch to quarter-inch connectors, 3 six-way half-inch to quarter-inch connectors, 4 end caps, and 2 elbows for building or expanding a drip system. All fittings are compatible with standard half-inch tubing measuring 0.62 to 0.65 inches outside diameter and quarter-inch dripline with a 4mm inner diameter. Barbed ends lock tubing in place without glue or tools for a secure, leak-proof connection.
Check On AmazonIf you click this link and buy, we earn a commission at no additional cost to you.
Building Multiple Beds at Once: Route the Mainline First
If you are building more than one raised bed at the same session, the mainline routing between beds is something to handle before the second frame goes down. This is the step that gardeners most often skip and most often regret.
The mainline that feeds multiple beds is typically 1/2-inch polyethylene tubing running from the hose bib to each bed in sequence. When beds are close together, that run goes between the frames. During construction, before the second or third frame is placed, you can lay the mainline along the ground between bed positions, cover it with 2 to 3 inches of soil or gravel, and set the frames on top or beside it. The result is a buried mainline between beds that is completely protected from foot traffic, UV exposure, and accidental snagging. Once everything is filled and planted, there is no above-ground tubing between the beds at all.
I have set up four-bed gardens where the homeowner asked me to add drip after the fact, and every one of them ended up with mainline running along the ground between frames where it got stepped on, kinked at the corners, and accidentally cut by a hoe. The same setup done during construction would have taken 15 minutes and the tubing would never have been exposed. The window for burying it cleanly is exactly as wide as the time between placing the first and second frame. After that, the frame is in the way.
| Task | During construction | After filling and planting |
|---|---|---|
| Notch or drill frame for mainline entry | 2 minutes, board is accessible | Difficult, soil pressure against board |
| Route mainline between bed frames | Lay and cover before placing next frame | Above-ground run, exposed to foot traffic |
| Install header inside bed | Easy in empty frame, soil settles around it | Must push into settled soil, harder to adjust |
| Adjust drip line layout | Full access, no roots to work around | Must work around established root zones |
| Test system before planting | Run system, check coverage, adjust freely | Adjustments disturb existing plants |
The pattern in that table is the same across all of these tasks: the action takes less time, less effort, and produces a cleaner result during construction than after. None of these steps require special tools or irrigation knowledge. They just require doing them before the soil goes in.

This 200-foot coil of half-inch poly tubing serves as main supply line or feeder line in drip irrigation systems, with an outside diameter of 0.620 inches and inside diameter of 0.520 inches for compatibility with standard drip fittings and emitters. Multi-layer construction uses 100% virgin poly on the inner and outer layers for UV and water resistance, with a recycled-content core for added strength. Suitable for trees, shrubs, raised beds, containers, and hanging baskets.
Check On AmazonIf you click this link and buy, we earn a commission at no additional cost to you.
Test the System Before You Plant
Once the bed is filled and the drip system is connected but before any transplants or seeds go in, run the system. Let it run for a full cycle at the timer setting you plan to use and watch where the soil surface shows moisture. This is the one moment in the life of that bed where you can see exactly where the emitters are wetting the soil without anything in the way.
What you are looking for is consistent moisture across the full planting area. Dry patches at the corners or along the edges of the bed usually mean the outer drip lines need to move closer to the frame edge, or that additional emitters are needed. In a new 4×8 bed with two drip lines running lengthwise, I typically see better corner coverage when the outer lines are 6 to 8 inches from the frame wall rather than running down the center of the bed. The center gets watered from both lines. The corners get watered from one line at whatever distance the spacing allows. Moving the outer lines toward the edges before planting takes 10 minutes. Moving them after the tomatoes are in takes considerably longer and usually means a disturbed root ball on at least one plant.
This test also tells you whether the pressure is correct and the emitters are flowing as expected. If some emitters are barely dripping and others are running steadily, that is usually a sign that the line is too long for the pressure available, or that the pressure regulator is set lower than the emitters need. Better to find that out on bare soil than after the plants are in and the schedule has been running for two weeks.
For a full walkthrough of how layout decisions connect to coverage, the raised bed drip irrigation layout guide covers line placement, emitter spacing, and how to read coverage patterns for different bed sizes and crop types.
The Mistakes That Are Hardest to Fix Later
Most drip system problems in raised beds are fixable at any point, but a few decisions made during construction are significantly harder to undo after the fact. These are the ones worth getting right while the bed is still empty.
- Entry point at a corner post or structural joint. The fitting needs clearance on both sides for connection. Drilling or notching at the same location as a post puts the fitting in a bind. The tubing seats, but the fitting cannot rotate or be tightened properly, and it will weep at the connection. Two inches of clearance from any structural joint fixes this.
- Routing the mainline over the top of the frame. An above-ground mainline bend over a frame edge is the most vulnerable point in any raised bed drip system. It gets snagged by hoses, bent by feet stepping over it, and UV-degraded faster than buried tubing. Routing through the frame during construction eliminates this entirely.
- Skipping the filter. A new raised bed filled with a blended soil mix often contains fine particles, compost dust, and debris that work their way into the drip lines during the first few waterings. Emitters can clog faster in a new bed than in an established one, especially when loose soil mix, compost dust, and fine particles wash into the lines during the first few cycles. Installing the filter at the water source connection from the start keeps the emitters clear from day one.
- No pressure regulator before the drip lines. Most hose bibs run 50 to 80 PSI. Most 1/4-inch drip line and emitters are rated for 20 to 30 PSI. Connecting drip directly to a hose bib without a pressure regulator works until it does not, usually when a fitting blows at the lowest-resistance point in the system. In a new setup where you are making connections for the first time, adding the regulator now is far easier than diagnosing a weeping fitting six weeks later.
None of these are complicated to address during construction. They are the kind of thing that gets skipped when someone is eager to fill the bed and start planting. The regret usually shows up mid-season when something is underperforming and tracing it back to the original setup takes longer than the fix would have.
Field Note: In my experience, the most common construction-window mistake is building all the beds, filling them immediately, and then deciding to add drip two weeks later when watering by hand becomes a problem. By that point, every step in this article is a retrofit. The system still works, but the mainline goes over the frames, the riser fittings are added to the outside of the boards after the fact, and the tubing between beds runs along the ground where it gets stepped on. It is a functioning system, but it is not a clean one. Fifteen minutes of planning during the build changes the outcome significantly.

This multi-function kit connects 1/2 inch drip tubing to any 3/4 inch male threaded faucet or garden hose, helping ensure your drip irrigation system runs properly. It includes a backflow preventer, a 25 PSI pressure regulator, and a 150 mesh filter, along with a compression fitting that creates a leak-proof seal to 1/2 inch tubing. Built from UV and chemical-resistant materials for long-lasting durability, the kit can also be paired with a compatible Rain Bird hose-end timer for automated watering.
Check On AmazonIf you click this link and buy, we earn a commission at no additional cost to you.
Before You Fill the Bed: Six Things to Confirm
Before the first shovelful of soil goes in, run through this list. Each item takes under a minute to check and is significantly harder to address after filling.
- Water source side is identified. You know which hose bib will feed the system and roughly how far the mainline needs to run to reach the bed entry point.
- Mainline entry is at the short end of the bed, near a corner. Not the long side, and not in the center of any frame wall.
- Entry point has clearance from any corner post or structural joint. At least 2 inches on both sides so the fitting can seat and be tightened without being in a bind.
- The notch or hole is made and the edges are smooth. A rough cut edge on the notch will abrade the tubing over time, especially if the mainline moves with temperature changes. A quick pass with sandpaper or a file fixes this during construction.
- If building multiple beds, the mainline between frames is routed before the next frame goes down. This is the step that cannot be undone. Once the second frame is placed, burying the mainline between beds means digging up the path.
- Filter and pressure regulator placement is decided. Both go between the hose bib and the drip lines. Knowing this before construction means you can plan how the mainline connects at the hose bib end and what fittings the connection requires.
None of these require purchasing anything additional or committing to a specific layout. They are routing and structural decisions that shape what is possible later. The layout, how many drip lines, what emitter spacing, and how long to run the timer, can all be figured out after the bed is filled and before the first plant goes in.

This robust hose-end timer works with sprinklers, drip irrigation, and soaker hoses, offering simple automatic programming with full 7 day scheduling for worry-free watering. An extra-large dial and readout screen make setup and schedule review easy, while one-touch buttons allow quick cancellation, a rain delay of up to 96 hours, or manual watering on demand. The display also shows the next scheduled cycle and time remaining on the current one.
Check On AmazonIf you click this link and buy, we earn a commission at no additional cost to you.
Final Thoughts: The Decisions That Only Cost Two Minutes Now
Drip irrigation does not have to be planned in detail before a raised bed is built, but a few decisions are worth making during construction because they become meaningfully harder afterward. The entry point notch or hole in the frame takes two minutes while the board is accessible. The mainline run between beds takes 15 minutes before the second frame is placed. The header pre-install takes five minutes in an empty bed. None of these are complex irrigation tasks. They are construction tasks that happen to shape how the irrigation system goes together later.
What you are planning during construction is the routing: where the water enters the bed, how it gets from one bed to the next, and where the drip lines will connect inside the frame. The detailed layout decisions, how many drip lines, what emitter spacing, and how long to run the timer, can all be made after the bed is filled and before planting. That is still before roots are established and adjustments are easy. The window for clean routing is the construction day. Everything else can follow.
If you are still working through the full system from hose bib to emitter, the complete raised bed drip irrigation setup guide covers the full component chain in a single walkthrough. For the layout decisions that follow once the routing is in place, the raised bed drip irrigation layout guide covers line placement and spacing by bed size and crop type.
FAQs
🏗️ Should I install drip irrigation before or after filling a raised bed?
The entry point, the notch or hole where the mainline enters the frame, should be made before filling because the frame board is accessible and the soil is not yet pressing against it. The header and drip lines can go in before or after filling, but before planting is the critical deadline. Once plants are in the ground, adjustments to line placement disturb root zones and coverage testing is harder to read.
💧 Where should the mainline enter a raised bed?
At one of the short ends, near the corner closest to the water source, roughly 2 inches from any corner post or structural joint. Short-end entry keeps the internal header layout simple and puts the riser fitting where it has clearance for connections on both sides. Long-side entry works but puts the mainline connection in the middle of the frame wall, which complicates the header and is harder to seal cleanly.
🔩 Do I need to notch the frame or can I run the mainline over the top?
A notch or drilled hole through the frame is significantly better than running the mainline over the top edge. A mainline bent over a frame edge is the most vulnerable point in a raised bed drip system: it gets snagged, bent by foot traffic, and degrades faster from UV exposure and repeated bending. A notch made during construction takes two minutes and eliminates that vulnerability entirely.
🌱 Can I bury the mainline between raised beds?
Yes, and it is the cleanest option when building multiple beds at the same time. Before placing the second frame, lay the mainline along the ground between bed positions and cover it with 2 to 3 inches of soil or gravel. The frame can sit beside or over it. Once the beds are filled and planted, there is no above-ground tubing between beds. This option is only practical during construction. After the frames are in place, burying the line means digging up the path between beds.
⚙️ What components should I connect before I plant anything?
At minimum: a filter and a pressure regulator at the hose bib connection, the mainline running to the bed, the header inside the short end of the bed, and the drip lines running the length of the bed with emitters in place. Connect the timer if you have one. Then run the system on bare soil before planting to confirm coverage and check that pressure and emitter flow look right. Adjustments on bare soil take minutes. The same adjustments after planting take much longer.
📏 Does the drip layout need to be finalized before the soil goes in?
No. The routing decisions, where the mainline enters the frame and how it runs between beds, should be made during construction. The layout decisions, how many drip lines, what emitter spacing, and where each line sits relative to the planting plan, can be made after filling but before planting. That window still gives you full flexibility to adjust lines without working around established roots.