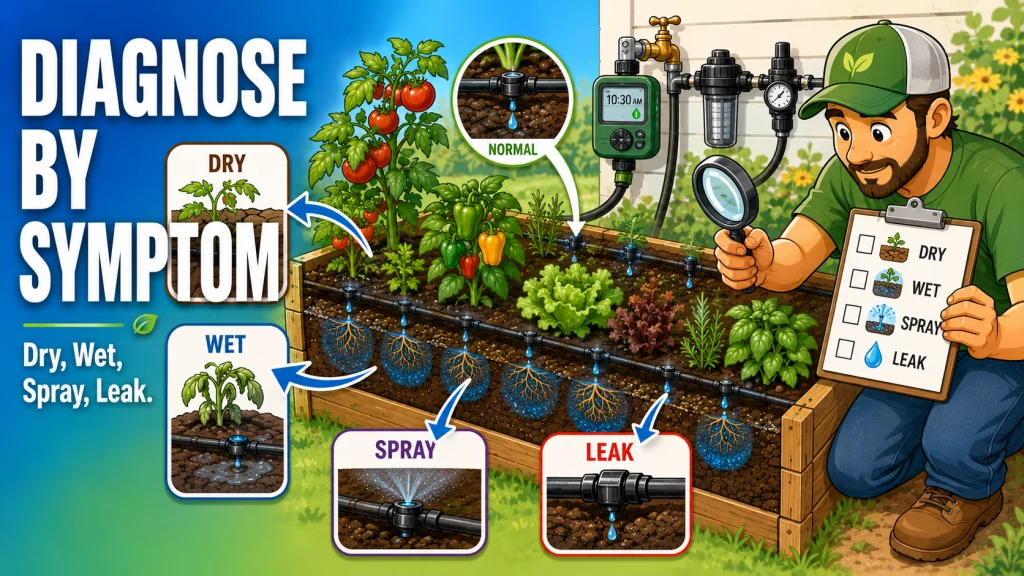
Most drip irrigation problems in raised beds come down to four observable symptoms: plants drying out despite a running system, plants wilting in wet soil, misting or spraying where steady drips should be, or water showing up at fittings where it never should. Each symptom points to a different cause, and knowing the symptom narrows the fix considerably. This article maps each symptom to its most likely cause and routes you to the right diagnosis before you start swapping parts.
Start With What You Can See, Not What You Think Is Wrong
Most drip problems I get called in to look at start the same way: the gardener already has a theory. The emitters must be clogged. The pressure regulator must have failed. The timer must be off. Sometimes they are right. More often they replaced something that was working fine while the actual problem sat two feet away, still unfixed. The faster path is always the symptom first.
Raised bed drip irrigation troubleshooting works better when you resist the urge to start pulling fittings and instead spend three minutes watching the system run. Walk the bed while the timer is active. Look at the soil surface. Look at the emitters. Look at every connection point. The problem usually announces itself visually before you touch anything. If you are not sure where to start with the broader setup, the raised bed drip irrigation overview covers the full system from hose bib to emitter, which can help you understand which component is responsible for which part of the flow.
What follows is a symptom map. Four visible symptoms, each with its most likely causes and the specific diagnosis that applies to it. Identify your symptom first, then follow the path that fits.
Symptom 1: Plants Are Dry or Wilting and the System Is Running
This is the most common symptom I see in raised beds, and it is also the one that produces the most wrong repairs. The timer fires on schedule, the gardener hears the system activate, and the plants still show heat stress or soil that feels dry two inches down. The assumption is almost always that the emitters are blocked or the timer is the problem. Both can be true, but neither is always the first thing to check.
The most useful thing you can do is confirm that water is actually leaving the emitters during a run cycle. Not just that the system activates, but that water is physically coming out at each emitter location. I have seen mainlines kink behind a raised bed corner, cutting off flow to an entire drip line while the timer and hose bib were both working correctly. One kinked line means half a bed can go bone dry and the rest looks fine.
When Emitter Output Is Low or Uneven Across the Bed
If some emitters are dripping and others are not, or if the ones furthest from the mainline have noticeably less flow, the two most likely causes are partial emitter clogging or pressure loss along the line. Clogging usually shows up as patchy dry spots: one area of the bed looks healthy, the area around a specific emitter is always dry, and rotating the emitter out fixes the problem immediately. Pressure-related issues tend to show up as a gradient, where the first emitter on the line flows well and output drops progressively down the run.
Both causes require a closer look at the emitter itself and at what is happening upstream. For partial or complete emitter blockage, the step-by-step diagnosis is in clogged drip irrigation emitters. If the emitters look clean but flow is still low or uneven, the cause is likely pressure: either too little reaching the emitters or too much being regulated away by a mismatched component. The drip irrigation pressure diagnosis for raised beds covers both ends of that range.
When the System Runs Correctly but Soil Still Dries Out in Spots
A different version of this symptom shows up when emitters are fine, pressure is in range, run time looks adequate, but one corner or strip of the bed is consistently drier than the rest. This is usually a coverage gap: the drip lines are placed where they made sense during layout but do not actually reach the root zone of every plant in the bed. Dry spots that do not trace back to emitter failure or pressure loss are a layout or spacing problem. The drip irrigation dry spots diagnosis covers how to tell a coverage gap from a flow problem and how to adjust the layout without pulling the whole system.

These green-coded emitters deliver a consistent 2 gallons per hour regardless of pressure fluctuations, making them well suited for sandy soil conditions. They attach to the end of quarter-inch feeder line or punch directly into half-inch supply tubing, and a turbulent flow design helps flush out sediment to reduce clogging over time. Ideal for individual shrubs, trees, and container plants.
Check On AmazonIf you click this link and buy, we earn a commission at no additional cost to you.
Symptom 2: Plants Are Wilting or Yellowing but the Soil Feels Wet
This one trips people up because the instinct says dry plants need more water. If the soil is already wet or waterlogged when the plants start wilting, more water makes the problem worse. Waterlogged roots cannot absorb oxygen, and plants under that condition show the same visual stress as drought stress: drooping, yellowing, stunted growth. The drip system is on time and running correctly. The problem is that it is running too much.
Overwatering in a drip-irrigated raised bed usually happens in one of three ways. The run time is too long for the emitter flow rate and soil type. The schedule runs daily when the soil does not have time to drain between cycles. Or the emitter spacing was designed for sandy soil and the bed was later amended to drain more slowly. In clay-heavy or heavily amended beds, I have seen daily 30-minute runs cause chronic waterlogging even with 0.5 GPH emitters.
Confirming that overwatering is the cause before adjusting the schedule is the right move. The symptom check and correction steps are in overwatering with drip irrigation in a raised bed. Once the root issue is corrected, you will likely need to revisit the run frequency and duration. The raised bed drip irrigation schedule section covers how to calibrate timing to soil type, crop mix, and season after you have resolved the symptom itself.
Field Note: The tell that separates overwatering from underwatering in a raised bed is a two-finger soil check at 2 to 3 inches depth, not at the surface. Surface soil in a raised bed can look dry within an hour of watering in warm weather, especially if there is no mulch. If the soil at root depth is wet or muddy during plant stress, the system is overdelivering, not under.

This robust hose-end timer works with sprinklers, drip irrigation, and soaker hoses, offering simple automatic programming with full 7 day scheduling for worry-free watering. An extra-large dial and readout screen make setup and schedule review easy, while one-touch buttons allow quick cancellation, a rain delay of up to 96 hours, or manual watering on demand. The display also shows the next scheduled cycle and time remaining on the current one.
Check On AmazonIf you click this link and buy, we earn a commission at no additional cost to you.
Symptom 3: Misting, Spraying, or Hissing at Emitters or Fittings
A drip emitter should drip. A slow, steady release of water at the emitter face is what the system is designed to produce. If you see misting, a spray pattern, or hear a faint hissing along the tubing or at a connection, the system is operating above the pressure it was designed to handle. This is not a clogging problem and it is not a timer problem. It is a pressure problem, almost without exception.
Most residential drip kits and emitters are rated for somewhere around 15 to 25 PSI. A hose bib in the average US home delivers 40 to 80 PSI. Without a properly rated pressure regulator installed before the filter and mainline, the full hose bib pressure reaches the small-diameter tubing and emitters, and they respond by turning a drip into a spray or blowing fittings apart at barbed connection points.
I have seen setups where the pressure regulator was installed downstream of the problem fitting, or where the regulator itself had failed, or where no regulator was used at all because the system appeared to work on the first run and nobody noticed the misting at the far end. All three situations produce the same visible symptom. The diagnostic steps for figuring out whether the regulator is missing, failed, or in the wrong position are in diagnosing drip irrigation pressure problems in a raised bed.
Seeing misting at the emitter head and assuming the emitter is damaged, then replacing it without checking the pressure upstream. The new emitter will mist for the same reason.
Check whether a pressure regulator is installed before the mainline, confirm it is rated to match the kit, and verify the hose bib pressure if a gauge is available. Fix the pressure first, then see if the emitter needs replacement.
The same high-pressure cause can blow a fitting apart at a barbed connection or crack a thin-walled section of tubing under repeated pressure cycles. If you see misting at an emitter and also notice a fitting that has started to weep or separate at the barb, both symptoms are connected to the same upstream cause. Fix the pressure and the fitting repair will hold.

This pressure regulator maintains an optimal 25 PSI to keep drip lines and emitters running at consistent flow, with a 20 gallon per minute capacity to support larger systems. It connects to any 3/4 inch male threaded faucet, garden hose, or component for easy setup. Built from UV and chemical-resistant materials, it offers durable, reliable performance season after season, and pairs well with a compatible Rain Bird hose-end timer for automated watering.
Check On AmazonIf you click this link and buy, we earn a commission at no additional cost to you.
Symptom 4: Water Appearing at Fittings or Along the Tubing
Water at a connection point that should be dry is a leak. There are a few different forms this takes in a raised bed drip setup, and the cause differs depending on where the water is appearing and what the fitting looks like up close.
The most common source is a barbed fitting that was not fully seated when the system was first installed. Barbed connectors require a firm push to seat the tubing past the shoulder of the barb, and the resistance can feel like enough before it actually is. A fitting that was pushed three-quarters of the way in may hold for the first few weeks, especially in cooler weather, then start weeping once the tubing softens slightly in summer heat. If the leak is at a barbed connector and the fitting looks intact, the first step is always to confirm the tubing is fully seated before assuming the fitting is damaged.
A different source is the rubber washer inside a compression fitting or at the hose thread connection. These washers flatten over time and eventually stop sealing. A washer compressed through multiple seasons will start allowing water past the seal without any visible cracking on the fitting itself, which makes this type of leak easy to miss visually. Cracked or split tubing is a third source, usually from UV degradation or a pressure spike that stressed the tubing wall at a barbed connection point. If the leak is along the tubing wall rather than at a connection, the section needs to be replaced rather than patched. All three sources are covered in the leak diagnosis for drip irrigation leaks in a raised bed.
Pro Tips: Run the system and walk the full perimeter of the bed slowly before checking the interior. Fitting leaks at the bed’s entry point (where the mainline transitions from the hose source into the bed) are easy to miss because they are often behind or below a raised bed wall. A wet patch on the ground outside the bed corner is usually where to start looking.

This portable kit packs 100 feet of self-dispensing quarter-inch blank distribution tubing alongside 40 pressure-compensating emitters in three flow rates, 0.5, 1.0, and 2.0 gallons per hour, plus 20 barbed couplers, 20 barbed tees, 10 tubing stakes with bug caps, and 10 tubing plugs. Rain Bird's patented emitter installation and removal tool is included, making it easy to punch in or swap out emitters and quarter-inch fittings. Everything stores in a compact plastic pouch with individually organized bags.
Check On AmazonIf you click this link and buy, we earn a commission at no additional cost to you.
The Partial Dry-Spot Problem: When Most of the Bed Is Fine
One more pattern that does not fit cleanly into a single symptom category: most of the bed is watering correctly, and one section or corner stays consistently dry. The emitters along the dry section are not blocked. Pressure checks out. The drip lines are running. But that zone stays dry regardless of run time.
In most cases this is a layout issue rather than a component failure. The drip lines put water at one part of the root zone but not another. This gets more pronounced as plants grow and the canopy redistributes where soil dries fastest. I have also seen it happen when one section of the bed was amended differently, creating a zone that drains faster between cycles while the surrounding mix holds moisture longer. Soil compaction can do the same thing: water pools at the surface and runs off laterally instead of percolating down to the root zone. How to distinguish a coverage gap from an emitter or flow failure, and how to adjust the layout without rebuilding the whole system, is in dry spots in raised bed drip irrigation.
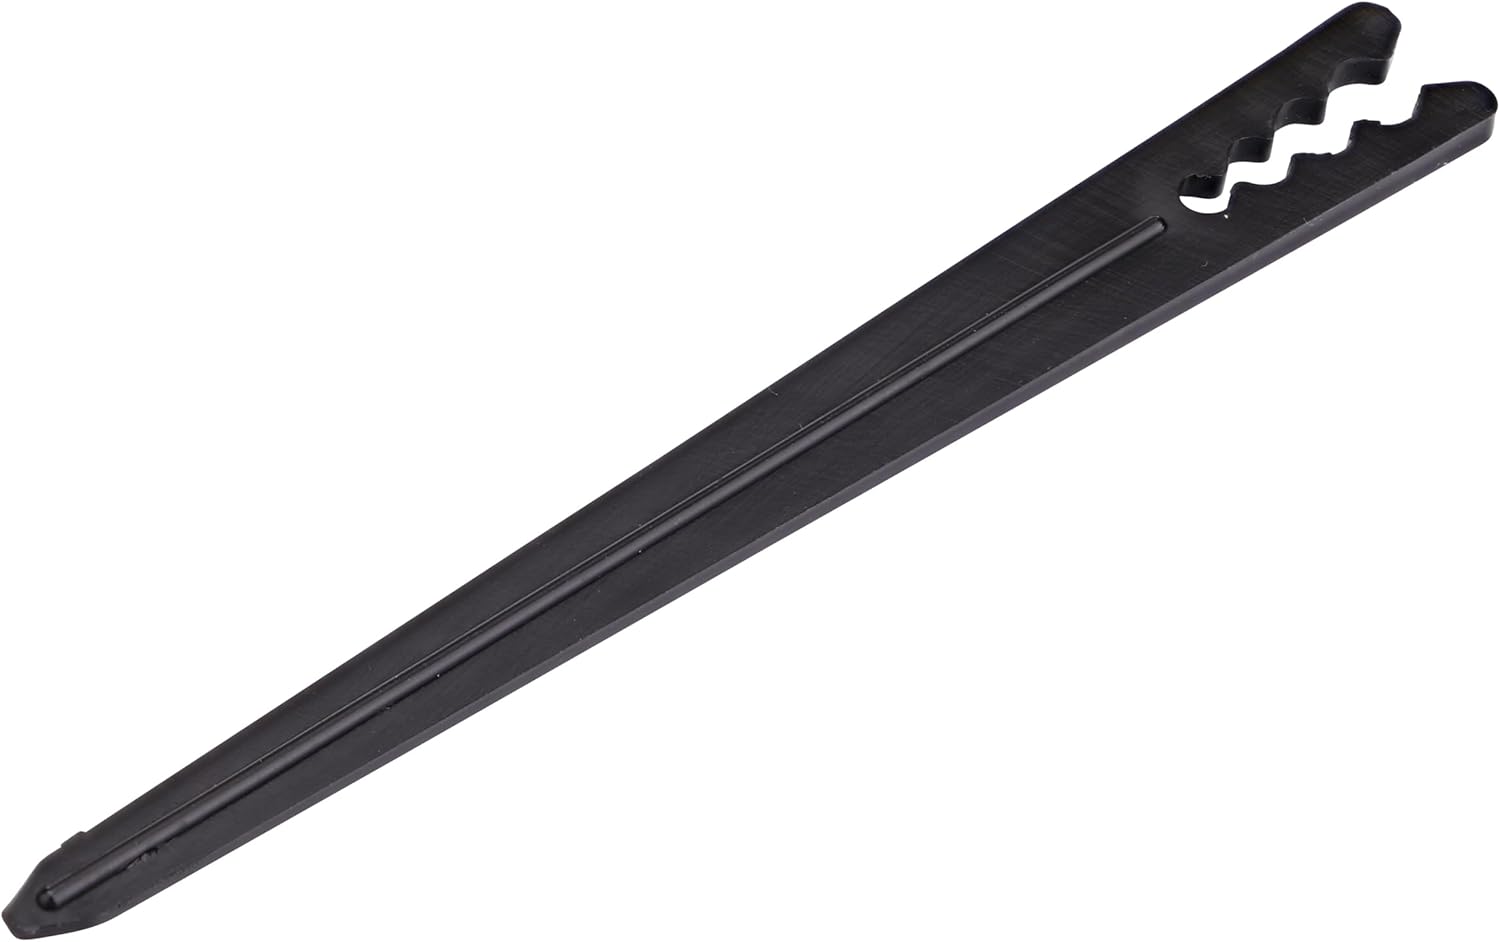
This pack of 25 heavy-duty stakes secures quarter-inch drip supply tubing firmly in place to keep emitters positioned at the root zone. Each 6-inch stake features built-in notches accommodating tubing from one-eighth to one-quarter inch with an outside diameter between 0.185 and 0.250 inches. Made from UV-inhibited ABS plastic to resist cracking through extended outdoor use.
Check On AmazonIf you click this link and buy, we earn a commission at no additional cost to you.
Quick Symptom Reference
Use this table to match what you observe to the most likely cause and the correct diagnostic path. If more than one symptom is present at the same time, start with the one that is most visible during a live run cycle.
| What you observe | Most likely cause | Where to diagnose it |
|---|---|---|
| Plants dry, system runs, emitters have low or no output | Clogged emitters or blocked line | Clogged emitter diagnosis |
| Plants dry, output uneven across the line (drops toward end) | Pressure too low for run length | Pressure problem diagnosis |
| Plants wilting or yellowing, soil wet or soggy | Overwatering: run time or frequency too high | Overwatering diagnosis |
| Misting or spraying at emitter heads | Pressure too high, missing or failed regulator | Pressure problem diagnosis |
| Water at fittings, barbed connectors, or along tubing | Unseated fitting, worn washer, or cracked tubing | Leak diagnosis |
| One section of bed stays dry, rest waters fine | Coverage gap from layout or soil compaction | Dry spot diagnosis |
One important note on using this table: the symptom categories can overlap. Misting at emitters and wet soil together usually means high pressure plus a run schedule that was calibrated for a system that was working correctly at lower pressure. Once pressure is corrected, the effective output per emitter drops, and the schedule may need to be adjusted upward. Fix the component problem first, then revisit the timing. For schedule recalibration after a repair, raised bed drip irrigation scheduling is the right next step.
What Troubleshooting Does Not Cover
A drip system that is working correctly today will eventually develop problems from normal wear: emitters that clog from mineral buildup, filters that need seasonal flushing, tubing that degrades after UV exposure, and washers that flatten and stop sealing. These are maintenance issues, not diagnostic ones. They follow a seasonal task schedule rather than appearing as a live symptom.
This section covers diagnosing a problem that is happening right now, based on what the system is doing during a run. It does not cover preventive maintenance. If problems are recurring and the system has not had a seasonal check in over a year, the maintenance side is worth reviewing alongside any symptom fix. That is a separate topic covered in raised bed drip irrigation maintenance.
Before You Replace Anything, Confirm the Failure Point
The most expensive raised bed drip mistake is not a bad emitter or a failed regulator. It is replacing a part that was not actually broken while the real problem stays in place. A gardener orders replacement emitters, swaps them all in, and has the same dry bed a week later because the issue was a kinked mainline two feet back. Before ordering anything, run one confirmation check that matches the symptom:
- No output at a specific emitter: pull it and test by hand before assuming the whole line is blocked.
- Output drops off toward the end of the run: check the pressure at the source before blaming emitters. A regulator rated too low or a line that runs too long shows the same pattern as clogging.
- Misting at the emitter head: confirm a pressure regulator is installed upstream before replacing the emitter. Misting is a system problem, not an emitter defect.
- Fitting leaking: push the tubing fully onto the barb and retest before pulling it apart. Many “leaking fittings” are unseated tubing.
- One corner stays dry: verify emitter output in that zone before rerouting lines. A partially blocked emitter is easier to fix than repositioning a drip line under a full canopy.
Each check takes a few minutes during a live run. Matching the replacement to a confirmed failure, not a suspected one, skips the second repair.

This kit includes everything needed to water a raised bed up to 4 by 8 feet, with professional-grade components built for repeated seasonal use. It features 35 feet of emitter tubing with 70 built-in, pressure-compensating emitters spaced every 6 inches for even watering near the roots, plus 25 feet of easy-to-handle 1/4 inch distribution tubing. This low-volume design can save up to 80% on water while supporting healthier plants and better yields. Installation is straightforward thanks to an illustrated manual covering multiple layout options, and the system can be automated with a compatible Rain Bird hose-end timer sold separately.
Check On AmazonIf you click this link and buy, we earn a commission at no additional cost to you.
Final Thoughts: Name the Symptom Before You Start the Repair
The mistake I see most often in raised bed drip troubleshooting is not that gardeners pick the wrong fix. It is that they start fixing before they have confirmed the symptom. Replacing an emitter when the real cause is pressure. Adjusting the timer when the real cause is a clogged filter. Pulling up a drip line to reposition it when the real cause is a partially blocked barbed fitting three feet upstream.
The four symptoms covered here (dry plants from no output, wet soil with plant stress, misting at emitters, and water at connections) each point to a narrow set of causes. If you can name the symptom clearly, the diagnostic path is usually short. Walk the system while it runs, check what is happening at the emitters and connections, and match what you see to the correct path before replacing anything. That sequence saves a lot of unnecessary parts changes.
One more thing: a successfully repaired system still needs a working schedule behind it. A clogged emitter fix is wasted if the run time was already too short for the bed size and crop mix. After any repair, confirm the schedule is still calibrated correctly for current conditions. Raised bed drip irrigation scheduling covers that side of the system once the mechanical problem is resolved.
Explore More in This Section
Each symptom covered above has a dedicated diagnostic page with step-by-step checks, numbered tests, and specific fixes for raised bed setups. If you know your symptom, go directly to the page that matches it.
| Diagnostic guide | What it helps with |
|---|---|
| Clogged drip irrigation emitter in a raised bed | How to confirm a clog, clear it, and prevent recurrence from mineral buildup or debris |
| Drip irrigation pressure problem in a raised bed | Diagnosing both low pressure (uneven output) and high pressure (misting, blown fittings) |
| Overwatering with drip irrigation in a raised bed | Confirming root stress from too much water and adjusting run time and frequency to match soil type |
| Drip irrigation leaking in a raised bed | Finding the source of a fitting, washer, or tubing leak and making the repair hold |
| Drip irrigation dry spots in a raised bed | Telling the difference between a coverage gap and a flow failure, and adjusting layout or spacing |
Any of these fixes can be made without rebuilding the whole system. Start with the symptom that matches your bed right now.
FAQs
💧 Why are my raised bed plants wilting even though the drip system is running?
Wilting despite a running system usually means water is not reaching the root zone. Confirm emitters are actually releasing water during the run cycle, not just that the timer activated. If emitters are flowing but plants are still dry, check for coverage gaps where the drip lines do not align with the root zone of every plant in the bed.
🌱 Why are my plants yellowing with drip irrigation if the soil is wet?
Yellowing in wet soil points to overwatering. Waterlogged roots cannot take up oxygen, which produces the same wilting and yellowing as drought stress. Check the soil at 2 to 3 inches depth rather than the surface. If it is soggy during plant stress, the run time or frequency is too high for the soil drainage rate in that bed.
🚿 Why are my drip emitters spraying or misting instead of dripping?
Misting means the water pressure reaching the emitter is higher than the emitter is rated for. Most drip emitters are designed for 15 to 25 PSI, but a standard hose bib can deliver 40 to 80 PSI. The first thing to check is whether a pressure regulator is installed upstream of the filter and mainline, and whether it is rated to match the kit components.
🔧 Why is water leaking at my drip irrigation fittings?
The most common causes are a barbed fitting that was not pushed fully onto the tubing during installation, or a rubber washer inside a compression or hose-thread fitting that has flattened after repeated use. Try reseating the fitting first. If the leak continues, check the washer and replace it before assuming the fitting itself is damaged.
🌿 Why does one corner of my raised bed stay dry even when the rest waters fine?
A dry corner with no emitter failure usually means the drip lines are not positioned to reach the root zone in that area. It can also happen when one section of the bed has denser or more compacted soil that deflects water laterally before it percolates down. Confirm emitter output in that zone, then check whether the lines physically cover that corner of the root zone.
⏱️ Should I adjust my drip schedule after fixing a raised bed irrigation problem?
Usually yes. Fixing a clogged emitter restores output that was missing, which means the actual water delivery per cycle increases. Fixing a pressure problem changes how efficiently each emitter operates. After any repair that changes the system’s flow rate or output pattern, verify the schedule is still calibrated for the bed size, soil type, and current crop stage before returning to automatic operation.
❄️ Can I troubleshoot drip irrigation problems at the start of the season after winter storage?
Yes, and the start of season is one of the best times to catch problems before they affect plants. Run the system manually for a full cycle before planting and walk the bed while it runs. Look for emitters that were damaged during winterization, fittings that loosened in the cold, and filters that need flushing after sitting dry. Catching these before the season starts is much easier than diagnosing them in July with a full canopy in the way.