Winterizing a raised bed drip system takes about 20 minutes. Skipping it can cost $40 or more in cracked fittings, a split pressure regulator, or a timer that no longer holds a schedule once spring arrives. The process has three steps that apply to every zone: shut off the water, remove and store the head assembly, and open the end caps to drain the lines. What changes by climate zone is how much of the system needs to come indoors and whether the dripline itself should be rolled up and stored or left in place. This guide covers the full winterization sequence with zone-specific decisions for USDA hardiness zones 4 through 10.
What Gets Damaged When a Drip System Is Not Winterized
The failure mode for a drip system left connected through a freeze is almost always the same. Water that sits inside a fitting, filter housing, or pressure regulator body expands when it freezes and creates a hairline crack that is invisible until the first time water pressure returns in spring. That crack may not even spray. It may just weep slowly behind the bed, under the mulch, and out of sight until the plants show stress and you start tracing back through the system looking for what changed.
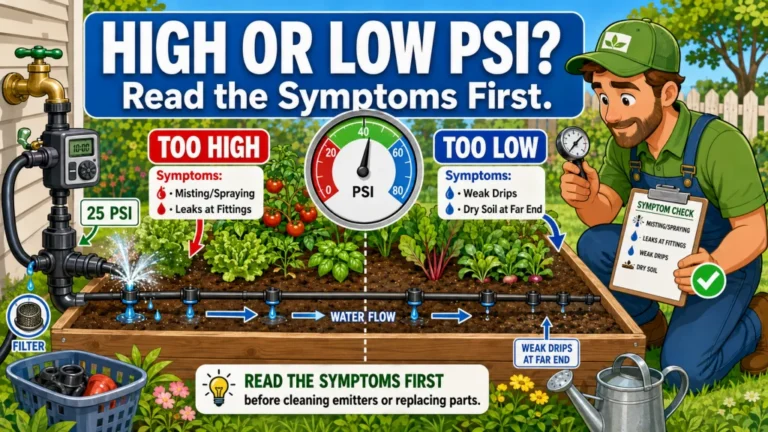
The pressure regulator is the component I see fail most often when winterization is skipped. The body is usually thicker plastic or brass, which makes it feel like it should survive a freeze, but the water sealed inside the body has nowhere to expand. A regulator that failed to a hairline crack will often still flow water, just at inconsistent and unregulated pressure, which is worse than no regulator at all. Replacing it is about $10 to $15. If pressure becomes inconsistent after the regulator cracks, nearby fittings may start leaking too, which can raise the repair cost quickly.
The timer is the other common casualty, and the failure there is usually the battery contacts rather than the housing. Batteries left inside a timer that sits through a hard freeze can leak and corrode the contacts. A corroded contact means the timer looks fine but will not hold a schedule, which is one of the more frustrating spring startup problems because it looks like a setting error before it reveals itself as a hardware issue.
None of this is inevitable. The steps to prevent it are straightforward and fast.

This pressure regulator maintains an optimal 25 PSI to keep drip lines and emitters running at consistent flow, with a 20 gallon per minute capacity to support larger systems. It connects to any 3/4 inch male threaded faucet, garden hose, or component for easy setup. Built from UV and chemical-resistant materials, it offers durable, reliable performance season after season, and pairs well with a compatible Rain Bird hose-end timer for automated watering.
Check On AmazonIf you click this link and buy, we earn a commission at no additional cost to you.
The Three-Step Core Process for Every Zone
Before getting into zone-specific adjustments, there is a three-step sequence that applies regardless of where you garden. Zone 9 gardeners and Zone 4 gardeners both start here. What changes is what happens after step three.
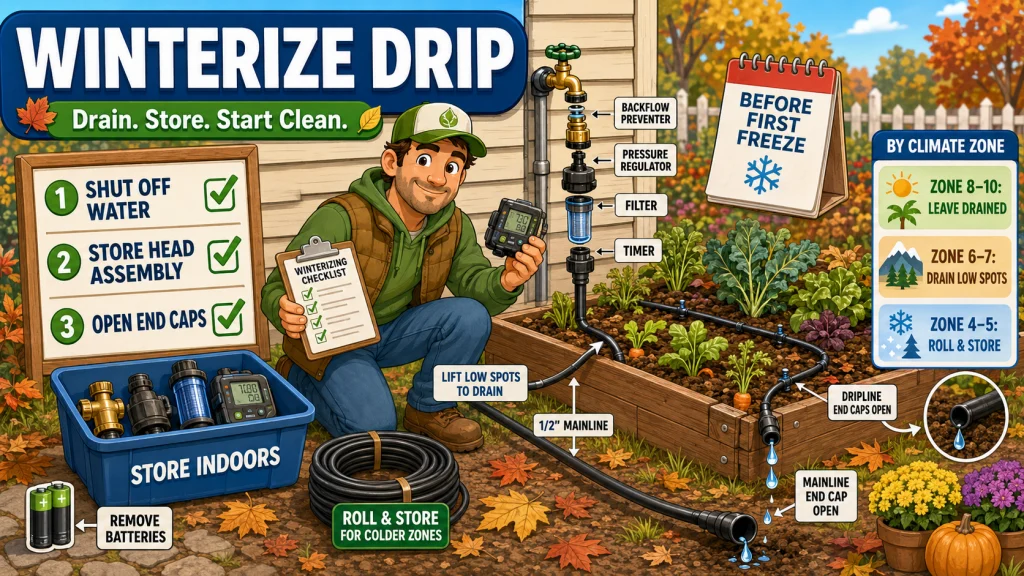
Step 1: Shut off the water supply at the spigot. Turn off the hose bib and disconnect the system at the water source. Do not just turn off the timer and assume the water is off. The timer controls the valve downstream of the head assembly. The supply line between the hose bib and the head assembly still has water in it under whatever pressure the bib holds, and that is where freeze damage starts when the bib itself is not shut off.
Step 2: Remove the head assembly and store it indoors. The head assembly is everything between the hose bib connection and the start of the mainline tubing: the timer, backflow preventer, filter, and pressure regulator. These are the components most vulnerable to freeze damage and the most expensive to replace. Disconnect them as a unit if they are connected in sequence, or individually if your setup has them spread out. Bring them inside, somewhere above freezing. An unheated garage in Zone 5 is not adequate. A basement shelf or utility room shelf is.
Step 3: Open the end caps to drain the lines. Open the end caps on the driplines and on the mainline tubing. This lets gravity pull the water out of the tubing. In most raised bed setups with relatively level or slightly tilted beds, the water drains on its own within a few minutes once the end caps are open. If your mainline runs through low spots before reaching the beds, walk it and lift the tubing at those points to help the water move toward the open end. Water left sitting in a low point in the tubing can freeze and split the line even when the rest of the system drains correctly.
Field Note: The most common mistake I see at this stage is opening only the end caps on the driplines and forgetting the end cap on the mainline. The mainline holds more water volume than the driplines, and the fitting connecting the mainline to the dripline branches is usually the first place to crack if that water freezes. Check both.

TOHONFOO Backflow Preventer Cover is a 16 x 20 inch insulated cover designed for outdoor backflow preventers, sprinkler valves, and exposed plumbing. Its five-layer construction combines heavy-duty 600D Oxford fabric, two cotton insulation layers, and two PE-coated layers for weather and freeze protection. Velcro closures and included nylon ties help keep the cover secured around the pipe assembly.
Check On AmazonIf you click this link and buy, we earn a commission at no additional cost to you.
Zone-Specific Adjustments After the Three-Step Core
Once the head assembly is stored and the lines are drained, what you do next depends on your climate. Those first three steps protect the most vulnerable components in every zone. The zone-specific decisions below cover whether the dripline itself needs to come indoors and how much protection the exposed mainline needs.
| Zone | Winter Severity | Head Assembly | Dripline | Mainline |
|---|---|---|---|---|
| 8 to 10 | Mild, occasional frost | Store indoors | Leave in place | Light cover at connections if freeze nights expected |
| 6 to 7 | Hard frost, cold winters | Store indoors, batteries removed | Drain and leave; walk low spots | Drain fully; disconnect at bed entry points |
| 4 to 5 | Severe winter | Store indoors, batteries removed | Roll up and store indoors | Drain, disconnect, and store or protect |
The table summarizes the decisions. The sections below explain the reasoning behind each zone’s approach.
Zone 8 to 10: Mild Winters with Occasional Frost
In Zone 8 through 10, extended freezing temperatures are uncommon. The primary concern is the occasional overnight dip below freezing rather than sustained cold that penetrates tubing and fittings over multiple days. In these zones, the standard approach is to store the head assembly indoors, open the end caps to drain the lines, and leave the dripline in place in the bed through winter.
If below-freezing nights are in the forecast, wrapping the mainline connections near the hose bib with a layer of pipe insulation or even an old towel secured with tape provides enough protection for a single-night frost. The dripline itself, once drained and without the head assembly pressurizing it, carries very little freeze risk in a mild climate. In Zone 9 and warmer parts of Zone 8, some gardeners run occasional manual watering cycles through winter for cool-season crops, which requires keeping the head assembly connected or reinstalling it temporarily. That is a workable approach, but the timer and filter should come back in between uses if sustained cold is expected.
Zone 6 to 7: Hard Frost and Cold Winters
Zone 6 and 7 gardens see sustained freezing temperatures across multiple weeks or months. The three-step core process is not optional here, and the execution of step three matters more than in milder climates. Walking the mainline and physically lifting it at low points is worth doing in these zones, not just opening the end caps and assuming the water ran out. A low point in a 50-foot mainline run can hold several ounces of water that will not drain by gravity alone.
Remove the timer batteries before storing the head assembly. Even stored indoors in a mild location, batteries left in a timer through a cold basement over winter can gradually discharge. More importantly, if the head assembly gets left out by accident or stored in a location that drops below freezing on cold nights, batteries inside the timer can leak and corrode the contacts. Removing and storing them separately takes about 10 seconds and eliminates that failure mode entirely.
The dripline can stay in the beds in Zone 6 and 7 as long as it has been fully drained. Standard polyethylene drip tubing handles cold temperatures without cracking as long as it is not holding water when it freezes. The risk is not the cold itself but the expansion of any water remaining in the line. Drain it well and leave it in place for spring.
Zone 4 to 5: Severe Winter
In Zone 4 and 5, winter is long enough and cold enough that drip tubing left in the beds through the season is exposed to repeated freeze-thaw cycles for several months. Standard polyethylene dripline does not crack easily from a single freeze, but prolonged cold and repeated cycling can make it brittle, especially at fitting connections and at any points where the tubing was kinked or stressed during the growing season.
The practical approach in these zones is to drain the driplines, disconnect them from the mainline, roll them up loosely, and store them indoors until spring. A short section of brittle dripline that needs replacing after one bad winter costs about $0.50 per foot in replacement tubing. Replacing a full kit section or dealing with fittings that pulled apart from a stiff, weakened line costs considerably more and takes longer to diagnose. Rolling up the dripline in fall takes 5 to 10 minutes per bed and removes the risk entirely.
The mainline, being thicker-walled tubing, is more resistant to cold damage, but in Zone 4 the same roll-and-store approach is worth applying to any sections that run exposed above ground or through areas that stay frozen for months.

This drip tubing works like a soaker hose but without the clogging or maintenance, thanks to pressure-compensating emitters that water evenly from one end of the line to the other. Built-in 0.8 gallon per hour emitters are spaced 12 inches apart with dual outlets positioned 180 degrees apart for even coverage. The tubing measures 0.25 inches outside diameter and connects with 1/4 inch barbed fittings, operating across a wide pressure range of 8.5 to 60 psi. Its micro-porous construction creates a tight, reliable connection that holds up over time.
Check On AmazonIf you click this link and buy, we earn a commission at no additional cost to you.
The Timer Battery Step Most Winterization Guides Skip
Removing the batteries from the timer before winter storage is a small detail that prevents one of the more annoying spring startup failures. Freezing weather accelerates battery discharge, and batteries left inside a timer that is stored in a cold location through winter may be partially drained by the time spring arrives. That can look like a dead timer when the actual issue is just low battery voltage that still reads as “on” but cannot power the valve reliably.
The more serious risk is battery leakage. Alkaline batteries under cold stress can leak, and the leak residue on timer battery contacts is corrosive. A corroded contact may not show any visible damage but will cause intermittent timer failures that are difficult to trace. Cleaning corroded contacts is possible with a small amount of white vinegar on a cotton swab, but it is not a guaranteed fix if the corrosion has reached the circuit board.
Store the batteries separately in a small labeled bag or container alongside the head assembly. When spring startup comes, install fresh batteries rather than the stored ones. AA or AAA alkaline batteries cost about $1 each and are worth replacing at the start of each season rather than troubleshooting timer behavior that turns out to be a battery issue from the previous fall.

This multi-function kit connects 1/2 inch drip tubing to any 3/4 inch male threaded faucet or garden hose, helping ensure your drip irrigation system runs properly. It includes a backflow preventer, a 25 PSI pressure regulator, and a 150 mesh filter, along with a compression fitting that creates a leak-proof seal to 1/2 inch tubing. Built from UV and chemical-resistant materials for long-lasting durability, the kit can also be paired with a compatible Rain Bird hose-end timer for automated watering.
Check On AmazonIf you click this link and buy, we earn a commission at no additional cost to you.
How Winterization Quality Affects Spring Startup
There is a direct relationship between how carefully the system was put away in fall and how much time spring startup requires. A system that was fully drained, properly stored, and had its batteries removed comes back to life in about 15 minutes: reinstall the head assembly, install fresh batteries, run a quick visual inspection of the fittings, flush the lines, and set the schedule. That is it.
A system that was left partially connected, or where the end caps were opened but the lines were not walked to drain the low spots, may have one or two cracked fittings to track down before the first run. Each cracked fitting is a 5-minute fix with the right parts on hand, but finding it first requires running the system, watching for the wet spot or spray, and then tracing back to the source. Multiply that by two or three fittings and what should be a 15-minute startup becomes an hour or more of early-spring troubleshooting.
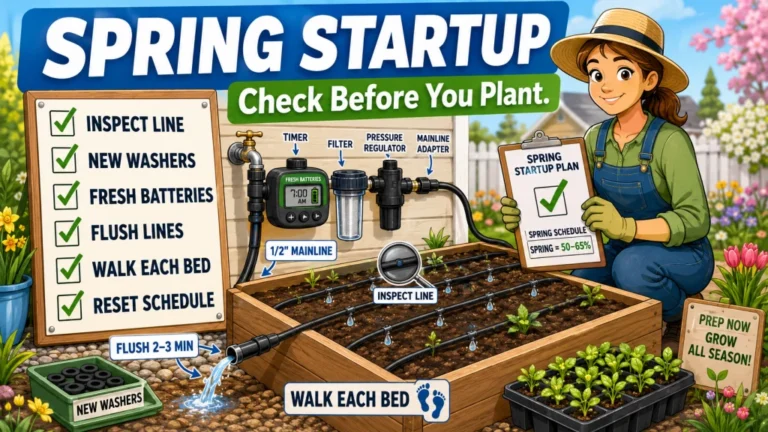
The full spring startup checklist, including how to inspect fittings after winter, when to replace washers and O-rings, and how to run the season’s first flush, is in the guide on raised bed drip irrigation spring startup. Winterization and startup are two halves of the same task. The cleaner the fall shutdown, the faster the spring restart.
For the broader context of seasonal and monthly maintenance across the full growing cycle, including how winterization fits into the year-round upkeep calendar, the overview is in the guide on raised bed drip irrigation maintenance tasks and seasonal schedule. And for a full overview of raised bed drip irrigation setup, components, and layout, the starting point is raised bed drip irrigation tips and setup.
Pro Tips: If you run several raised beds, label each dripline section before rolling it up for storage. A small piece of painter’s tape marked “Bed 1” or “mainline south end” takes 30 seconds per bed and makes spring reconnection straightforward. A quick photo of the layout before disconnecting saves even more time. Reconnecting the wrong dripline to the wrong bed head is a minor problem, but tracing it mid-season when plants are already in is not how you want to spend a Saturday morning.
Final Thoughts: Twenty Minutes in Fall, Fifteen Minutes in Spring
Winterizing a raised bed drip system is one of the few garden tasks where the effort and the payoff are genuinely proportional. Twenty minutes in October directly buys back a smooth 15-minute spring startup instead of a diagnostic session with a leaky mainline and a timer that will not hold a schedule.
If you are in Zone 8 or warmer, the head assembly is the main thing that needs protection. If you are in Zone 4 or 5, roll up the dripline too. In Zone 6 and 7, drain everything well, walk the mainline to clear the low spots, and remove the batteries before the head assembly goes into storage. That covers the failures I see most often when systems come back out in spring with problems that started in fall.

This kit includes everything needed to water a raised bed up to 4 by 8 feet, with professional-grade components built for repeated seasonal use. It features 35 feet of emitter tubing with 70 built-in, pressure-compensating emitters spaced every 6 inches for even watering near the roots, plus 25 feet of easy-to-handle 1/4 inch distribution tubing. This low-volume design can save up to 80% on water while supporting healthier plants and better yields. Installation is straightforward thanks to an illustrated manual covering multiple layout options, and the system can be automated with a compatible Rain Bird hose-end timer sold separately.
Check On AmazonIf you click this link and buy, we earn a commission at no additional cost to you.
FAQs
❄️ When should I winterize my raised bed drip system?
Winterize before the first hard freeze in your area, not after. In Zone 6 and colder, that usually means completing the process in October. In Zone 8 and warmer, you have more flexibility, but the head assembly should come in before any hard freeze is forecast for your area. The goal is to have the vulnerable components stored before freeze events happen, not as a response to damage already done.
💧 Do I need to remove all the drip tubing before winter?
It depends on your zone. In Zone 8 through 10, drained dripline can stay in the bed all winter with minimal risk. In Zone 6 and 7, drained dripline in the beds is usually fine as long as it was fully drained. In Zone 4 and 5, rolling up and storing the dripline indoors protects it from the brittleness that can develop after repeated freeze-thaw cycles across a long, cold winter.
🔧 What happens if I forget to winterize my drip system?
The most common results are a cracked pressure regulator, split fittings, and corroded timer battery contacts. The damage is usually in the head assembly components that hold water inside a sealed body. The dripline itself is more resilient, but fittings where lines connect are vulnerable. Spring startup after a missed winterization usually involves tracking down one or two cracks before the system runs correctly.
🌡️ Can I leave my drip timer outside in winter?
No, not in climates with freezing temperatures. The timer housing may survive a freeze, but the batteries inside will discharge faster in the cold, and a hard freeze can cause them to leak and corrode the contacts. Remove the batteries and store the timer indoors regardless of your zone. In Zone 8 and warmer, a garage shelf is usually adequate. In colder zones, bring it inside the house or into a heated space.
🌱 How do I drain a raised bed drip system for winter?
Shut off the water at the hose bib, disconnect and remove the head assembly, then open the end caps on both the mainline and the driplines. Gravity will pull most of the water out within a few minutes. If your mainline runs through low spots, walk the line and lift it at those points to help the water drain toward the open end. Do not assume the water has cleared on its own if the mainline has any dips in the run.
🧊 Does drip tubing crack in cold weather?
Standard polyethylene drip tubing does not crack from cold alone. The risk is water inside the tubing that expands when it freezes. Drained tubing handles freezing temperatures without damage in most zones. In Zone 4 and 5, prolonged cold and repeated freeze-thaw cycles over several months can gradually make the tubing brittle at connection points, which is why storing it indoors is the safer approach for severe-winter zones.