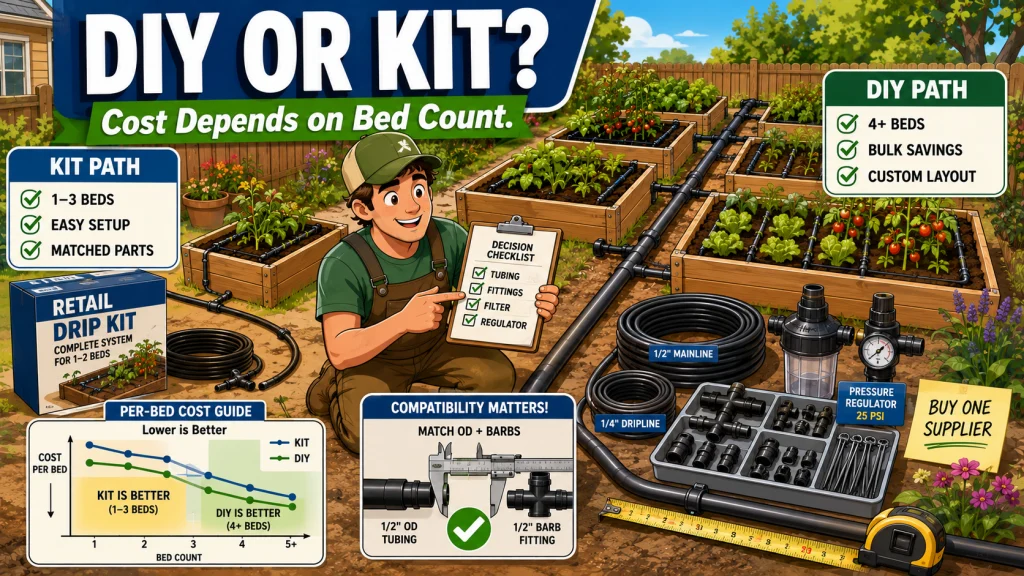
Building a raised bed drip system from individual components costs roughly the same as buying a pre-packaged kit for a small garden, and saves real money only when you are running four or more beds. At one to three beds, the DIY cost advantage is negligible and the compatibility risk is real. At five beds or more, buying components in bulk can cut the per-bed cost nearly in half compared to stacking retail kits. This article runs through the actual cost math at different garden sizes, covers the fitting compatibility problem that trips up most first-time DIY builders, and lays out which approach makes sense for which gardener.
What a DIY Raised Bed Drip Build Actually Involves
A DIY raised bed drip system uses the same basic components as a pre-packaged kit. The difference is that you source each part separately rather than buying them as a confirmed set. The core component list for a standard raised bed setup is not long: 1/2-inch polyethylene mainline tubing, 1/4-inch emitter dripline or soaker dripline, a pressure regulator, an inline filter, and a set of barbed fittings. You will also need stakes or hold-downs to keep the tubing in place once it is laid out across the bed.
The sourcing approach is different from a retail kit purchase. Most DIY component builds come from irrigation supply websites like DripDepot rather than a hardware store shelf. These sites sell tubing by the roll in 50- or 100-foot lengths, fittings individually, and pressure regulators and filters as standalone components. That is where the bulk pricing advantage comes from when the garden is large enough for the quantity to matter. DripDepot also publishes compatibility guides and system design resources for raised beds, which helps with component selection for gardeners who are new to sourcing drip components independently.
What a DIY build does not include is a pre-confirmed compatible component set with instructions. That is the tradeoff. You have more flexibility in component selection and spacing, you can buy exactly the lengths you need for your layout, and at sufficient scale you pay less. You also take on the responsibility of confirming that the fittings, tubing, and regulators you ordered will work together before the delivery arrives and the setup begins.

This pressure regulator maintains an optimal 25 PSI to keep drip lines and emitters running at consistent flow, with a 20 gallon per minute capacity to support larger systems. It connects to any 3/4 inch male threaded faucet, garden hose, or component for easy setup. Built from UV and chemical-resistant materials, it offers durable, reliable performance season after season, and pairs well with a compatible Rain Bird hose-end timer for automated watering.
Check On AmazonIf you click this link and buy, we earn a commission at no additional cost to you.
The Real Cost Comparison
The savings from a DIY build depend almost entirely on garden size. At a small scale, the math is not in favor of going component-by-component. As the bed count rises, it shifts noticeably.
One to Three Beds: Minimal Savings, Higher Complexity
A standard retail drip kit designed for a single 4 x 8 raised bed runs around $40 to $55 and includes mainline tubing, dripline, a pressure regulator, a filter, and fittings. Sourcing equivalent individual components from a supplier like DripDepot for the same coverage runs approximately $35 to $50. The savings at this scale land somewhere between zero and ten dollars. The kit also comes with instructions and pre-confirmed compatible parts. For most gardeners with one to three beds, the kit wins on practical grounds before the cost comparison even matters much.
The one exception at this scale is a gardener who already owns some of the components: leftover mainline from a previous install, a pressure regulator that was bought for another bed, or a roll of dripline with footage remaining. In that case, filling in only what is missing from the component list genuinely costs less than buying a full kit with parts you do not need. But that is a different situation from sourcing a brand-new system from scratch at one to three beds.
Four Beds or More: Where the Numbers Actually Change
At four or five beds covering 600 to 800 square feet, buying components in bulk starts to matter. A 100-foot roll of mainline costs less per foot than the kit-length cut in a retail kit. The same applies to dripline and fittings purchased by quantity. A five-bed system built from components sourced in bulk typically runs $80 to $120 in total. Covering those same five beds with stacked retail kits, buying one per bed, runs $150 to $250 once you account for the redundant filters, regulators, and fittings that come in each separate kit and mostly go unused.
That cost gap is real and it grows as the garden scales. The savings come from two places: bulk roll pricing on tubing and dripline, and not paying kit markup for five pressure regulators when the system only needs one. A single correctly rated pressure regulator at the hose bib can handle the full run as long as the total flow demand stays within the regulator and tubing limits. At $12 to $20 per regulator, eliminating four redundant regulators from the component list moves the numbers meaningfully.
| Garden size | DIY component cost (estimate) | Retail kit approach (estimate) | Where the savings come from |
|---|---|---|---|
| 1 bed (4 x 8) | $35 to $50 | $40 to $55 (one kit) | No meaningful difference. Kit compatibility and instructions have more value than the margin. |
| 2 to 3 beds | $55 to $80 | $80 to $165 (two or three kits) | DIY starts to show slight savings by using one pressure regulator and filter for the whole run. |
| 4 to 5 beds | $80 to $120 | $150 to $250 (kits per bed) | Bulk roll pricing on tubing and dripline; one regulator and filter for the full system rather than one per kit. |
| 6 or more beds | $110 to $170 | $200 to $350+ | Component pricing advantage compounds with scale. DIY is increasingly the rational choice. |
These are estimates based on component pricing from irrigation supply sites and retail kit pricing from major home improvement stores. Exact costs vary by supplier, component brand, and whether your layout requires extra fittings for corners or split runs. The point of the table is the pattern, not the specific dollar figure: the DIY advantage is negligible at one bed and becomes substantial at five or more.

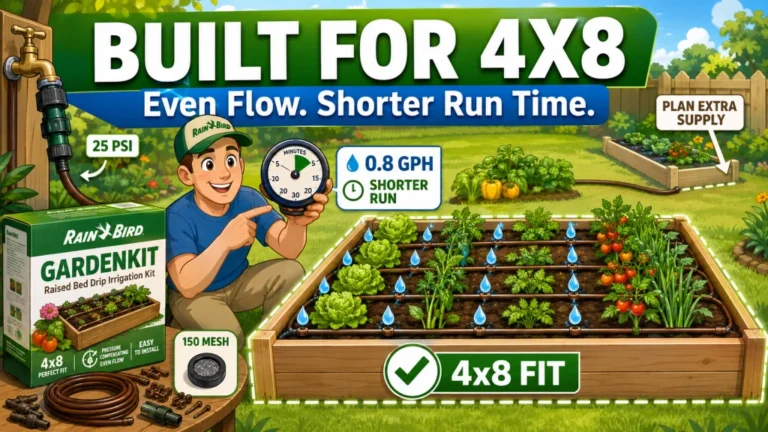
This kit includes everything needed to water a raised bed up to 4 by 8 feet, with professional-grade components built for repeated seasonal use. It features 35 feet of emitter tubing with 70 built-in, pressure-compensating emitters spaced every 6 inches for even watering near the roots, plus 25 feet of easy-to-handle 1/4 inch distribution tubing. This low-volume design can save up to 80% on water while supporting healthier plants and better yields. Installation is straightforward thanks to an illustrated manual covering multiple layout options, and the system can be automated with a compatible Rain Bird hose-end timer sold separately.
Check On AmazonIf you click this link and buy, we earn a commission at no additional cost to you.
The Compatibility Problem That Catches Most First-Time DIY Builders
The component list for a DIY drip build is simple. The compatibility requirements are not, and this is where most first-time builders run into trouble before a single emitter has dripped water onto a plant.
Barbed fittings are sized to match specific tubing outer diameters. The problem is that those outer diameters are not universal, even when the nominal size is the same. A 1/2-inch fitting from one brand may be sized for a slightly different tubing OD than a 1/2-inch fitting from another. If the fitting is too loose for the tubing, the connection will not seat securely and may weep under pressure. If the fitting is too tight, it may distort the tubing, split the end, or fail to seat fully. Neither failure is always obvious at dry assembly; both show up once the water is on.
The same issue applies to 1/4-inch dripline connections. The OD of 1/4-inch emitter tubing varies enough between manufacturers that small barbed connectors are not always interchangeable across brands. I have seen this exact problem on a three-bed first-time install where the gardener sourced mainline from one site and fittings from another because the shipping was faster. The fittings were the right labeled size and they would not seal. Everything got disassembled and re-sourced from the same supplier.
Ordering 1/2-inch mainline from one supplier and 1/2-inch barbed fittings from another because the price or delivery timing was better. “Same size” is not the same as “confirmed compatible.” The fitting size and tubing OD must be compatible, and those dimensions vary between manufacturers even at the same nominal size.
Source all tubing and fittings from the same supplier, or confirm the tubing OD spec and fitting size before mixing brands. DripDepot and similar irrigation supply sites list tubing OD in their product specs and will confirm compatibility if you contact them before ordering. Pre-built component kits from these sites use confirmed compatible parts across the system.
The compatibility problem is solvable. It requires either buying all components from one supplier, or confirming OD and fitting specs across brands before the order goes in. What it is not is something you want to discover at 7 a.m. on the Saturday you planned to set up the beds before the tomatoes go in the ground.
Who Should Choose DIY
The cost math and the compatibility requirements together define a fairly specific profile for a DIY raised bed drip builder. It is not usually a beginner profile.
- Gardener expanding an existing system: If you already have mainline tubing and fittings from a previous install, adding beds by sourcing individual roll lengths and fittings costs a fraction of buying a new kit for each expansion. This is probably the clearest case for DIY at any garden size.
- Four or more new beds: The bulk pricing advantage is real at this scale. One pressure regulator, one inline filter, and roll-length tubing priced by the foot rather than kit-length cuts change the total cost significantly.
- Gardener who needs custom emitter spacing: Pre-made dripline comes in standard spacing: typically 6-inch, 9-inch, or 12-inch between emitters. Gardeners growing wide-spaced crops like squash, winter squash, or melon sometimes need emitter placement that standard dripline spacing cannot match cleanly. Individual emitters punched into blank tubing at the correct spacing require a DIY approach.
- Comfortable sourcing from irrigation supply websites: DripDepot and similar sites are not complicated to use, but they require more product knowledge than buying a kit off a shelf. Reading tubing specs, matching fitting sizes, and selecting the right pressure regulator for your hose bib PSI requires a bit more attention than opening a kit box with instructions.
What the DIY profile is not: a casual first-time drip buyer who wants something working before the weekend is over. The compatibility work and the sourcing research take time upfront, and the cost savings at small scale do not justify that time for most gardeners.

This kit includes 10 tees, 10 couplings, 10 elbows, and 10 end cap plugs compatible with most half-inch drip irrigation tubing with an inner diameter of approximately 0.520 inches. All fittings push in without glue, tools, or clamps, and are made from UV-resistant, high-impact plastic for long-term outdoor durability.
Check On AmazonIf you click this link and buy, we earn a commission at no additional cost to you.
Who Should Buy a Kit
A pre-packaged kit is the right call for a different but probably larger group of raised bed gardeners. The value of a kit is not just the contents; it is the pre-confirmed compatibility between those contents, the instructions, and the fact that someone else has already matched the pressure regulator to the tubing to the fittings to the dripline. For a first-time drip buyer, that is not a small thing.
- First-time drip irrigation user: The learning curve on drip irrigation is real. Understanding emitter flow rates, pressure regulation, run time, and soil type interactions takes a season or two. Starting with a kit that works out of the box makes that learning easier than also troubleshooting fitting compatibility at the same time.
- Gardener with one to three standard beds: The cost savings from DIY at this scale are at most a few dollars and can easily go negative if a compatibility problem requires replacement parts. A kit is almost always the better financial decision here once the value of confirmed compatibility is included.
- Gardener who values setup speed: A kit for a single bed can be connected and running in under an hour with no prior drip irrigation experience. A DIY build for the same bed takes longer, even with all the right parts on hand.
- Anyone who does not want to manage component sourcing: There is nothing wrong with not wanting to research tubing OD specs and fitting sizes. That is a reasonable position, and it is exactly what a kit solves.
A full comparison of kit options across different bed counts and garden sizes is available in the raised bed drip irrigation kit comparison, which covers the main choices from single-bed retail options to multi-bed specialist kits. If you are a first-time buyer and want to see how a standard single-bed retail kit performs in a real raised bed setup before committing, the single-bed raised bed drip kit review covers one of the most common starter options in detail.
The Middle Option: Component-Quality Kits
There is a third path that sits between a retail kit and a fully sourced DIY build, and it is worth knowing about before making the decision. Irrigation supply sites like DripDepot sell component-quality parts in pre-selected sets for raised beds. These are not retail kits packaged for a hardware store shelf. They use better components than most big-box kits, the parts are confirmed compatible within each set, and they come with more configuration flexibility than a fully pre-packaged retail kit.
DripDepot also publishes a raised bed system design guide that walks through component selection, layout, and pressure requirements for different bed counts. This kind of resource reduces the sourcing research burden significantly for a gardener who wants to go the component route without starting from scratch. The result is something close to DIY pricing with kit-level compatibility confidence, which is the main advantage of sourcing from an irrigation specialist rather than a retail store or a general marketplace.
For a gardener with three to five beds who finds retail kit components underwhelming but is not ready to source a full DIY build from individual specs, this middle path is usually the right answer. The upfront price is higher than a big-box kit and the total cost is lower than stacking multiple retail kits. The component quality difference shows up across seasons rather than in the first week.
Field Note: One pattern I see regularly is a gardener starting with two retail kits for two beds, adding a third bed the next season, discovering the kit extension parts do not quite match the first kit brand, and ending up with a patchwork system that works but never waters evenly. Sourcing from a single irrigation supply site from the beginning, even for two beds, avoids the compatibility drift that happens when the system expands season by season with parts from different sources.

This all-in-one drip irrigation kit is designed specifically for standard 4 by 8 foot raised beds, with options covering 2 to 10 beds depending on the tier you choose. Everything needed to connect to a standard outdoor faucet or garden hose is included, and all fittings require only hand tightening. The tubing cuts easily with household scissors, and the fully modular design lets you expand or customize the system over time.
Check On AmazonIf you click this link and buy, we earn a commission at no additional cost to you.
Final Thoughts: Match the Approach to the Garden Size
The honest summary is that the DIY cost advantage is not real at small scale and becomes real at large scale. One to three beds: a kit usually makes more sense. Four or more beds where you are setting up from scratch: DIY from a single irrigation supply source will cost meaningfully less and the compatibility risk is manageable if you do the sourcing work once before ordering. Expanding an existing system: DIY almost always wins, because you are buying only what you are missing rather than paying for a full kit’s worth of components you already own.
The one thing both approaches share: a pressure regulator at the hose bib, an inline filter before the mainline, and emitter spacing that matches the crops in the bed. Those three things matter more for how well the system waters than whether the tubing came from a kit box or a bulk roll. For help choosing which kit option fits your specific bed count, the guide to drip irrigation kits for raised beds covers the decision from a single starter bed through large multi-bed gardens.

This multi-function kit connects 1/2 inch drip tubing to any 3/4 inch male threaded faucet or garden hose, helping ensure your drip irrigation system runs properly. It includes a backflow preventer, a 25 PSI pressure regulator, and a 150 mesh filter, along with a compression fitting that creates a leak-proof seal to 1/2 inch tubing. Built from UV and chemical-resistant materials for long-lasting durability, the kit can also be paired with a compatible Rain Bird hose-end timer for automated watering.
Check On AmazonIf you click this link and buy, we earn a commission at no additional cost to you.
FAQs
💧 Is DIY drip irrigation cheaper than buying a kit for raised beds?
For one to three beds, the savings from a DIY component build are minimal, usually under ten dollars compared to a pre-packaged kit. The real cost advantage starts at four or five beds, where buying tubing and dripline by the roll and using a single pressure regulator and filter for the full system reduces the per-bed cost significantly compared to buying a kit for each bed.
🔧 What components do I need to build a DIY drip system for raised beds?
The core list is: 1/2-inch polyethylene mainline tubing, 1/4-inch emitter dripline or soaker dripline, a pressure regulator sized for your hose bib PSI, an inline filter, barbed fittings (tees, elbows, end caps, and 1/4-inch connectors), and stakes or hold-downs. The sourcing decision matters as much as the list; buying all tubing and fittings from the same supplier avoids compatibility problems between fitting sizes and tubing outer diameters.
⚠️ What is the most common mistake in a DIY drip irrigation build?
Ordering fittings and tubing from different suppliers without confirming that the fitting size matches the tubing outer diameter. Nominal size labels like “1/2-inch” are not universal; different manufacturers size components slightly differently, and a fitting that does not match the tubing OD will weep or fail under pressure. Buy all tubing and fittings from one supplier, or verify compatibility specs before mixing brands.
🌱 Can I mix fittings and tubing from different brands?
Sometimes, but only if you confirm that the fitting size and tubing outer diameter are compatible before ordering. Irrigation supply sites like DripDepot list these specs in their product descriptions and can confirm compatibility if you ask. Without that confirmation, mixing brands is the most reliable way to get a leaking connection that is hard to diagnose.
🍅 How many raised beds do I need before DIY saves real money?
Four beds is roughly where the DIY cost advantage becomes meaningful. Below that, the savings from bulk component pricing are offset by the setup complexity and the risk of compatibility issues. At five beds, a component build typically costs $80 to $120 versus $150 to $250 for the equivalent coverage using retail kits, and the savings grow as the garden scales further.
🏪 Is buying from DripDepot better than buying at Home Depot for a raised bed drip system?
For a single-bed first-time setup, a retail kit from Home Depot or Lowe’s is convenient and adequate. For a larger garden or a DIY component build, an irrigation supply site like DripDepot offers better component quality, confirmed compatibility within their product sets, and published resources for raised bed system design. The retail store advantage is accessibility and same-day pickup; the irrigation supply site advantage is component quality and selection.
🔄 Can I expand a kit-based system with DIY components later?
Yes, but check the tubing outer diameter and fitting specs of your existing kit before ordering expansion components. Retail kits vary in tubing wall thickness and OD, and fittings from a DIY source may not seal correctly on tubing from the kit. The safest approach when expanding a kit-based system is to source extension tubing and fittings from the same brand as the original kit, or to verify specs before mixing.