Two raised beds can share one head assembly, one timer, and one mainline. So can six, up to a practical limit set by how far the mainline runs and how much pressure your faucet actually delivers. This guide lays out the standard layout for running drip irrigation to several raised beds at once: how the mainline acts like a supply artery passing each bed in sequence, what fittings you need at every bed, roughly how many beds one faucet can realistically support, and what to do when different beds in the group need different watering schedules.
The Mainline as an Artery Layout
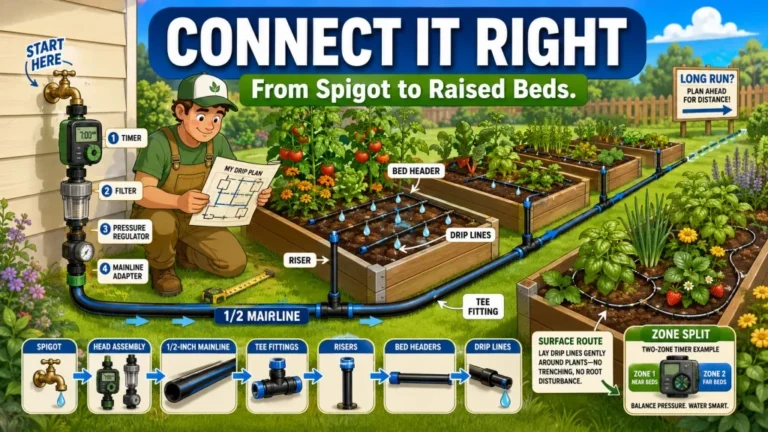
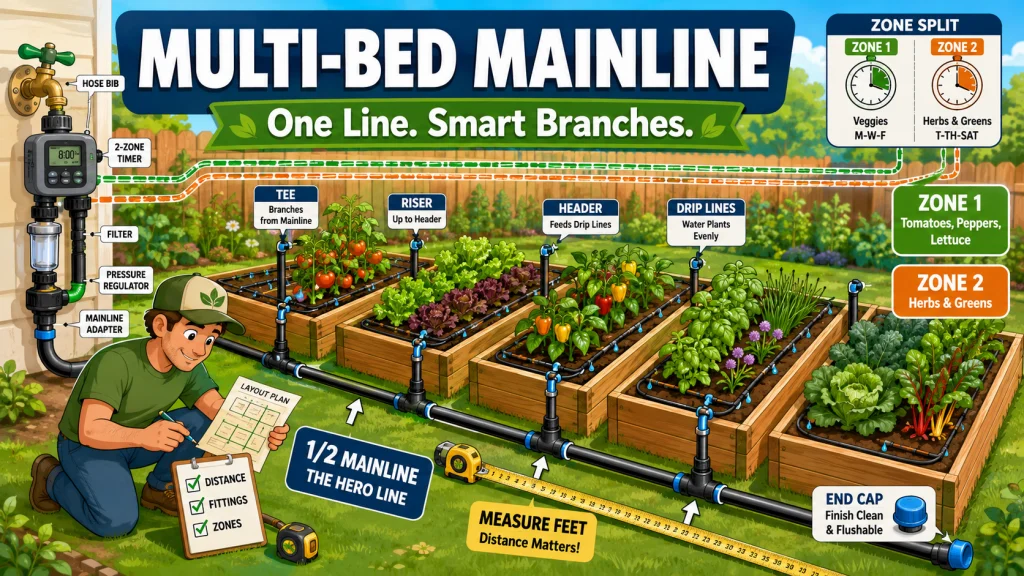
The standard way to connect drip irrigation to multiple raised beds is to treat the mainline like an artery rather than a separate hookup for each bed. One 1/2-inch mainline runs from the spigot head assembly, where the filter and pressure regulator live, and travels past each bed in sequence rather than branching out from a central point. At each bed, a barbed tee fitting taps into the mainline and sends a short riser up to the top of the bed, while the mainline itself keeps running forward toward the next bed in line.
At the last bed in the sequence, the mainline ends with a barbed elbow and a cap, rather than continuing on to nowhere. This single-line, sequential layout is what lets you run drip irrigation to multiple raised beds off one head assembly and one timer instead of building a separate watering setup for every bed you add to the garden.
The reason this layout works better than running individual lines from the spigot to each bed is simple: every bed downstream still gets filtered, regulated water from the same head assembly, and you are not managing four or five separate connection points back at the faucet. The tradeoff is that pressure has to make it all the way to the last bed in the chain, which is where distance starts to matter.

This complete two-zone kit includes 50 feet of half-inch mainline tubing, 115 feet of quarter-inch tubing, 32 adjustable emitters and sprayers, two faucet adapters, and an assortment of push-to-connect tees, splitters, and end plugs. Locking clips and inner O-ring seals replace traditional barbed fittings, requiring no tools, heat, or forcing during installation. Three emitter types covering stream, vortex, and spray patterns allow customized watering across vegetables, shrubs, and container plants.
Check On AmazonIf you click this link and buy, we earn a commission at no additional cost to you.
How Many Beds One Faucet Can Realistically Supply
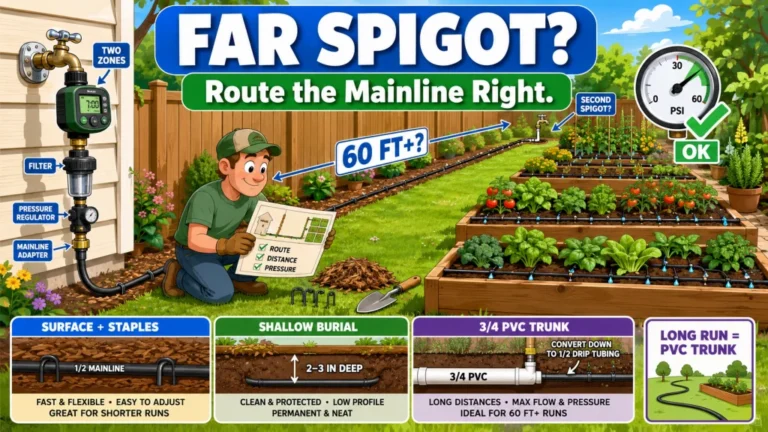
This is usually the first question I get once someone moves past a single bed: how many raised beds can actually run off one faucet before something stops watering evenly? The honest answer depends on distance more than bed count. The practical limit sits around 200 feet of 1/2-inch mainline before pressure drop starts reducing emitter performance at the beds farthest from the spigot.
In a typical backyard where the beds sit within 50 feet of the spigot, six to eight beds on one mainline is workable without special treatment. Homestead and Chill has reported running 5 beds over 90 to 100 feet of 1/2-inch mainline without pressure problems, which gives a useful real-world data point for what a mid-size multi-bed setup looks like in practice.
So the number of beds is really a secondary question behind the actual footage of mainline between the spigot and the last bed in the chain. A garden with three beds packed close together is an easier connection than a garden with three beds spread across a long, narrow yard, even though the bed count is identical.
Field Note: the mistake I see most often with multi-bed setups is someone counting beds instead of measuring feet. A 6-bed layout in a tight 30-foot footprint behaves completely differently than a 4-bed layout strung along a 150-foot side yard, even though the second one has fewer beds.
Once you know roughly how much mainline your layout needs, the next thing to plan is exactly what hardware connects each bed to that line.
The Fittings Needed at Each Bed
Every bed in the sequence uses roughly the same small set of fittings, which makes a multi-bed system more predictable to plan than it might first look. Knowing this list before you start buying parts means you are not making a separate trip back to the hardware aisle for every bed you add.
- One barbed tee, which branches off the mainline at that bed’s location without ending the mainline at that bed.
- One riser, which carries water up from the buried or surface-routed mainline to the top edge of the bed.
- One barbed elbow, which turns the riser horizontal once it reaches the top edge of the bed so it can feed into the header.
- One short header section of 1/2-inch tubing, run along the bed’s short end, that the driplines branch from.
- The driplines themselves, whether that is drip tape or emitter line, running the length of the bed from the header.
That same pattern repeats at every bed along the mainline, with the only real variation being how each bed’s header and driplines are arranged to match its width and crop spacing. The mainline itself stays untouched in design at each tap point; it just keeps moving forward to the next barbed tee.
Finishing the Line at the Last Bed
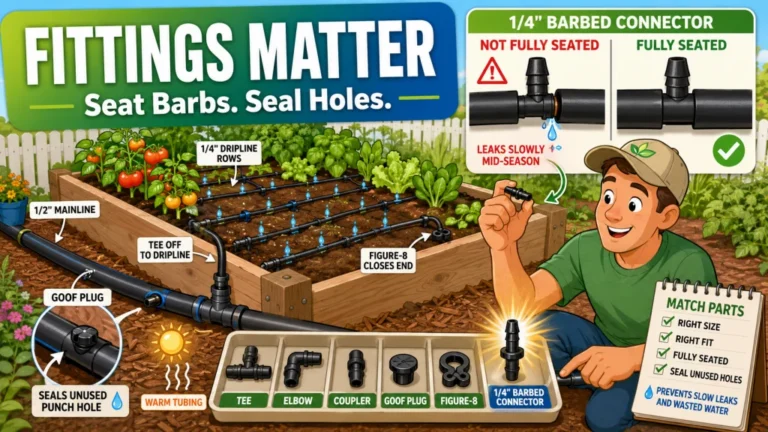
The bed at the very end of the sequence is the one exception to the tee-and-continue pattern. Instead of a barbed tee feeding a riser while the mainline keeps going, the last bed gets a barbed elbow that turns the mainline up to the riser and a cap that closes off the line cleanly. Skipping this step and just crimping or folding the end of an open mainline is one of the more common shortcuts that leads to a slow leak right at the final connection.

A 37-piece barbed fitting assortment for standard 1/2-inch drip irrigation tubing, including couplings, tees, elbows, end closures, cross connectors, and two drip valves for building, extending, or repairing garden watering layouts.
Check On AmazonIf you click this link and buy, we earn a commission at no additional cost to you.
Quick Parts Check Before You Build the Layout
Before any tubing gets cut, it is worth turning the fitting list above into an actual count for your specific yard rather than buying by guesswork. Walk the route the mainline will take, measure the total footage from the spigot to the last bed in the sequence, and add a little extra for the risers and headers at each bed rather than cutting mainline to the exact distance.
From there, multiply the per-bed fitting list by the number of beds in the sequence: one barbed tee, one riser, one barbed elbow, one header section, and the driplines for each standard bed. The last bed still needs its riser, header, and driplines, but the mainline connection changes from a tee-and-continue fitting to a closing elbow and cap. Buying a few spare tees and elbows beyond the exact count saves a second trip if a fitting cracks during installation or you decide to add a bed later in the season.
This is also the point to decide whether any bed needs more control than the group schedule gives it. A simple manual shutoff valve at an individual bed’s riser lets you close off water to that one bed without touching the timer or affecting the rest of the sequence, which is a lighter fix than splitting an entire zone when only one bed occasionally needs less water than its neighbors. If the mismatch is more than occasional, that is the signal to move that bed onto its own timer outlet instead of relying on a valve to compensate every time.
Once the parts list and any per-bed valves are sorted, flush the mainline by running water through it before capping the last bed or attaching driplines, so any debris from cutting and assembly clears out before it reaches the smaller drip fittings downstream.
Why Beds on One Mainline Water on the Same Schedule
Here is the part of a multi-bed setup that catches people off guard after the connection is finished and the system is already running. Every bed tied to the same mainline waters at the same time, on the same schedule, because they are all drawing from the same supply line and timer outlet. That works fine when every bed has similar crops and similar water needs, but it breaks down the moment your beds do not.
A bed of tomatoes that wants water daily and a bed of lettuce that prefers watering every other day cannot both be served well by one mainline running on one schedule. One of the two beds ends up either overwatered or underwatered, and the connection itself is not the problem. The mismatch is between crop needs and a single shared schedule.
Running every bed off one mainline and one timer outlet regardless of how different the crops in each bed actually are.
Grouping beds by similar watering needs and giving each group its own timer outlet, even if they still start from the same spigot and water source.
Recognizing this mismatch early, before the mainline and fittings are buried or anchored, saves you from redoing the connection layout later just to add a second schedule.
The Zone Split Solution
The fix for mismatched watering needs across a multi-bed system is a timer with two outlets instead of one. A 2-outlet timer lets one outlet run a group of beds on one schedule while the second outlet runs a different group of beds on its own schedule, all from the same spigot, with each drip zone protected by the right downstream filter and pressure regulation. The mainline architecture barely changes; what changes is which beds are routed to which timer outlet.
This setup is confirmed in practice by gingerwithroots.com, who runs drip irrigation on one timer zone and a sprinkler on a separate zone from the same system, which is the same underlying principle applied to two different watering methods rather than two different crop groups. The same logic applies just as well to two groups of raised beds with different crop water needs.
If you already know going in that some beds will need a different schedule than others, it is worth grouping those beds together physically along the mainline sequence rather than scattering them, so each timer outlet only has to manage one contiguous stretch of beds instead of jumping back and forth across the layout.

This battery-powered hose timer converts any standard faucet into a two-outlet automatic watering system with programmable schedules and adjustable watering durations. The clear LCD display makes programming straightforward, and a built-in rain delay feature pauses irrigation automatically during wet weather. Designed for outdoor durability and water-resistant construction, it backs its reliability with a six-year limited warranty.
Check On AmazonIf you click this link and buy, we earn a commission at no additional cost to you.
Final Thoughts: Plan the Sequence, Not Just the Bed Count
Running drip irrigation to multiple raised beds comes down to two decisions: how far the mainline has to travel to reach every bed in the sequence, and whether all of those beds genuinely belong on the same watering schedule. Get the sequence and fittings right, and adding a third or fourth bed later is a matter of a tee fitting and a riser, not a redesign.
If your beds are spread out enough that the mainline distance itself feels uncertain, that is worth working out before you commit to a layout, and it gets a fuller answer in the broader overview of how to connect drip irrigation to raised beds, which this guide builds on for setups beyond a single bed. For the exact pressure drop numbers at longer distances, the dedicated breakdown on drip irrigation mainline distance for raised beds covers that question in more depth than fits here, and the wider planning context for a full raised bed setup is covered in the raised bed drip irrigation setup guide.

This 200-foot coil of half-inch poly tubing serves as main supply line or feeder line in drip irrigation systems, with an outside diameter of 0.620 inches and inside diameter of 0.520 inches for compatibility with standard drip fittings and emitters. Multi-layer construction uses 100% virgin poly on the inner and outer layers for UV and water resistance, with a recycled-content core for added strength. Suitable for trees, shrubs, raised beds, containers, and hanging baskets.
Check On AmazonIf you click this link and buy, we earn a commission at no additional cost to you.
FAQs
🪴 How do you connect drip irrigation to multiple raised beds?
Run one 1/2-inch mainline from the spigot head assembly past each bed in sequence. At each bed, a barbed tee branches to a riser and header inside the bed, while the mainline continues to the next bed and ends with a barbed elbow and cap at the last one.
🚿 How many raised beds can one faucet supply?
In a typical yard with beds within 50 feet of the spigot, six to eight beds on one mainline is usually workable. The real limit is mainline length, with pressure drop becoming a concern as total distance approaches 200 feet.
🔧 What fittings do I need at each bed for a multi-bed drip system?
Each bed typically needs one barbed tee, one riser, one barbed elbow, a short header section, and the driplines running through the bed. The last bed in the sequence uses a barbed elbow and cap instead of a tee.
⏱️ Can raised beds on the same mainline water on different schedules?
Not on the same timer outlet. Beds sharing one mainline and one outlet water simultaneously. Splitting beds across a 2-outlet timer, with each outlet serving a different group of beds, allows different schedules.
🍅 Should tomatoes and lettuce be connected to the same drip zone?
Not ideally, since tomatoes typically want more frequent watering than lettuce. Grouping beds by similar water needs onto separate timer outlets avoids overwatering one crop or underwatering the other.
📏 Does the number of raised beds matter more than mainline distance?
Distance matters more. A tightly clustered group of beds with a short mainline run is easier to supply evenly than fewer beds spread across a long mainline, since pressure drop depends on total footage, not bed count.