If you’ve asked how far apart to run drip lines in a raised bed, you’ve probably gotten the same answer everywhere: 12 inches. That number is a fine starting point for loam soil, but it can leave dry strips in a raised bed filled with sandy or perlite-heavy mix. In this guide I break raised bed drip irrigation spacing into the two numbers that actually matter, line spacing across the bed and emitter spacing along each line, and show how soil type changes both. I’ll also walk through the emitter stagger trick that fixes the most common dry-patch complaint I see in raised beds running more than one line.
The 12-Inch Answer Is a Starting Point, Not a Rule
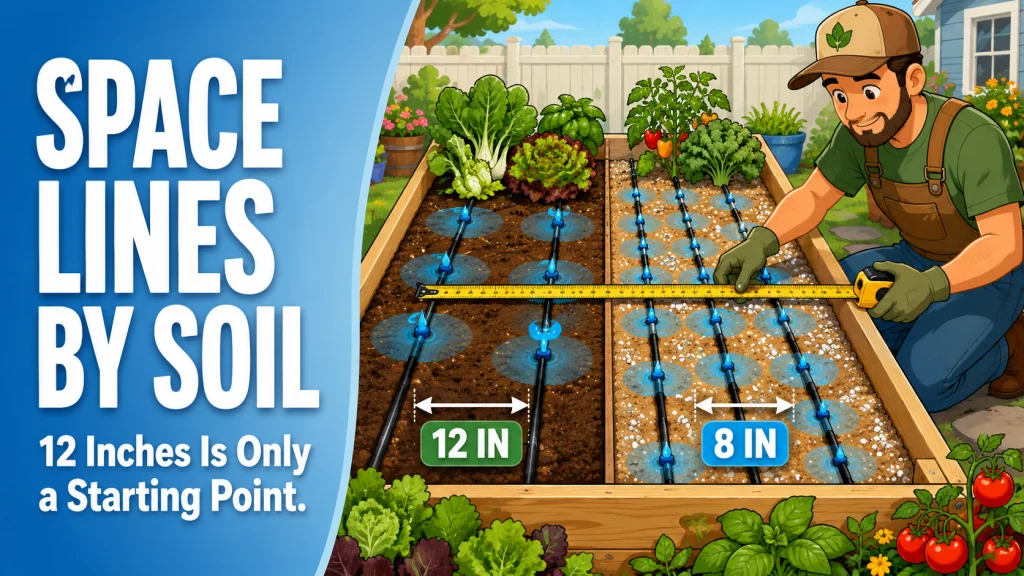
Raised bed drip irrigation spacing is usually answered with a single number: 12 inches between lines. That number comes from somewhere real. It works fine in loam or well-amended raised bed mix, where water spreads sideways from each emitter and fills in the gap between lines on its own. The problem is that the same 12 inches gets repeated for sandy or perlite-heavy mixes, where water moves almost straight down with very little sideways spread, and 12 inches apart starts leaving dry strips between the lines that never quite get wet.
This guide is specifically about spacing, not layout in general. That means how far apart your lines should run across the bed, and how far apart the emitters should sit along each line. It does not get into how many total lines a given bed width needs, since that is its own calculation, and it does not cover grid patterns or printed layout diagrams. Once you know the right spacing numbers for your soil, those other decisions get a lot easier to make.
The Two Spacing Numbers That Actually Matter
Drip line spacing in a raised bed is really two separate measurements wearing one name. The first is line spacing: how far apart the parallel driplines run across the width of the bed. The second is emitter spacing: how close together the individual emitters sit along each line. A bed can have great line spacing and still water unevenly if the emitter spacing along those lines is wrong for the plants going in, and the reverse is just as true.
Deciding how many lines to run in the first place is a related but separate question, and settling that first makes spacing easier. If you have not settled on a line count yet, how many drip lines per raised bed covers that decision in more depth. This guide picks up once you already know roughly how many lines you are running and just need to know how far apart to put them and their emitters.
Line Spacing by Soil Type
Soil type changes how far water travels sideways from an emitter before gravity pulls it straight down, and that lateral spread is the whole reason line spacing numbers differ. Loam and well-amended raised bed mix, the kind with real organic matter and decent water-holding structure, lets water wick sideways several inches before it moves down. Sandy or perlite-heavy mixes, common in lightweight bagged raised bed soil, drain fast and barely spread sideways at all.
| Soil Type | Lateral Water Spread | Recommended Line Spacing |
|---|---|---|
| Loam or well-amended mix | Spreads several inches sideways from each emitter | 12 inches is usually adequate |
| Sandy or perlite-heavy mix | Minimal lateral spread, water drops mostly straight down | 8 inches or closer is safer |
- Water disappears within a second or two of hitting the surface: likely fast-draining, sandy, or perlite-heavy
- You can squeeze a handful into a loose ball that holds its shape briefly: likely loam or a well-amended mix
- Water pools or sits visibly on the surface before soaking in: likely a denser, clay-heavy mix, which behaves more like loam for spacing purposes but drains slower overall
- The bag or product listing mentions perlite, vermiculite, or “fast-draining” prominently: treat it as sandy for spacing decisions
A 4×8 bed filled with bagged raised bed mix that leans heavily on perlite for drainage is a different watering problem than the same bed filled with a denser, compost-rich loam, even though both are technically “raised bed soil.” I would rather start a sandy bed at 8-inch line spacing and widen it later if coverage looks excessive than start at 12 inches and discover dry strips once the canopy has filled in and tracing the problem gets harder.

This dripline delivers 0.65 GPH through dual-outlet emitters spaced every 9 inches, designed to run at 15 to 25 PSI for uniform root zone watering and reduced clogging. It can extend up to 22 feet from the supply line at this spacing, and accepts all standard 1/4 inch barb fittings for easy setup and expansion. It's well suited for vegetable gardens, window boxes, flower beds, and looping around trees or hedges where thorough saturation is needed. Made from UV-protected, edible-plant-safe polyethylene, it's built for reliable long-term outdoor use.
Check On AmazonIf you click this link and buy, we earn a commission at no additional cost to you.
Emitter Spacing Along the Line
Once line spacing is set, emitter spacing along each individual line is the second number that determines coverage. Standard kits commonly use either 9-inch or 12-inch emitter spacing. A DIG ML50-style emitter line is a common example of 9-inch spacing with lower-flow emitters, while a Rain Bird GARDENKIT-style setup is a common example of 12-inch spacing with higher-flow emitters. Drip tape works on the same principle with the emitters built into the tape itself rather than separate fittings, and drip tape spacing in a raised bed usually follows the same 6 to 12-inch range depending on the product.
Key point: tighter emitter spacing and higher individual flow rate are not the same lever. A 9-inch spacing with a lower GPH emitter and a 12-inch spacing with a higher GPH emitter can deliver similar total water along the line, but the dry-patch behavior between emitters is different because of how far each individual emitter’s wetted area actually reaches.
Plant density should drive this decision more than the kit’s default. Dense plantings like lettuce, spinach, or herbs packed close together do better with 6-inch emitter spacing, because the wetted area from each emitter needs to overlap before the next plant’s root zone to avoid dry gaps. Row crops with wider natural spacing, like tomatoes or peppers planted 12 to 18 inches apart, are usually fine matching a 12-inch emitter spacing to the row spacing itself, since each plant effectively gets its own emitter zone.

This drip tubing works like a soaker hose but without the clogging or maintenance, thanks to pressure-compensating emitters that water evenly from one end of the line to the other. Built-in 0.8 gallon per hour emitters are spaced 12 inches apart with dual outlets positioned 180 degrees apart for even coverage. The tubing measures 0.25 inches outside diameter and connects with 1/4 inch barbed fittings, operating across a wide pressure range of 8.5 to 60 psi. Its micro-porous construction creates a tight, reliable connection that holds up over time.
Check On AmazonIf you click this link and buy, we earn a commission at no additional cost to you.
The Emitter Stagger Mistake Almost Nobody Catches
Here is the mistake I run into most often in beds with more than one line, and it is almost invisible until the plants are already in the ground. If every line has emitters positioned at the exact same points along the bed’s length, the gaps between lines end up dry in a repeating pattern, because no emitter on any line is ever covering that strip. This is the mistake a first-time raised bed gardener almost never catches before planting, since the surface looks evenly wet right after the system runs.
Running every line with emitters at the same positions: 9, 18, and 27 inches along the bed on Line 1, and again at 9, 18, and 27 inches on Line 2.
Staggering emitters by half the spacing interval: Line 1 at 9, 18, and 27 inches, Line 2 offset to 4.5, 13.5, and 22.5 inches, so the wetted zones overlap in the strip between the lines instead of missing it entirely.
Field Note: I first paid closer attention to the stagger fix after seeing an experienced drip installer document the exact same dry-strip pattern in raised beds with loam-type soil. The soil looked fine on top and stayed noticeably drier a few inches down, right in the gap between two lines whose emitters lined up at identical positions. Offsetting the second line by half the spacing interval closed that gap completely on the next test.
This offset works regardless of whether you are running 9-inch or 12-inch emitter spacing, the math is just half of whatever interval your kit uses. At 9-inch spacing, stagger by 4.5 inches. At 12-inch spacing, stagger by 6 inches. It costs nothing and takes a few extra minutes during install, which makes it one of the easiest fixes in this entire guide relative to the dry patches it prevents.

This 1000 foot roll of 5/8 inch drip tape features 15 mil polyethylene construction with laser-cut outlets spaced every 12 inches, delivering 0.25 GPH per emitter and 0.42 GPM per 100 feet. The laser-cut design offers strong resistance to root intrusion, making it well suited for watering crops and vegetable gardens. It's installed with the emitter side facing up, just below the soil surface, for efficient and direct root zone watering.
Check On AmazonIf you click this link and buy, we earn a commission at no additional cost to you.
Verify Spacing Before the Roots Make It Hard to Fix
A brand-new raised bed, filled but not yet planted, gives you a window most gardeners waste. Before anything goes in the ground, run the system for about 30 minutes, then probe the soil with a screwdriver or soil probe at multiple points: directly under an emitter, halfway between two emitters on the same line, and in the gap between adjacent lines. You are checking for consistency, not a single depth number, since the goal is confirming that the spacing you chose actually wets the spaces it is supposed to reach.
If the gap between lines comes up dry while the spots under emitters are soaked, that is the stagger problem from the previous section showing up in soil rather than in theory. If an entire line spacing zone feels dry regardless of where you probe, the line spacing itself is too wide for that soil type and needs to come in closer. Doing this check on fresh soil before planting means adjusting a line or adding a stagger costs you a few minutes of moving tubing. Doing it after the canopy fills in means working blind around root zones you cannot see and do not want to disturb.
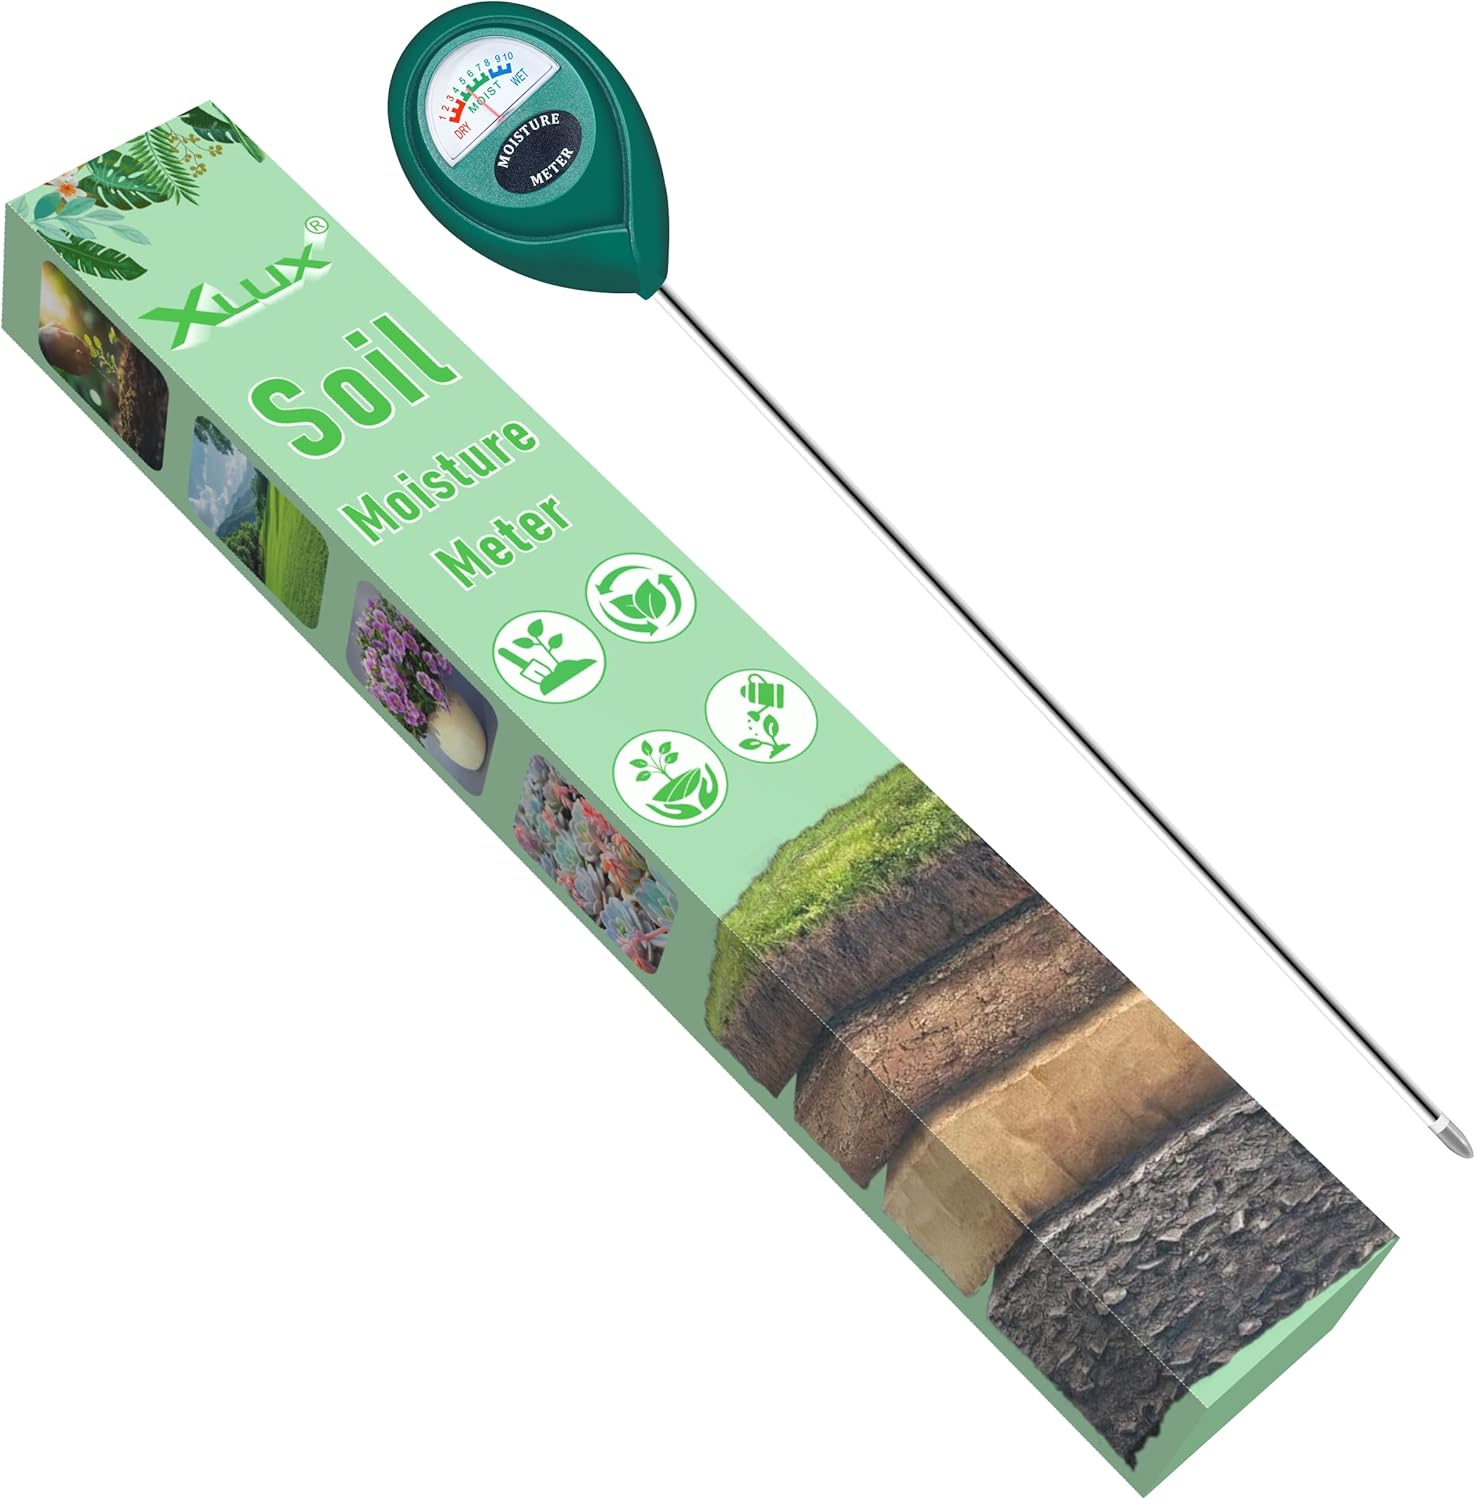
This moisture meter measures soil conditions deep inside pots and gardens with a probe 5.5 inches longer than standard styles, ideal for larger or deeper containers. Simply insert it into the soil for an immediate reading on the large, easy-to-read dial, which shows three zones across ten scales. Its single probe design causes less root disturbance than double or multiple probe meters. For best results, avoid testing hard soil or liquids, and remove the probe within 5 minutes to prevent corrosion of the metal tip.
Check On AmazonIf you click this link and buy, we earn a commission at no additional cost to you.
Final Thoughts: Spacing That Matches Your Bed, Not the Default
Raised bed drip irrigation spacing for vegetable and herb gardens really comes down to two adjustable numbers, line spacing and emitter spacing, and one easy fix that most installs skip entirely: staggering emitters between adjacent lines. Soil type decides how forgiving your spacing can be, plant density decides how tight the emitter spacing needs to run, and the screwdriver test on fresh soil tells you whether the numbers you picked actually worked.
This guide stays deliberately narrow to those two spacing variables. For help deciding how the lines themselves should be arranged across the bed once spacing is settled, the raised bed drip irrigation layout guide picks up from here, and the broader raised bed drip irrigation setup guide covers how spacing fits into the rest of the install. Get the spacing right first, and the rest of the layout decisions have something solid to build on.

This kit includes everything needed to water a raised bed up to 4 by 8 feet, with professional-grade components built for repeated seasonal use. It features 35 feet of emitter tubing with 70 built-in, pressure-compensating emitters spaced every 6 inches for even watering near the roots, plus 25 feet of easy-to-handle 1/4 inch distribution tubing. This low-volume design can save up to 80% on water while supporting healthier plants and better yields. Installation is straightforward thanks to an illustrated manual covering multiple layout options, and the system can be automated with a compatible Rain Bird hose-end timer sold separately.
Check On AmazonIf you click this link and buy, we earn a commission at no additional cost to you.
FAQs
📏 How far apart should drip lines be in a raised bed?
About 12 inches apart works for loam or well-amended raised bed mix, since water spreads sideways enough to fill the gap. In sandy or perlite-heavy mix, where water barely spreads sideways, 8 inches or closer is a safer starting point.
🌱 What is the best drip irrigation spacing for a raised bed vegetable garden?
It depends on both soil type and plant density rather than one fixed number. Loose, well-draining mix and dense plantings like lettuce or herbs need tighter line and emitter spacing than loam planted with widely spaced row crops like tomatoes.
🏖️ Does sandy soil need closer drip line spacing?
Yes. Sandy and perlite-heavy mixes drain almost straight down with very little sideways spread, so lines spaced for loam at 12 inches often leave dry strips. Closing the spacing to around 8 inches usually closes those gaps.
🧵 How far apart should drip tape emitters be spaced in a raised bed?
Most drip tape spacing in a raised bed falls between 6 and 12 inches depending on the product. Tighter spacing around 6 inches suits dense plantings, while 12 inches is usually fine for widely spaced row crops.
🔀 Why do I have dry patches between my drip lines?
The most common cause is emitters on adjacent lines lining up at the exact same positions, leaving the strip between lines uncovered by any emitter. Offsetting the second line’s emitters by half the spacing interval usually fixes it.
🪛 How do I check if my drip line spacing is actually covering the bed?
Run the system for about 30 minutes, then probe the soil with a screwdriver under an emitter, between emitters on the same line, and in the gap between adjacent lines. Even moisture across all three spots means the spacing is working.