Every drip kit for raised beds ships with a collection of small plastic fittings that are easy to ignore until one of them leaks, pulls out, or turns out to be missing. This article covers the drip irrigation fittings for raised beds used in a standard hose-end setup: what each type does, where it belongs in the system, and which one is responsible for the most mid-season leaks in the field. If you are assembling a kit for the first time or sourcing components separately, understanding what each fitting is for before you start saves a significant amount of troubleshooting later.
The Fittings in the Bag: What You Are Actually Looking At
Every raised bed drip kit includes more drip irrigation fittings than the instructions adequately explain. The diagram on the back of the box shows a clean layout with arrows pointing to labeled components, but when you empty the bag on a table, there are usually four or five types of small plastic connectors mixed together, and the diagram does not cover all of them. Most first-time installs slow down here, or push forward with pieces in the wrong spots.
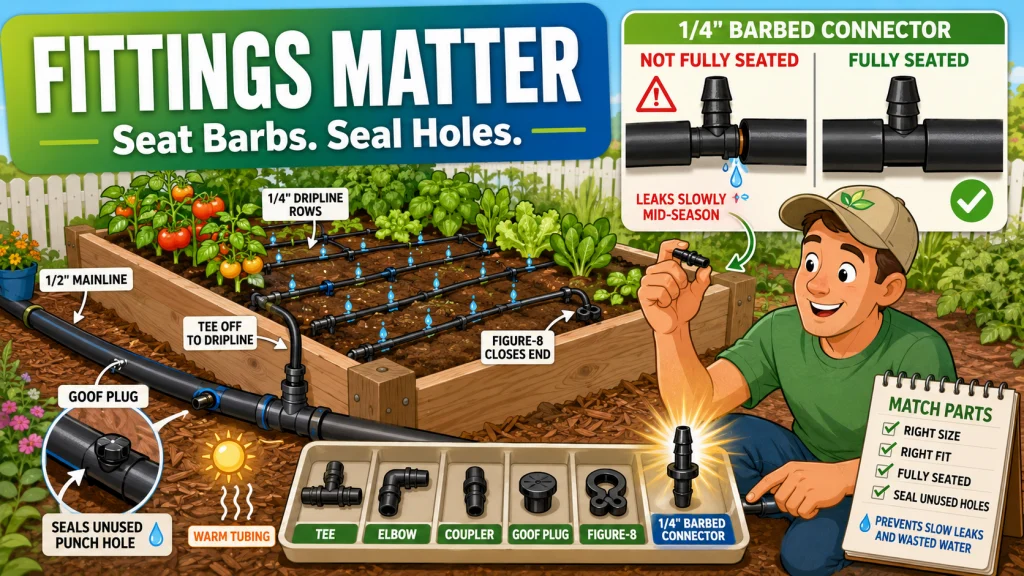
The fittings in a standard raised bed kit are not interchangeable. Each type is shaped for a specific job: tees branch the mainline to a bed, elbows change direction, couplers join two tubing sections end to end, goof plugs seal unused punch points, and figure-8 clamps close off dripline ends. Getting one of these wrong rarely causes an immediate failure. It causes a slow drip or a pressure drop that shows up two weeks into the season when the far corner of the bed starts drying out.
| Fitting type | What it does | Where it goes |
|---|---|---|
| Barbed tee | Branches a running mainline to a raised bed | Along the 1/2-inch mainline, one per bed connection |
| Barbed elbow | Changes the tubing direction 90 degrees | At riser tops and bed header corners |
| Barbed coupler | Joins two sections of same-diameter tubing | Anywhere a run comes up short or needs extending |
| Goof plug | Seals an unused or misplaced punch hole | Any unplugged hole in the 1/2-inch mainline |
| Figure-8 end clamp | Folds and holds the open end of a dripline closed | At the terminus of each dripline inside the bed |
| 1/4-inch barbed connector | Connects 1/4-inch dripline to 1/2-inch header | Punched into the bed header at each dripline insertion point |
The sections below cover each fitting in detail, including the specific failure mode most likely to cause problems in a real raised bed setup. For context on how these fittings fit into the overall system structure, the guide on raised bed drip irrigation components covers each major component category, including tubing, emitters, and the faucet assembly.
Barbed Tee Fittings: Branching the Mainline at Each Bed
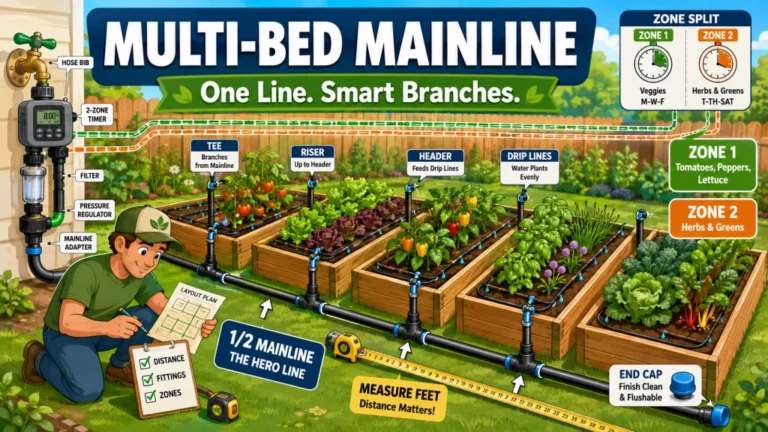
The barbed tee is a three-way fitting with two inline ends and one branch end. In a raised bed drip layout, the two inline ends connect to the 1/2-inch mainline tubing running along the ground from the faucet. The branch end connects to a short riser or a header section that goes up to the bed. Every bed in the system requires one tee at its branch point. A layout with four raised beds needs four tees, one at each bed connection along the mainline.
Spacing between tees determines how far apart the beds are positioned, and the mainline sections connecting them need to be cut accurately so each run lies flat and reaches the bed header without tension. Tension on a barbed fitting is one of the more common causes of slow leaks at branch points, especially in summer when the tubing softens and the joint shifts slightly. If the mainline has to stretch to reach the tee, cut a short additional section to relieve the pull before the tubing relaxes on its own.
When inserting a barbed tee into 1/2-inch tubing, push each barb fully until the tubing seats against the shoulder of the fitting. A barb that stops halfway in will hold water through initial setup but will weep under repeated pressure cycling. If the tubing is cold and stiff, warm the insertion point in your hands or leave the line in the sun for a few minutes before seating the barb.

A 37-piece barbed fitting assortment for standard 1/2-inch drip irrigation tubing, including couplings, tees, elbows, end closures, cross connectors, and two drip valves for building, extending, or repairing garden watering layouts.
Check On AmazonIf you click this link and buy, we earn a commission at no additional cost to you.
Elbows and Couplers: Direction Changes and Extensions
Barbed Elbow Fittings
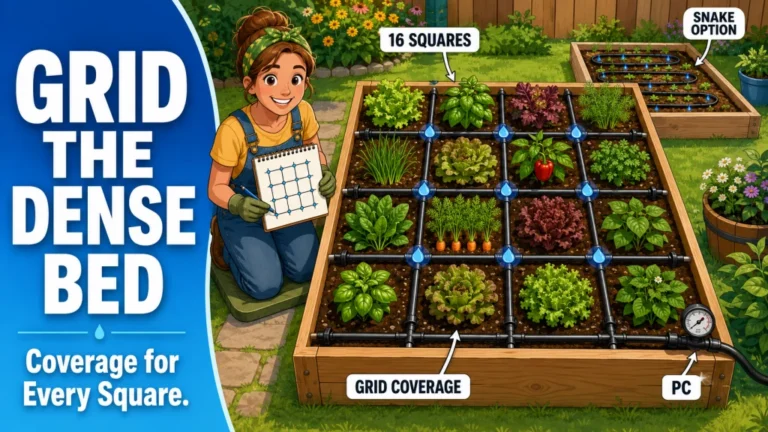
A barbed elbow changes the direction of a tubing run by 90 degrees. In a raised bed setup, elbows appear in two places most often: at the top of a riser where the line turns from vertical to horizontal to become the bed header, and at the corners of the header if it runs around the perimeter of the bed rather than straight across it. A 4×8 bed with a header running all four sides uses four elbows, one at each corner.
The most common mistake with elbows is using them to force a tubing run that is already under tension from being stretched between two points. The fitting seat absorbs that load instead of the tubing lying flat. Over a season, a fitting under tension works loose. The fix is cutting a short extra section of tubing to relieve the tension before using the elbow to make the turn cleanly. A fitting under no load seats correctly and stays that way.
Barbed Coupler Fittings
A barbed coupler is a straight two-ended fitting that joins two sections of same-diameter tubing. Couplers are the most underordered fitting in a DIY raised bed drip build. The typical scenario: the mainline run comes up a few feet short of the last bed, or a dripline inside the bed needs to be extended after planting is rearranged. A coupler and a short extra section of tubing solves both without removing any part of the existing layout.
I recommend ordering a handful of couplers even if you do not expect to need them. They are small and inexpensive, and having one on hand when the mainline comes up short is far better than stopping the install halfway to drive back to the store. The same applies to tees and elbows. Kits include the minimum, not a working buffer.

A five-pack of reusable figure-8 end clamps designed to close 1/2-inch to 5/8-inch drip irrigation supply tubing and dripline, allowing the line to be reopened easily for flushing, draining, or system changes.
Check On AmazonIf you click this link and buy, we earn a commission at no additional cost to you.
Goof Plugs and Figure-8 End Clamps: Sealing the System
Goof Plugs
A goof plug is a small barbed plug that seals an unused or misplaced hole punched into a 1/2-inch mainline. Any time a hole is punched and the branch at that point is moved, removed, or changed, the original hole needs a goof plug. An open punch hole behaves exactly like an intentional emitter: it drips water at that spot, drops mainline pressure, and reduces flow to every emitter further down the line.
Goof plugs are also the recovery tool for the most common kit mistake, which is punching a hole in the wrong location. It happens on almost every install. The header is laid out, a hole gets punched two inches off the target spot, and instead of cutting and restarting the line, a goof plug seals the misplaced hole and a fresh hole goes in the correct position. Keep a handful of goof plugs anywhere you are punching holes. Running short of them mid-install is genuinely disruptive.
Figure-8 End Clamps
A figure-8 clamp closes off the end of a dripline by folding the tubing back on itself and holding that fold with a small plastic clip shaped like the number 8. It is the standard way to terminate a dripline inside a raised bed without permanently capping or crimping the tubing. The fold stops water from running out the open end, and the clamp holds the fold secure under normal drip pressure.
The reason figure-8 clamps are used instead of permanent cap fittings is seasonal maintenance. At the end of the growing season, removing the clamp opens each dripline for flushing before winterization. Caps work, but they require unscrewing and reattaching each line when flushing time comes. A figure-8 clamp folds back and releases in seconds. For a bed with three or four parallel driplines, that time difference adds up.
When ordering fittings for a new raised bed drip build, this is the short list I put together for a typical 4×8 bed before starting:
- 1 barbed tee (for the mainline branch to this bed)
- 2 barbed elbows (for the header corners if the line turns at the bed ends)
- 2 to 3 barbed couplers (buffer stock for extensions)
- 6 to 8 goof plugs (more than you think you will need)
- 3 to 4 figure-8 end clamps (one per dripline plus spares)
- Enough 1/4-inch barbed connectors for each dripline insertion point in the header
That list scales up by bed count for a multi-bed layout. The tees and elbows scale directly with bed count and header design. The goof plugs and couplers stay as buffer stock regardless of bed count, because the mistakes they fix do not scale linearly.

This pack of 50 double-sided polypropylene goof plugs seals accidental holes or open fittings in half-inch, five-eighths inch, and 0.710 inch supply tubing. The barbed end pushes in by hand or with a fitting inserter tool, and plugs come pre-attached in a strip that snaps apart when needed. UV-inhibited construction prevents cracking during long-term outdoor use.
Check On AmazonIf you click this link and buy, we earn a commission at no additional cost to you.
The Fitting That Causes the Most Leaks
The barbed connector that joins 1/4-inch dripline tubing to the 1/2-inch mainline header is the fitting responsible for more mid-season leaks in a raised bed drip system than any other barbed fitting in the layout. Not because the fitting is poorly designed, but because it is almost always inserted when the tubing is cold and stiff, and cold tubing does not let a barb seat fully.
Field Note: The failure pattern is consistent. The gardener pushes the 1/4-inch barb connector into a punched hole in the 1/2-inch header. It goes in about two-thirds of the way, feels snug, and the system runs without visible issues for a week or two. Then the emitters at the far end of the bed start underperforming. The barb was never fully seated. It was held by friction against stiff tubing, not by the shoulder contact that creates an actual seal. As the tubing warms and relaxes in the sun over the following days, the joint starts to weep at the insertion point. By mid-season, pressure is visibly lower downstream of that connection.
The fix documented by Homestead and Chill and confirmed by Roots and Boots is consistent: warm the tubing before inserting any barbed connector. Leave the 1/2-inch header and the 1/4-inch dripline in direct sun for 5 to 10 minutes before making connections. Warm tubing is noticeably softer and allows the barb to seat completely, shoulder flush against the outer tubing surface. Roots and Boots also recommends needle-nose pliers to push the barb the final few millimeters when resistance stays high even with warmed tubing.
A correctly seated barb does not pull free with two fingers. If a 1/4-inch connection comes out with light hand pressure, it was not seated to begin with. Pull it, let the tubing warm longer, and reseat it before running the system.
Brand Compatibility: Why Mixing Fittings from Different Kits Creates Problems
Drip irrigation fittings look nearly identical across brands, but the outer diameter tolerances on 1/2-inch and 1/4-inch tubing vary enough that a barbed fitting from one brand may not seat correctly in tubing from another. Rain Bird fittings are engineered to seat in Rain Bird tubing. DIG fittings are designed for DIG tubing. Mixing them can produce a connection that feels fully seated but does not hold tightly enough to stay leak-free through a full growing season of pressure cycling.
The problem usually comes up when a gardener runs out of fittings from the original kit and grabs a mixed bag from a hardware store without checking the brand. The replacement fittings look identical to what is already installed. The sizing printed on the bag matches. But the barb either seats too loosely in the existing tubing or requires enough force to insert that the tubing wall deforms around the fitting. Neither produces a reliable joint under sustained drip pressure.
Warning: If you are adding fittings to an existing system, match the brand to the tubing already in place, or measure the outer diameter of your installed tubing before ordering anything new. Mixing brands is one of the fastest ways to introduce a slow leak that does not appear until the bed is fully planted and difficult to reach.
When building a new system from scratch, sourcing all fittings and tubing from the same brand removes the compatibility question entirely. When expanding an existing layout, a quick caliper check on the outer diameter of the installed tubing takes 30 seconds and eliminates most guesswork. The number to match is the outer diameter of the tubing, not the nominal size printed on the bag, because nominal sizing is not always consistent across manufacturers.
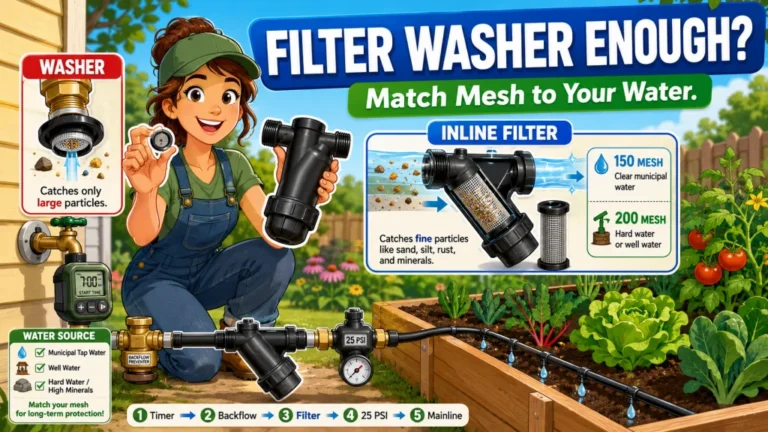
For more on how to assemble these raised bed drip irrigation connectors and fittings into a complete faucet setup, the article on raised bed drip irrigation head assembly covers the correct component order from spigot to mainline and why the sequence matters.

This pack of 30 UV and chemical-resistant black plastic plugs seals unwanted holes in half-inch drip tubing or caps the ends of quarter-inch tubing runs. Compatible with the Rain Bird ET/1PK25S emitter tool for easy installation and removal.
Check On AmazonIf you click this link and buy, we earn a commission at no additional cost to you.
Final Thoughts: Small Fittings, Outsized Impact on System Reliability
The fittings in a raised bed drip kit are easy to treat as an afterthought. They are small, inexpensive, and not the components that get listed prominently on the box. But in my experience, more mid-season problems trace back to fitting issues than to timer failures, emitter clogs, or pressure regulator problems. A tee that was not fully seated, a 1/4-inch connector inserted into cold tubing, a goof plug that was never installed over a misplaced punch: these are the common sources of the dry corners and pressure drops that show up weeks after setup.
Know what each fitting type is for before you open the bag, order a buffer of goof plugs and couplers before you start, warm the tubing before inserting any barbed connector, and keep all fittings and tubing within the same brand. Those four habits cover the most common fitting failures in a raised bed drip system. For a full picture of how the fittings connect to the rest of the system, the raised bed drip irrigation setup guide covers the complete layout process from faucet to emitter.
FAQs
🔧 What fittings do I need for a raised bed drip irrigation system?
A standard raised bed drip setup uses barbed tees to branch the mainline, barbed elbows to change direction, barbed couplers to extend tubing runs, goof plugs to seal unused punch holes, figure-8 clamps to terminate driplines, and 1/4-inch barbed connectors to insert driplines into the bed header. Order extra goof plugs and couplers as buffer stock before you start.
🌱 Why does my drip line keep leaking where the 1/4-inch connector meets the mainline?
The barb was most likely not seated fully when it was installed. Cold, stiff tubing resists full barb insertion and holds the fitting in place by friction rather than by shoulder contact. Remove the connector, warm the tubing in the sun for 5 to 10 minutes, and reseat the barb until the shoulder sits flush against the outer tubing surface.
🔩 What is a goof plug used for in drip irrigation?
A goof plug seals any hole punched into a 1/2-inch mainline that is no longer being used for a branch or dripline connection. An unsealed punch hole drips water continuously at that point and drops mainline pressure downstream. Any time a hole is moved, changed, or removed from the plan, the original hole needs a goof plug before the system runs.
💧 Can I mix Rain Bird and DIG fittings in the same drip system?
Not reliably. The outer diameter tolerances on 1/2-inch and 1/4-inch tubing vary between brands, and a fitting designed for one brand’s tubing may not seat correctly in another’s. Mixing brands is a common source of slow leaks that appear weeks after setup. When adding to an existing system, match the fitting brand to the installed tubing or measure the tubing outer diameter before ordering.
⏱️ What is a figure-8 clamp and do I need one?
A figure-8 clamp folds the open end of a dripline back on itself and holds the fold closed with a small plastic clip. It terminates the line without permanently capping it, which makes end-of-season flushing faster than using threaded caps. Most raised bed dripline setups use one per dripline run.
🛠️ How do I know if a barbed fitting is fully seated in my drip tubing?
The shoulder of the fitting should sit flush against the outer wall of the tubing with no visible gap between the fitting flange and the tubing surface. A correctly seated barb does not pull free with light hand pressure. If two fingers can remove the connection, the barb was not inserted far enough. Warm the tubing and reseat it before running the system.