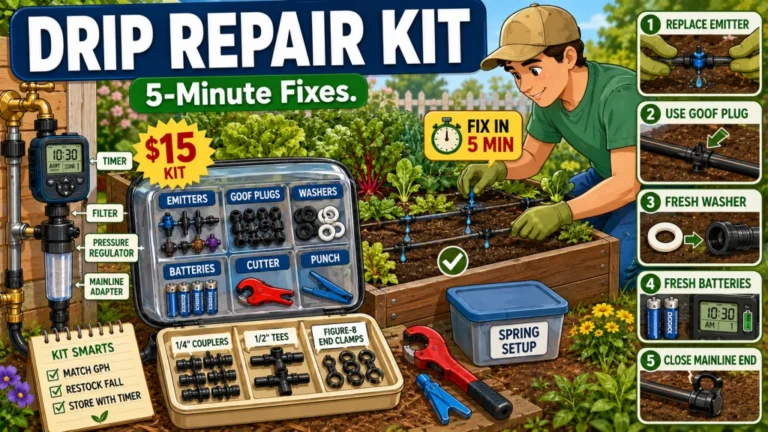
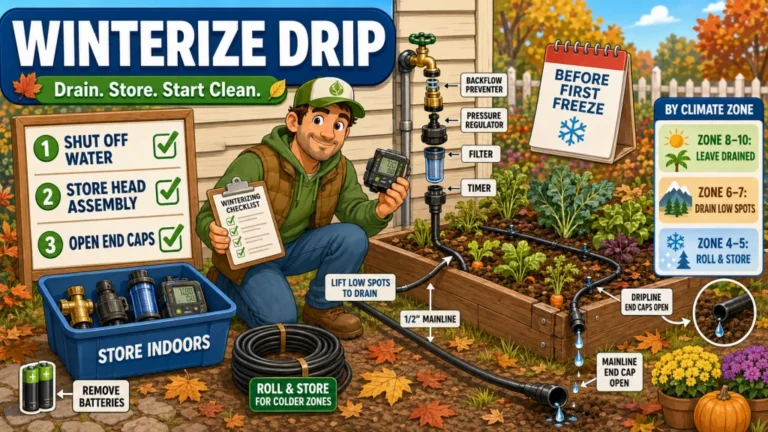
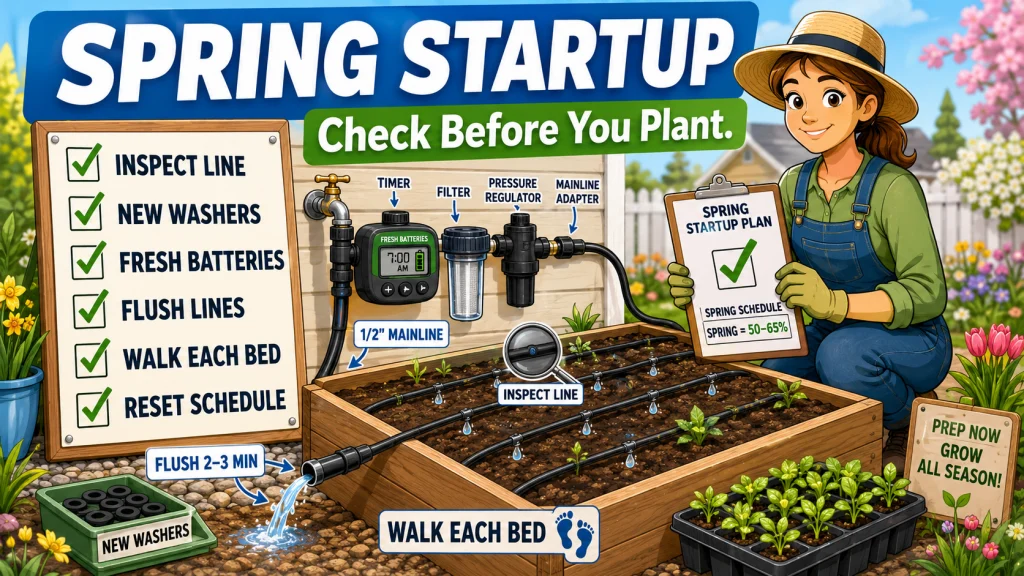
This spring checklist for raised bed drip irrigation runs through six steps that catch the damage a winter season leaves behind before you put a single transplant in the ground. Raised bed drip irrigation spring startup covers visual inspection of the dripline, rubber washer replacement at every threaded connection, fresh batteries in the timer, a line flush with end caps open, a pressurized walkthrough of every bed, and a schedule reset before planting begins. Many common mid-season drip failures in raised beds trace back to something startup day would have caught. These steps take about 15 minutes and cost almost nothing compared to fixing a dry zone in July with plants in the way.
The Best Time to Find a Problem Is Before You Plant
A raised bed drip irrigation spring startup check does one thing well: it finds winter damage before the season depends on the system. The bed that watered consistently through September may have a cracked emitter insertion point, a hardened washer at the hose bib, dead timer batteries showing a false charge on the display, or debris packed into the line from months of sitting idle. None of it is obvious until you pressurize, and the only question is when you want to find it.
I have walked systems in early spring that looked completely intact from the outside and then found three leaks during the pressurized walkthrough. Cold temperatures, freeze-thaw cycles, UV exposure from last season, and the occasional rodent do things to drip tubing and fittings that are not visible until water is moving through the line. Running this check before you plant means fixing problems in an empty bed. Running it after means working around established roots and disturbed soil, or waiting until something wilts before you go looking.
| Step | What it catches |
|---|---|
| 1. Inspect the dripline | Cracks, brittle sections, gnaw marks, unseated fittings from winter freeze |
| 2. Replace rubber washers | Dried, compressed seals at threaded connections that will leak on first pressurization |
| 3. Fresh timer batteries | Low-output batteries that cause missed cycles or inconsistent runs mid-season |
| 4. Flush before capping | Debris, grit, and mineral deposits that settled in lines over the dormant season |
| 5. Pressurized walkthrough | Clogged emitters, leaking fittings, weeping goof plugs, and pressure-revealed cracks |
| 6. Schedule reset | Peak summer run time still loaded from last year, which overwaters cool-season crops in spring |
Each step feeds into the next. Inspecting before connecting prevents pressurizing a cracked section. Swapping washers before reconnecting avoids troubleshooting a leak that should not have been there. The table above is the short version; the sections below cover what to actually look for and why each step matters in a raised bed context.
Pro Tips: Gather these beside the hose bib before you start. Having them within reach means you fix problems the moment you find them rather than stopping to hunt down parts mid-walkthrough.
- Fresh batteries for the timer
- A few 3/4-inch hose washers for the threaded connections
- A couple of spare goof plugs and common barbed fittings
- A short piece of matching dripline for any cracked section that needs swapping
- Small scissors or a tubing cutter
- A small tray for old washers, end caps, and removed plugs so nothing rolls away
- One minute to pull and rinse the filter screen before the first pressurized run, so any debris from winter does not reach the lines during the flush

This kit includes everything needed to water a raised bed up to 4 by 8 feet, with professional-grade components built for repeated seasonal use. It features 35 feet of emitter tubing with 70 built-in, pressure-compensating emitters spaced every 6 inches for even watering near the roots, plus 25 feet of easy-to-handle 1/4 inch distribution tubing. This low-volume design can save up to 80% on water while supporting healthier plants and better yields. Installation is straightforward thanks to an illustrated manual covering multiple layout options, and the system can be automated with a compatible Rain Bird hose-end timer sold separately.
Check On AmazonIf you click this link and buy, we earn a commission at no additional cost to you.
Step 1: Inspect the Dripline Before Reconnecting Anything
Before touching the head assembly, walk the beds and look at the dripline still in place from last season. You are looking for visible cracks, sections that have turned brittle or stiff compared to when they were installed, and any gnaw marks from rodents that found the tubing over winter. The spots that need the most attention are the emitter insertion points on 1/4-inch dripline. Those points take repeated stress from pressure cycles across a full season, and they are usually the first place to show cracking after hard cold.
If you left the dripline in the beds without storage through Zone 6 conditions or colder, run your fingers along those insertion points. A small crack there will not always appear as an obvious split in the tubing. What it often looks like is a patch of soil that stays wet directly under the line rather than at the emitter itself, which can be mistaken for a system that is working but watering unevenly. Replacing a short cracked section now costs almost nothing. Diagnosing the same problem in May with transplants in the bed costs time and disturbed roots.
Field Note: In beds that stayed outside through a hard freeze, I also check the mainline at any fittings left assembled over winter. Barbed tee and elbow connections usually hold fine, but a quick tug on each fitting before pressurizing catches any that unseated during the cold. A fitting that comes off in your hand during inspection is better than one that blows loose during the first run.
Step 2: Replace the Rubber Washer in Every Threaded Connection
This is the cheapest step on the startup list and the one most gardeners skip entirely. The rubber washer inside a threaded head assembly connection compresses, dries out, and stiffens over a winter of sitting disconnected at the hose bib. A washer that sealed cleanly last September will often start weeping on first pressurization in March. DripDepot recommends replacing head assembly rubber washers annually, and the start of season is the natural time to do it.
The 3/4-inch size covers most standard hose-thread connections in the head assembly. The swap itself takes about two minutes per connection. Unscrew the fitting, pull the old washer out, seat the new one, hand-tighten and then a quarter turn more with pliers. Do this before reconnecting anything to the hose bib, not after you have already found a weeping connection with the system running and pressure up.
If you are not sure whether you swapped washers at shutdown last fall, replace them now regardless. The cost is negligible. The alternative is chasing a slow drip at the pressure regulator that may not surface as an obvious problem until the fitting has been running wet long enough to corrode the threads on a brass component.

These heavy-duty rubber washers fit all standard three-quarter inch garden hose fittings and measure 25mm outside diameter, 16mm inside diameter, and 3mm thick. Built to hold up in all weather conditions for reliable, leak-free hose connections.
Check On AmazonIf you click this link and buy, we earn a commission at no additional cost to you.
Step 3: Put Fresh Batteries in the Timer
Cold weather drains batteries faster than normal use, and a battery that sat in a timer through a hard winter may show a partial or even full charge on the display without having enough consistent output to run the timer reliably through a full season. DripWorks confirms that freezing temperatures accelerate drain in digital hose-end timers. Both Orbit and Rain Bird recommend replacing timer batteries at spring startup regardless of what the display shows. That recommendation exists because the display reading and the actual battery capacity are not the same thing after a winter of cold storage.
A digital timer that fires inconsistently because of a marginal battery does not fail dramatically. It misses a cycle here, shortens a run there, and the first sign is usually a zone that seems drier than expected without an obvious cause. By the time the pattern becomes clear, it is mid-June and the timer has been unreliable for weeks. Putting in fresh batteries at startup takes less than two minutes and eliminates an entire category of mid-season watering problems before they start.
Note: Keep a spare set of batteries within reach of the hose bib throughout the season. A timer that fails in a July heat wave has a short window before it shows up as wilted plants.
After replacing the batteries, confirm that the schedule survived the swap. Some timers lose the saved program on a battery change. Verify the run days, start times, and run duration before moving on. You will be adjusting run time in Step 6 anyway, so this is a good moment to check the full program.

This battery-powered hose timer converts any standard faucet into an automatic single-zone watering system with programmable schedules and adjustable watering durations. The clear LCD display makes programming straightforward, and a built-in rain delay feature pauses irrigation automatically during wet weather. Designed for outdoor durability and water-resistant construction, it backs its reliability with a six-year limited warranty.
Check On AmazonIf you click this link and buy, we earn a commission at no additional cost to you.
Step 4: Flush the Lines Before Capping
Once the head assembly is reconnected with fresh washers and the timer has new batteries, do not cap the dripline ends yet. Leave the end caps off, open the system, and run it for two to three minutes with the ends open. Whatever settled into the lines over a dormant season needs to come out the ends before you close the system and send debris toward the emitters.
Debris inside a dripline after winter is not always visible from outside the tubing. Fine soil particles, grit, algae residue, and mineral deposits from the shutdown at the end of last season sit in the line and move forward on first pressurization. UGA Extension recommends flushing before closing the system specifically to prevent that debris from reaching and clogging emitters. Flushing at startup moves it out the open ends instead. On a 25- to 50-foot run, two minutes is usually enough. On longer runs, go three. Once you see clear flow from each open end, cap the lines and move to the pressurized walkthrough.
This step also confirms that the mainline and dripline connections are holding pressure before you do the full walkthrough. If a fitting was not seated properly during reconnection, you will know it here, when the ends are still open and pressure is lower, rather than during the walkthrough with full system pressure up.
Step 5: Pressurize and Walk Every Bed
After flushing and capping, run a full timed cycle and walk every bed while the system is under pressure. This is where most of the real startup findings happen. You are checking three things simultaneously:
- Emitter flow: each emitter should drip or weep at a steady, visible rate. Misting or spraying means pressure at that point is too high or the emitter is damaged. No flow at all points to a clog, a kink in the supply tubing, or a crack upstream that is diverting water before it reaches the emitter.
- Fittings: a slow drip at a barbed tee, elbow, or connector means the tubing did not seat fully over the barb, or that the tubing has softened slightly and pulled back. Push the tubing on more firmly. If it keeps pulling loose, cutting a fresh end on the tubing and reseating it usually solves the problem more reliably than trying to clamp the existing connection.
- Goof plugs: any goof plug that seeps water under pressure needs to be pushed in more firmly or replaced if the hole has widened from a previous emitter removal.
Walk slowly enough to actually watch each emitter. The one near the far corner of the bed that is barely flowing will not announce itself. Pressure also reveals damage that the visual inspection in Step 1 missed. A hairline crack in the tubing that shows nothing at rest will weep noticeably once the line is at operating pressure. I find that people who do a quick pressurization check and then go inside catch maybe half the problems a proper walkthrough turns up.
Field Note: On a setup with more than three or four beds, I note problems by location while I walk rather than trying to remember them afterward. A quick sketch of the bed layout with marks at the problem spots takes 30 seconds and means I do not spend 20 minutes trying to relocate a leaking fitting I saw during the walkthrough but cannot find again.
Fix every problem before planting. A fitting swap or a short section replacement in an empty bed takes five minutes. The same repair around established tomato roots in June is a different job entirely.

This assortment of UV-resistant, high-impact ABS fittings covers tee, elbow, coupling, and plug configurations for quarter-inch drip tubing. Precisely angled barbs grip tubing firmly to minimize leaks, and the fittings are compatible with quarter-inch blank distribution and emitter tubing from Orbit, Hydro-Rain, and other major brands.
Check On AmazonIf you click this link and buy, we earn a commission at no additional cost to you.
Step 6: Adjust the Schedule Before the Season Starts
The last step most gardeners forget is also the one that causes the most immediate plant damage. Whatever schedule was running last August was calibrated to peak summer demand: full canopy, high evapotranspiration, and heat stress on actively fruiting plants. Restarting drip irrigation after winter with that same schedule intact will overwater cool-season crops and newly transplanted starts, especially in raised bed mixes with good drainage that do not hold water the way heavier in-ground soil does.
Spring watering for most raised beds should start at roughly 50 to 65 percent of mid-summer run time. A 4×8 bed of recently transplanted tomato and pepper starts in late April does not need the same daily minutes as a full canopy in July heat. Reduce the timer run time now, before the beds are planted, and plan to increase it in stages as temperatures rise, plants size up, and the soil dries more quickly between cycles. The biggest spring overwatering errors I see happen when someone resets the timer, leaves the summer schedule in place, and assumes the plants will signal a problem. Cool-season crops in a well-amended raised bed mix can look perfectly healthy for a week before showing signs of root saturation.
For a full breakdown of how to adjust drip run time through the season as conditions change, the raised bed drip irrigation maintenance and seasonal scheduling section walks through the progression from spring through fall in detail.
Final Thoughts: Fifteen Minutes Now, Fewer Problems All Season
A drip system that skips spring startup inspection usually works for a while. The trouble is that “a while” tends to end in July when the heat arrives and the plants are fully dependent on the system. A cracked emitter insertion point that weeps slowly in April becomes a dry zone in August when run times increase. A washer that seals 90 percent in spring can be fully failing by midsummer. Fresh batteries and a corrected schedule take less than five minutes of the startup window and eliminate entire categories of problems before they start.
Run through these six steps each spring as part of the spring startup routine for your raised bed drip system: inspect before connecting, swap the washers, replace the batteries, flush before capping, walk under pressure, and reset the schedule for spring conditions. Each step is quick on its own. Together they cover the full range of winter damage that shows up on raised bed drip systems in the first weeks of the growing season. For a broader look at how these startup tasks fit into the full-year maintenance cycle, the raised bed drip irrigation setup and care overview covers the complete picture from installation through seasonal upkeep.

This multi-function kit connects 1/2 inch drip tubing to any 3/4 inch male threaded faucet or garden hose, helping ensure your drip irrigation system runs properly. It includes a backflow preventer, a 25 PSI pressure regulator, and a 150 mesh filter, along with a compression fitting that creates a leak-proof seal to 1/2 inch tubing. Built from UV and chemical-resistant materials for long-lasting durability, the kit can also be paired with a compatible Rain Bird hose-end timer for automated watering.
Check On AmazonIf you click this link and buy, we earn a commission at no additional cost to you.
FAQs
💧 What should I check on my raised bed drip system before spring planting?
Inspect the dripline for cracks and brittle emitter insertion points, replace the rubber washers in every threaded head assembly connection, put fresh batteries in the timer, flush the lines with end caps off for two to three minutes, then pressurize and walk every bed while the system is running. This sequence catches the most common winter damage before the season depends on the system.
🔋 Do I really need to replace timer batteries every spring?
Yes. Batteries left in a digital hose-end timer through a cold winter lose charge from freezing temperatures even when the display still shows partial bars. A marginal battery tends to run the timer inconsistently rather than failing outright, which makes the problem hard to diagnose until cycles have already been missed. Replacing them at spring startup takes two minutes and removes a source of mid-season watering failures entirely.
🚿 How do I flush raised bed drip lines in the spring?
Reconnect the head assembly, leave the end caps off the dripline, and run the system for two to three minutes. Water moving through the open ends carries out debris, grit, and mineral deposits that settled in the lines over the dormant season. Once the flow runs clear from each open end, cap the lines and run a normal pressurized cycle.
🌱 Should I change my drip schedule between spring and summer?
Yes. Spring run times should be roughly 50 to 65 percent of peak summer settings. Cool-season crops and newly transplanted starts need less water than a full summer canopy in high heat. Start at the lower setting and increase in stages as temperatures rise and plants mature, rather than running the previous summer schedule from the first day of the season.
🔩 How do I know if a drip emitter stopped working or is just clogged?
Run the system and watch the emitter directly while nearby emitters are also running. If surrounding emitters are flowing normally and one shows no drip or very reduced output, the problem is usually that emitter. Remove it, rinse it under tap pressure, and reinstall. If it still does not flow, replace it. An emitter that mists or sprays rather than drips is a different issue: that usually points to excess pressure at that section of the line.
❄️ What winter damage should I look for when restarting a raised bed drip system?
Focus on emitter insertion points in the dripline, which can crack from freeze-thaw stress; threaded connections at the head assembly, where rubber washers harden and lose their seal; and any compression fittings or barbed connections in the mainline that may have unseated if the line was left under tension during a freeze. The pressurized walkthrough in Step 5 will reveal anything the visual inspection missed.