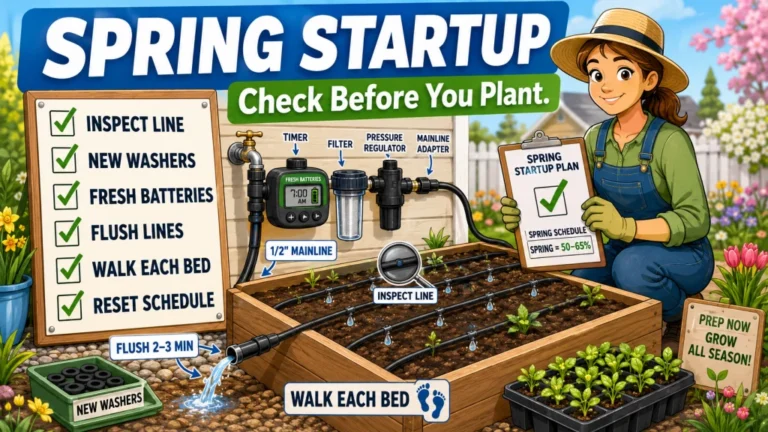
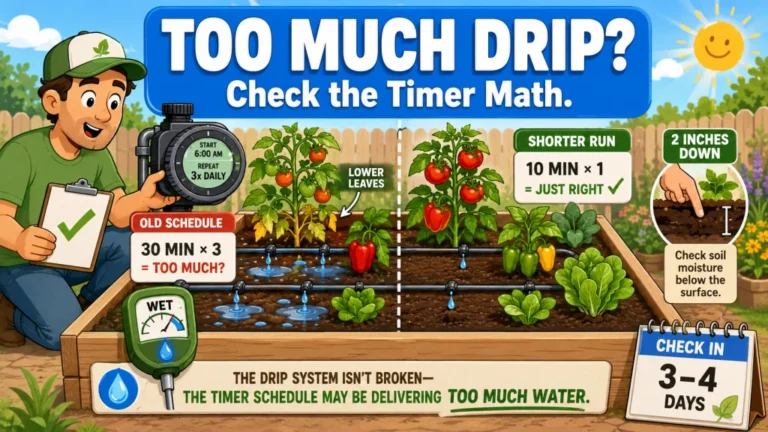
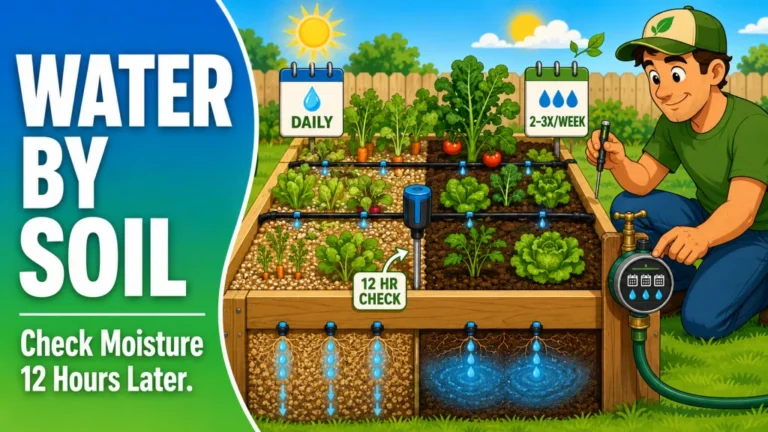
Clogging is the most common reason drip emitters stop working in raised bed gardens, but before you pull anything apart, the pattern of which emitters are failing tells you whether you actually have a clog or a pressure problem. Those two issues need different fixes. This article covers how to confirm clogging, identify which type of clog you are dealing with, clean it using the right method, and prevent it from coming back next season.
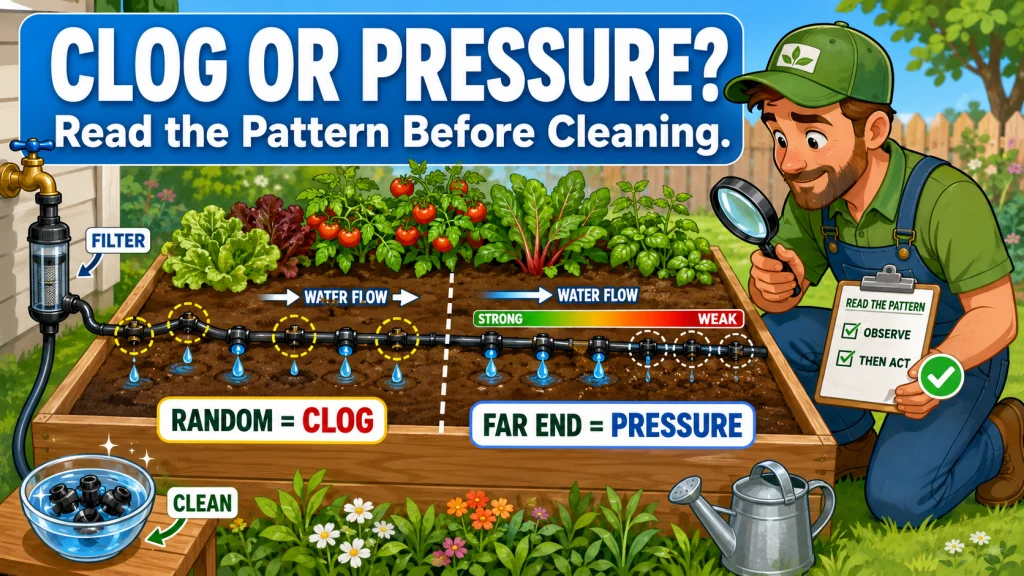
The Pattern Test: Is It Really a Clog?
When a drip emitter stops dripping in a raised bed, the instinct is to pull it out and clean it. That works if clogging is actually the cause. But a drip irrigation emitter clogged in a raised bed behaves differently from an emitter that is starved for pressure, and the pattern across your system will tell you which problem you have before you touch a single fitting.
Here is the test I use. Walk the full length of your drip line and check which emitters are flowing normally and which are dry or weak. If the problem emitters are clustered toward the far end of the line while the emitters near the water source look fine, that is a pressure issue. The water is losing force before it gets there. If the dry or slow emitters are scattered randomly across the whole system (one close to the hose bib, two in the middle, one at the end) with no pattern tied to position along the line, clogging is almost always the answer. Random, distributed failures across a bed are the signature of blocked emitters, not a system that is running short on pressure.
This distinction matters because the fix is completely different. A pressure problem calls for adjusting line length, mainline diameter, or regulator setting. Cleaning a clogged emitter will not help if the real problem is that the line is too long for the flow rate. Get the diagnosis right first, and the repair is straightforward from there.
Field Note: The most common misread I see is a gardener replacing the emitters at the far end of a long run, then wondering why the new ones are also barely dripping. The emitters were never the problem. The line was just too long for the flow rate. Check the pattern across the whole system before pulling anything.

This pressure regulator maintains an optimal 25 PSI to keep drip lines and emitters running at consistent flow, with a 20 gallon per minute capacity to support larger systems. It connects to any 3/4 inch male threaded faucet, garden hose, or component for easy setup. Built from UV and chemical-resistant materials, it offers durable, reliable performance season after season, and pairs well with a compatible Rain Bird hose-end timer for automated watering.
Check On AmazonIf you click this link and buy, we earn a commission at no additional cost to you.
Three Types of Clogs and How to Spot Each One
Not all emitter clogs come from the same source, and each type responds to a different cleaning method. Pulling an emitter and rinsing it under the tap will clear loose sediment but does almost nothing for mineral scale. Knowing which type you are dealing with before you start cleaning saves time and avoids the frustration of reinstalling an emitter that is still partially blocked.
Mineral Scale
Mineral scale is calcium and magnesium from hard water, and it is the most stubborn clog type. It builds up gradually inside the emitter body, narrowing the flow path until the emitter drips unevenly or stops entirely. The sign is a white or gray crusty residue on or around the emitter opening. In hard water areas this can start showing up within the first growing season. If your tap water leaves white deposits on fixtures and your emitters are developing the same buildup, mineral scale is what you are dealing with.
Sediment
Sediment clogs come from particles in the water supply (sand, fine grit, organic debris) that pass through the filter and settle inside the emitter. When you remove a sediment-clogged emitter, you will usually see brown or dark particles either lodged in the opening or washed out when you rinse it. Sediment clogs are more common early in the season when lines have been sitting empty over winter, when a filter screen gets damaged, or when the filter mesh is too coarse for the local water supply.
Biological Growth
Biological clogging is less common in raised bed systems but worth recognizing. Algae or bacterial slime can grow inside drip lines that are exposed to sunlight or stay wet for extended periods. The visual clue is a green or slimy coating on the emitter after removal. This type shows up more often in systems where liquid fertilizer is run through the drip line, since organic residue inside the tubing feeds microbial growth. A system flush usually clears it, but if it keeps returning, the line itself may need to be flushed with a dilute bleach solution and rinsed thoroughly before the next run.
Warning: If you flush the line with a dilute bleach solution, do not run it while plants are in the bed. Flush with clean water for at least five minutes after the bleach rinse before resuming normal irrigation.
| Clog type | Visual sign | Common cause | Best cleaning method |
|---|---|---|---|
| Mineral scale | White or gray crust on emitter | Hard water (calcium, magnesium) | Vinegar soak 20 to 30 minutes |
| Sediment | Brown or dark particles in opening | Sand, grit, damaged filter | Physical clearing + system flush |
| Biological | Green or slimy coating | Algae, fertigation residue | Line flush, dilute bleach if recurring |
Identifying the clog type from what you see on the emitter takes about 30 seconds and tells you exactly which method to use next. Skip this step and you risk spending time on the wrong cleaning approach.
Cleaning Method 1: Physical Clearing
Physical clearing is the first thing to try on any clogged emitter. It works fastest on sediment and loose debris, costs nothing, and takes about two minutes per emitter, so it is worth doing before reaching for anything else.
Remove the emitter from the drip line. Most quarter-inch emitters pull straight out or unscrew depending on the style. Once it is out, use a paper clip, a thin wire, or a toothpick to gently push through the emitter opening and dislodge what is blocking it. Do not force it: the internal parts are small and can be damaged if you push too hard. After clearing, rinse the emitter under running water, hold it up to the light to confirm the opening looks clear, and reinstall. Run the system briefly to verify flow before moving on.
For a 4×8 raised bed with 12 to 16 emitters, physically checking each one takes under 10 minutes. I usually do a quick check at the start of each season regardless of whether any emitters appear to be failing, because a partially blocked emitter can drip at a reduced rate without looking obviously wrong, right up until the plants show dry stress in July and the cause is no longer obvious.
Cleaning Method 2: Vinegar Soak for Mineral Scale
If the emitter has white or gray buildup, physical clearing is not going to get it all. Mineral scale bonds to the plastic and needs an acid to dissolve it. White vinegar handles light to moderate buildup reliably and is safe for the emitter body.
Remove the emitters showing scale and drop them into undiluted white vinegar. Let them soak for 20 to 30 minutes. The acid breaks down the calcium and magnesium deposits without damaging the emitter. After soaking, rinse thoroughly under running water, use a paper clip to clear any loosened particles from the opening, and reinstall. For heavier buildup that vinegar alone does not fully clear, irrigation-specific cleaning chemicals are available through drip irrigation suppliers and work on more persistent deposits.
A 4×4 bed with nine emitters is easy to pull and soak in a small bowl while you do something else. A larger setup with four or five beds is more work up front, but in hard water areas I recommend building the vinegar soak into the fall shutdown routine rather than waiting for dry plants to signal a problem mid-season. Twenty minutes at the end of October is easier to manage than troubleshooting uneven coverage in July.
Note: Rinse vinegar-soaked emitters completely before reinstalling. Residual acid dripping repeatedly into a small raised bed volume can affect soil pH over time, especially in lighter mixes.

TrueFlo cleans and maintains hydroponic irrigation systems by combating scale, mineral deposits, and organic buildup across all system components including lines, emitters, reservoirs, trays, pumps, and injectors. Safe for all plants at recommended usage rates and compatible with all growing equipment. Should not be used alongside hydrogen peroxide or other oxidizing agents.
Check On AmazonIf you click this link and buy, we earn a commission at no additional cost to you.
Cleaning Method 3: System Flush for Sediment
When multiple emitters across a bed are showing sediment clogs at the same time, the problem is usually upstream. Particles are traveling through the mainline and settling into emitters gradually. Cleaning individual emitters addresses the symptom; flushing the system addresses the source before more sediment reaches more emitters.
To flush, remove or open the end caps on all your drip lines. Run the system at full pressure for two to three minutes. The water flowing out the open ends carries sediment with it. Cap the lines, run for another minute, and then check emitter flow across the bed. This is most useful at the start of the season when lines have been stored over winter, picked up debris, or when the first run of the year sends whatever settled in the tubing through to the emitters.
The flush also works as a diagnostic step. If sediment visibly comes out the end caps in volume, the filter is not catching everything. Either the screen is clogged, damaged, or the mesh is too coarse for your water supply. That points directly to the next step, which is prevention.
Prevention: Stop the Clog Before It Starts
Cleaning clogged emitters in a raised bed is not a difficult job, but it is an avoidable one. The most effective thing you can do to prevent clogging is install a quality inline filter at the head assembly, between the hose bib and the mainline, and keep it clean.
The filter washer inside a standard garden hose fitting catches large debris but is not designed to protect small-orifice emitters from fine particles. A 200-mesh inline filter, installed at the head of the system before the pressure regulator, catches the fine sand and mineral particles that actually cause emitter clogging. Once a proper filter is in place, the maintenance task shifts from troubleshooting emitters across the bed to cleaning a single filter screen, which takes under two minutes and involves no crawling through a planted bed.
How often the screen needs cleaning depends on your water source and season length. In hard water regions or where the municipal supply carries higher particle load, I check it every two to three weeks during peak growing season. In areas with cleaner water, once a month is usually enough. The screen unscrews, rinses under tap water, and goes back in. That routine is far less work than pulling emitters and soaking them.
- Install a 200-mesh inline filter at the head assembly, before the pressure regulator
- Clean the filter screen every two to three weeks in hard water areas; monthly elsewhere
- Flush the end caps at the start of each season before the first timed run
- Soak emitters in white vinegar at fall shutdown if you are in a hard water region
- After running liquid fertilizer through the line, flush with clean water for five minutes to clear organic residue
The inline filter is the most consistently overlooked component in basic raised bed drip kits. For a single 4×4 bed on clean municipal water, the filter washer that comes in the kit sometimes holds up fine. For a setup with four or five beds, a longer growing season, or hard water, a proper 200-mesh filter is what keeps the system running consistently without constant emitter work. It is a small addition to the head assembly that changes how much time you spend maintaining the rest of the system.
For more detail on building a complete approach to diagnosing raised bed drip problems, the raised bed drip irrigation troubleshooting guide covers pressure problems, timer faults, and layout issues alongside clogging. It is useful if you are still working out which type of problem you are dealing with.

This inline filter protects downstream drip components from debris using a pre-installed 200 mesh stainless steel filter element rated to catch particles as small as 75 microns. The glass-filled polypropylene body handles up to 150 psi and fits any standard three-quarter inch irrigation valve via male pipe thread connections on both ends. The cap unthreads quickly for easy filter cleaning without tools.
Check On AmazonIf you click this link and buy, we earn a commission at no additional cost to you.
After Cleaning: Confirming the Emitter Is Actually Fixed
Reinstalling a cleaned emitter and assuming it is fine is where people get tripped up. The emitter can look clear and still drip at the wrong rate, either because the clog was not fully removed or because the internal diaphragm is damaged. Two minutes of checking after reinstallation saves a lot of guessing later when the plants look uneven.
Run the system for two to three minutes after reinstalling the cleaned emitter. Then crouch down and compare its drip rate against the two emitters on either side of it. They do not need to drip in perfect sync, but the rate should be close enough that a wet spot forms at roughly the same pace beneath each one. If the cleaned emitter is still noticeably slower, or if it is dripping unevenly rather than at a steady rate, the cleaning did not fully work. Try the vinegar soak if you only did physical clearing the first time, or move to replacement if the emitter has already been soaked and cleared.
If several emitters you cleaned come back weak after just a few days, the problem is upstream. The filter is letting particles through, and the emitters are reclogging faster than any cleaning method can keep up with. At that point the fix is the filter, not the emitters.
When to Replace Instead of Clean
Most clogged emitters can be restored with one of the methods above. But not all of them. Drip emitters contain a small internal diaphragm that regulates flow. Once that diaphragm is damaged (from sustained high pressure, physical force, or long-term wear) the emitter will not flow consistently no matter how clean the opening is.
The sign of a damaged emitter is uneven or inconsistent flow after a thorough cleaning. If you have soaked the emitter, cleared the opening, reinstalled it, and it still drips noticeably slower or faster than the emitters next to it, replace it. Mismatched flow rates inside a raised bed create uneven watering. One emitter dripping at half the rate of its neighbors can produce a dry strip down part of the bed without looking obviously wrong during a quick visual check. Plants on that side will show stress before the cause is obvious.
When replacing, match the GPH rating of the original emitter: 0.5 GPH, 1 GPH, or 2 GPH depending on what the system was designed for. Mixing GPH ratings in the same line is one of the less obvious ways a raised bed ends up with uneven coverage, and it is easy to do accidentally when replacing a single emitter without checking the label.
For more context on what a well-built raised bed drip setup includes from the start (filter placement, pressure regulation, and layout basics), the raised bed drip irrigation tips guide covers the full picture before problems start.

These black-coded emitters deliver a consistent 1 gallon per hour regardless of pressure fluctuations, making them well suited for medium loam soil conditions. They attach to the end of quarter-inch feeder line or punch directly into half-inch supply tubing, and a turbulent flow design helps flush out sediment to reduce clogging over time. Ideal for individual shrubs, trees, and container plants.
Check On AmazonIf you click this link and buy, we earn a commission at no additional cost to you.
Final Thoughts: Clean the Emitter, Then Find the Cause
Cleaning a clogged drip emitter is a quick fix. Preventing the next clog is the real goal. The physical clearing and vinegar soak methods will restore most emitters in 30 minutes or less, but if you are pulling and cleaning emitters every few weeks through the season, something upstream is not right: usually a filter that is missing, inadequate for the water quality, or not being cleaned often enough.
Start with the pattern test to confirm you are actually dealing with a clog. Identify the type from what you see on the emitter. Use the right cleaning method. Then trace the clog back to its source and address it: add or upgrade the inline filter, adjust the cleaning schedule, or build an emitter soak into your fall shutdown. That sequence turns a recurring maintenance problem into a one-time setup correction.

This portable kit packs 100 feet of self-dispensing quarter-inch blank distribution tubing alongside 40 pressure-compensating emitters in three flow rates, 0.5, 1.0, and 2.0 gallons per hour, plus 20 barbed couplers, 20 barbed tees, 10 tubing stakes with bug caps, and 10 tubing plugs. Rain Bird's patented emitter installation and removal tool is included, making it easy to punch in or swap out emitters and quarter-inch fittings. Everything stores in a compact plastic pouch with individually organized bags.
Check On AmazonIf you click this link and buy, we earn a commission at no additional cost to you.
FAQs
💧 How do I know if my drip emitter is clogged or if I have a pressure problem?
Check the pattern across the system. If dry or weak emitters are clustered toward the far end of the line while emitters near the water source flow normally, the issue is pressure, not clogging. If dry or slow emitters are scattered randomly across the whole bed with no pattern tied to their position along the line, clogging is the most likely cause.
🌿 Can I unclog a drip emitter without removing it from the line?
A system flush (running the system with end caps open for two to three minutes) clears loose sediment from the line before it reaches the emitters. But for an emitter that is already blocked, removing it gives a better result. You can see what type of clog it is, clear the opening directly, and confirm it is actually flowing before reinstalling.
🧱 Why do my drip emitters keep clogging even after I clean them?
Recurring clogs usually mean the filter at the head assembly is not adequate for your water quality. If you are relying on the filter washer inside the hose fitting, upgrade to a dedicated 200-mesh inline filter installed before the pressure regulator. In hard water areas, periodic vinegar soaks will still be part of the routine, but the frequency should drop significantly once the filter is doing its job.
⏱️ How long should I soak a drip emitter in vinegar to clear mineral scale?
20 to 30 minutes in undiluted white vinegar clears light to moderate mineral buildup. For heavier scale, extend the soak to 45 minutes. After soaking, rinse thoroughly and use a paper clip to clear any loosened particles before reinstalling. If mineral scale returns within a few weeks, the filter at the head assembly needs attention.
🔍 What does a clogged drip emitter look like when I pull it out?
Mineral scale shows as white or gray crusty buildup on the emitter body and around the opening. Sediment clogs show as brown or dark particles in or near the opening. Biological clogging from algae appears as a green or slimy coating. The appearance tells you which cleaning method to use: vinegar for mineral scale, physical clearing and flushing for sediment, and a line flush for biological growth.
🛠️ When should I replace a drip emitter instead of cleaning it?
Replace an emitter if it still flows unevenly or noticeably slower than the emitters around it after a thorough cleaning. Inconsistent flow after cleaning usually means the internal diaphragm is damaged. When replacing, match the GPH rating of the original emitter to keep watering consistent across the bed.
🌱 Does keeping emitters close to the soil surface make clogging worse?
It can. Emitter heads sitting on or below the soil surface are more likely to pick up soil particles, compost, and organic debris through the opening. Keeping emitter heads slightly above the soil surface and away from heavy mulch reduces this type of debris entry. The main source of clogging is still the water supply, but position matters in beds with heavy top-dressing.