Adding drip irrigation to an existing raised bed is harder once the bed is full of established plants, but it does not require pulling anything out of the ground. The trick is routing the mainline over the top of the frame instead of through the soil, then working the dripline around root zones instead of through them. The easiest window is right after harvest when the bed is empty, but mid-season retrofits work fine too if you respect lane spacing and slow down around the stems. This guide walks through the entry point, the dripline routing, the timing tradeoffs, and the one mistake that causes more damage than just hand watering for the rest of the season.
The Worst Time to Install Drip Irrigation Is Mid-July With Full-Grown Tomatoes
The worst time to start adding drip irrigation to an existing raised bed is mid-July, with tomato vines sprawled over the frame and root systems that have already claimed every inch of soil. The second worst time is any time you go in without a plan for staying off the roots. I have watched homeowners try to thread a mainline straight across a packed bed because that was the shortest path, and it almost always means digging a trench through soil that a pepper plant has been living in for two months. That is the wrong move, and it is avoidable.
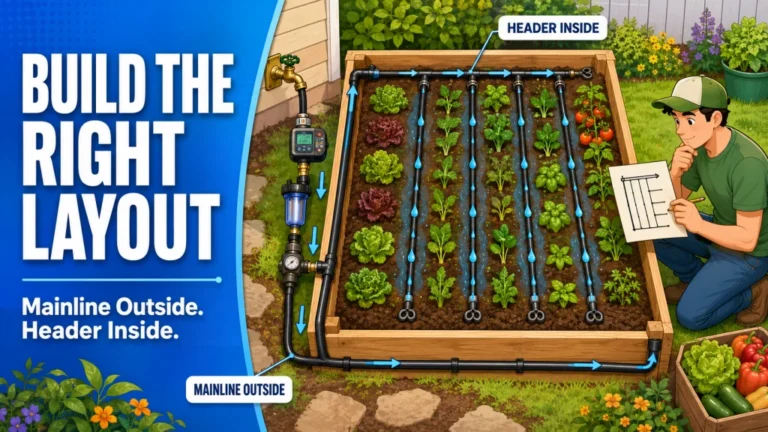
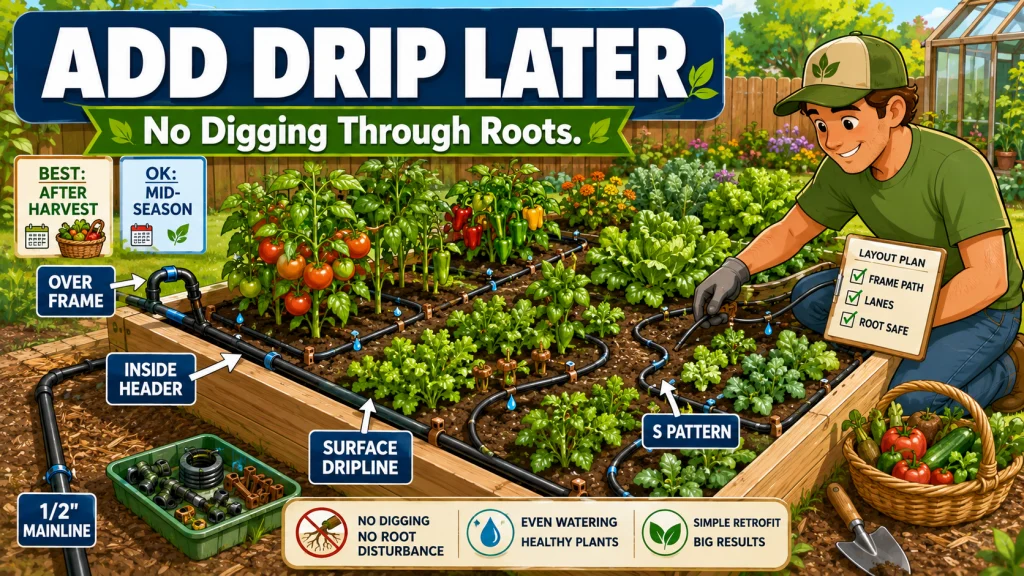
The retrofit approach that actually works treats the bed frame as the path, not the soil. The mainline rides along the outside edge and over the top of the frame, the header runs along the inside perimeter, and only the dripline itself goes in close to the plants, laid on the surface instead of buried. Once you see it done this way, the whole job stops feeling like surgery and starts feeling like routine plumbing around furniture that happens to be alive.
Getting the Mainline Into a Planted Bed Without Touching the Soil
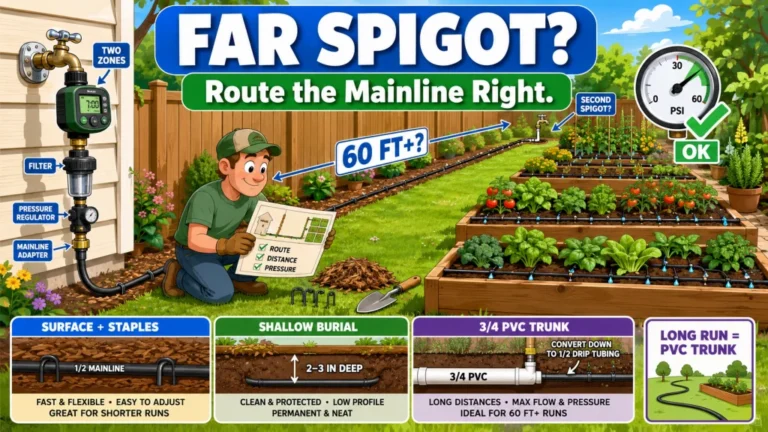
Start with the half-inch mainline, because it sets up everything else. Since the bed frame is already built and full, the mainline cannot go underground the way it might during new construction. It enters at one corner through a riser, rises up and over the top edge of the frame, and bends down the inside face to become the header along the short end of the bed. None of that requires moving a single shovel of soil inside the planting area.
This is the same basic entry logic covered in a broader walkthrough of connecting drip irrigation to a raised bed, but a planted bed adds one constraint: you are working around live stems while you fit the corner riser, so take it slow and check clearance before you tighten any fittings. If the bed already has a trellis, cage, or stake in that corner, move the entry point to the next clearest corner instead of forcing the riser past an obstacle. A header that has to detour around a tomato cage is still a clean install. A header that snaps a stem is not.
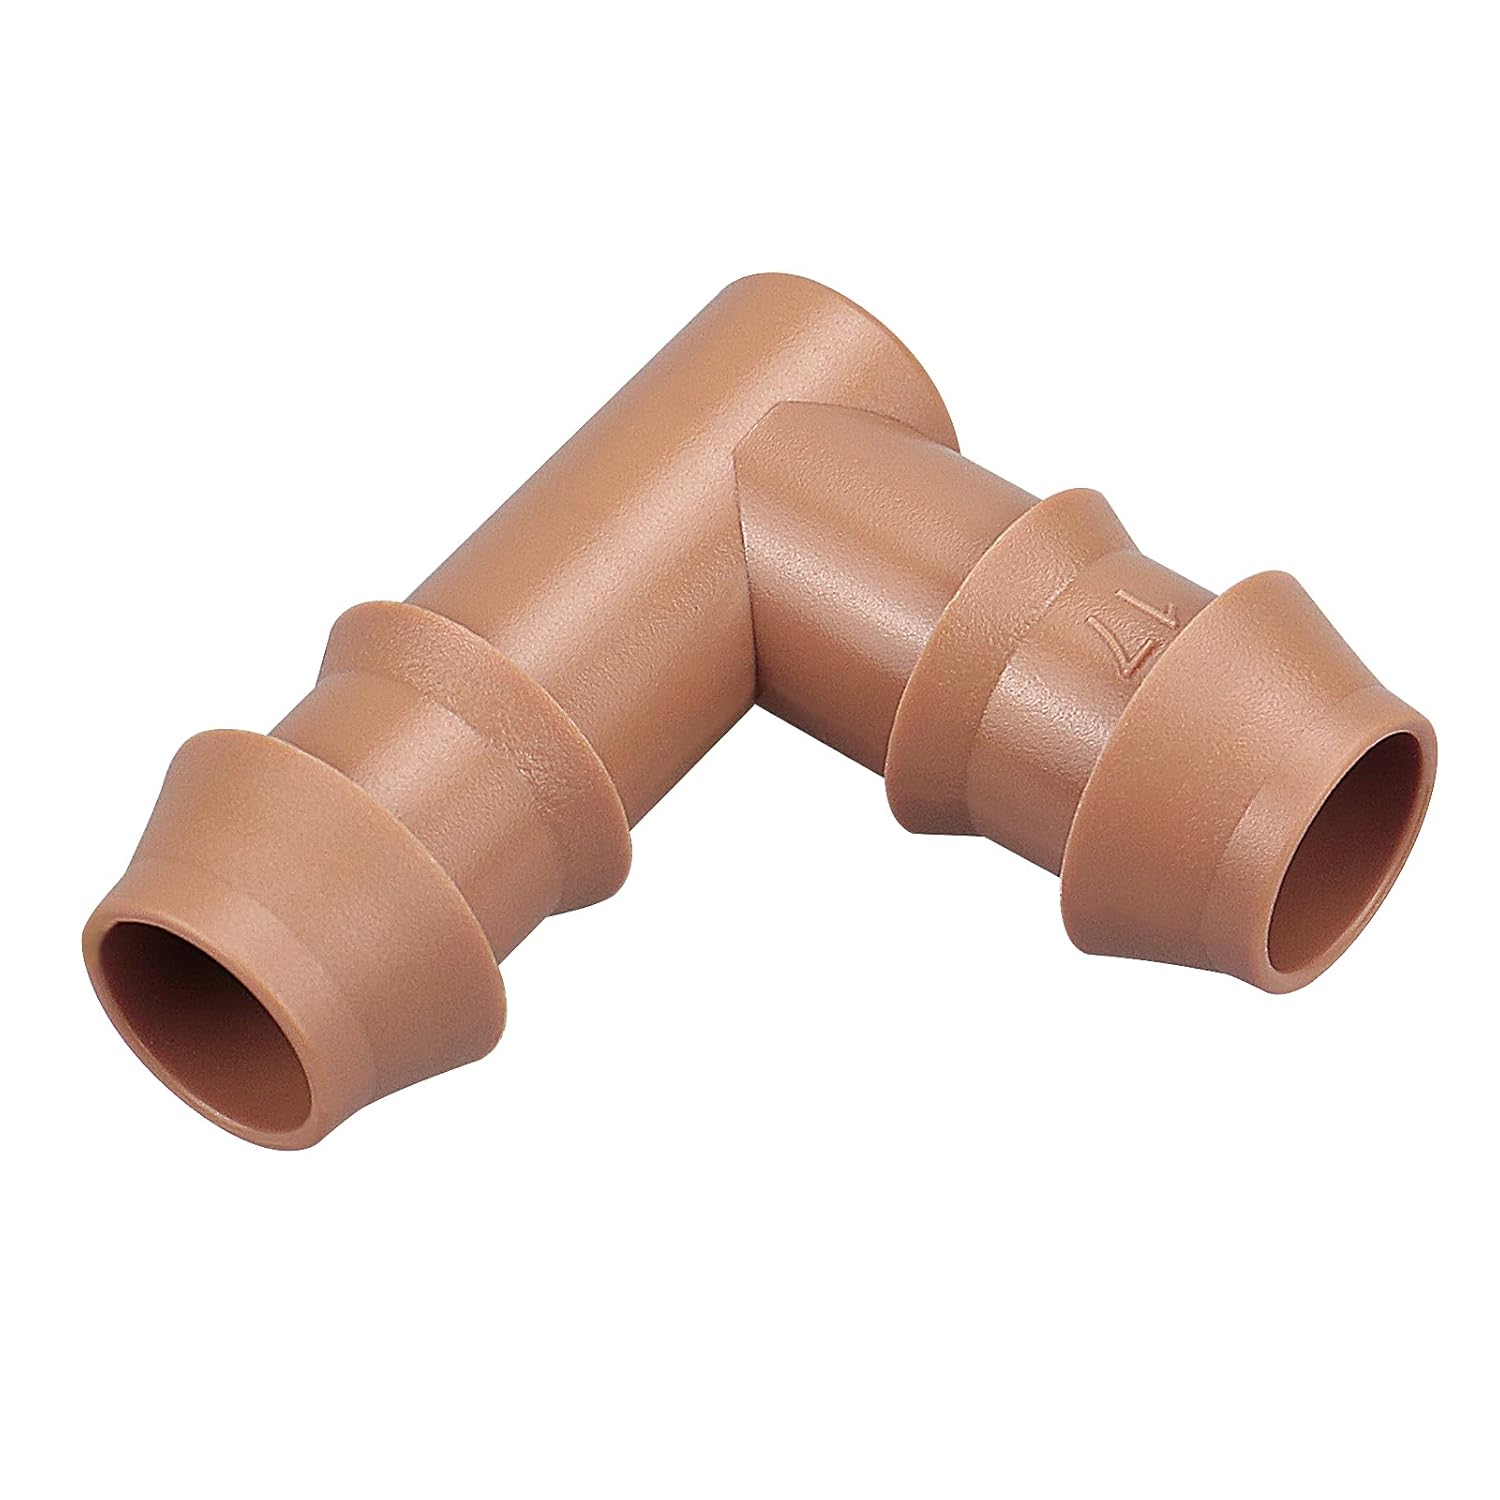
This pack of 21 barbed elbow fittings creates 90-degree turns in half-inch drip tubing with an inside diameter of 0.560 to 0.600 inches, compatible with Rain Bird, Orbit, Dig, and Toro tubing. Barbed ends push in without glue, tools, or clamps for a secure leak-proof connection. Made from durable plastic for long-term use in raised beds, greenhouses, and agricultural drip systems.
Check On AmazonIf you click this link and buy, we earn a commission at no additional cost to you.
Installing Dripline Between Plants That Are Already in the Ground
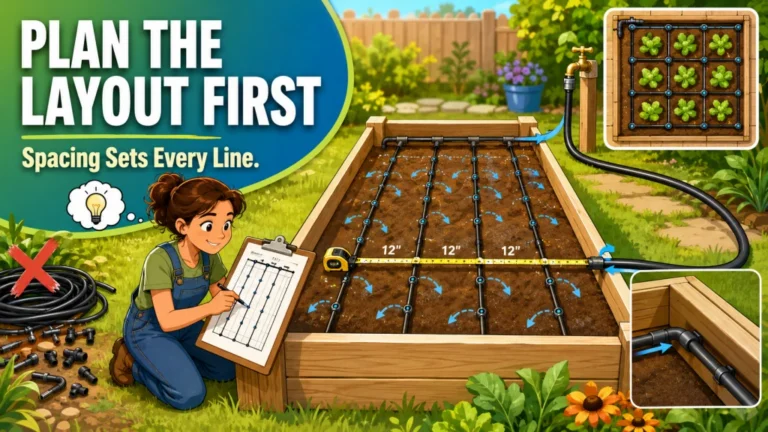
Once the header is in place, the quarter-inch dripline slides between the established plants along the soil surface, not under it. Pin it down every 12 to 18 inches with landscape stakes so it stays close to the soil and does not float up when the bed gets watered or walked near. Go slowly as you route around the base of each plant. Established vegetable roots typically extend 6 to 12 inches out from the stem, and that root mass does not need to be moved. It only needs to be avoided.
A 4×8 bed with tomatoes and peppers gives you more room to maneuver than a 4×4 bed packed with lettuce, simply because the spacing between plants is wider. In the looser bed, I usually run dripline in fairly straight lines just inside the drip zone of each plant. In the tighter bed, straight lines start fighting with roots almost immediately, and that is where the routing approach has to change.
- Confirm the frame is solid enough to route the mainline over the top edge instead of cutting into the soil.
- Walk the bed first and mark where root zones are dense versus where there is still open soil between plants.
- Decide whether this is a quick mid-season patch or a full install you are saving for after harvest.
- Have your landscape stakes on hand before you start laying dripline, not after the line is already loose on the surface.
- Plan the header path along the inside edge of the frame before you cut any tubing, so you are not improvising fittings mid job.
That checklist sounds basic, but skipping the first walk through the bed is the most common reason a retrofit takes twice as long as it should. You end up rerouting a line you already pinned down because you did not notice a root zone until the stake was already in the ground.

This pack of 10 two-pronged galvanized steel stakes anchors quarter-inch drip supply tubing firmly into the ground to keep emitters positioned at the root zone. Each stake measures 3.5 inches long and is made from 11-gauge galvanized steel for weather-resistant, long-term outdoor use.
Check On AmazonIf you click this link and buy, we earn a commission at no additional cost to you.
When to Retrofit: Some Windows Are Far Easier Than Others
Timing changes everything about how disruptive this job feels. The easiest window by far is right after harvest, before the next planting starts, when the bed is empty and you can route everything without thinking about a single root. The second easiest window is early in the season while plants are still small and there is open space between them. After that, things get more situational.
Mid-season retrofits are still realistic in a bed planted in rows, because the lanes between rows give you a clean path for dripline that never has to cross a root zone. A square foot garden bed is the hardest case, because the planting is dense in every direction and there are no real lanes left by midsummer. The table below is the rough order I would go through when deciding how to approach a given bed.
| Retrofit Window | Root Disruption Risk | Routing Method That Works Best |
|---|---|---|
| Just after harvest, bed empty | None | Lay out the mainline, header, and dripline freely before replanting |
| Early season, plants still small | Low | Route lines through the open gaps between young seedlings |
| Mid-season, row crop layout | Moderate | Run dripline down the lanes between rows, parallel to the plants |
| Mid-season, dense square foot bed | Highest | S pattern dripline at the soil surface, avoiding straight runs through roots |
None of these windows require pulling plants out of the ground. They just change how much patience and how much creative routing the job takes. A row crop bed in July is a Tuesday afternoon project. A dense square foot bed in July is a slower job, and it is the one where the next section actually matters.
Retrofitting a Square Foot Bed Without Fighting Every Root
A square foot garden is the densest planting style I deal with, and it is also the hardest bed to retrofit mid-season because plant roots overlap in every direction instead of leaving a predictable gap. Trying to force a straight dripline run through that kind of bed usually means crossing several root zones no matter which way you angle it.
The fix is to stop thinking in straight lines. Run the quarter-inch dripline in an S pattern along the soil surface instead, weaving it between plants the way water would naturally find a path if it were running across the surface on its own. The S pattern looks less tidy on day one than a row of parallel lines, but it is built to bend around root clusters instead of plowing through them, and it holds up better once the canopy fills in and you can no longer see the soil to make adjustments.
What Not to Do: Pulling Plants to Route Line Underneath
The mistake I see most often is someone deciding to lift an established plant just far enough to slide a dripline underneath it, with the idea of setting it back down afterward. This is never actually necessary, and it almost always causes more harm than it solves. Mid-season root disturbance sets a plant back further than a few weeks of careful hand watering ever would.
If a section of the bed is too dense to route around cleanly right now, that is a sign to either wait for the season-end retrofit or accept hand watering for that one section until harvest. Both of those options leave the plant alone. Lifting it out of the ground to make room for tubing does not.
The Season-End Retrofit: Why It Is the Easiest Option on the List
If you have any flexibility on timing, the season-end retrofit is the cleanest path there is. Once the last harvest is in and you pull the spent plant material, the bed is empty and behaves exactly like new construction. Route the mainline and header while there is nothing to avoid, install the dripline in whatever spacing and pattern actually fits the bed dimensions, cap the ends, and leave the whole system in place through winter.
When the next planting season starts, the drip system is already sitting there waiting, and you are planting into a bed that has full irrigation from day one instead of patching something together once the seedlings are already in the ground. This is the same end state covered in a broader look at setting up drip irrigation for a raised bed, just arrived at through a retrofit instead of a fresh build. If you are choosing between fighting a packed bed in July or waiting six weeks for harvest, the waiting almost always pays off in less frustration.

This kit includes everything needed to water a raised bed up to 4 by 8 feet, with professional-grade components built for repeated seasonal use. It features 35 feet of emitter tubing with 70 built-in, pressure-compensating emitters spaced every 6 inches for even watering near the roots, plus 25 feet of easy-to-handle 1/4 inch distribution tubing. This low-volume design can save up to 80% on water while supporting healthier plants and better yields. Installation is straightforward thanks to an illustrated manual covering multiple layout options, and the system can be automated with a compatible Rain Bird hose-end timer sold separately.
Check On AmazonIf you click this link and buy, we earn a commission at no additional cost to you.
Check the System Before You Walk Away
Once the dripline is pinned down and the caps are on, do not treat the job as finished yet. Turn the water on and let it run for a few minutes before you do any final tidying or cover the lines with mulch. This is the point where small mistakes are still easy to fix and almost impossible to spot once everything is buried or hidden under foliage.
Walk the bed while the water is running and look at how the line is actually sitting against the plants. A dripline that got pulled too tight while you were routing it around a root zone can end up pressing against a stem, and that is worth catching now rather than a month from now. Check for any section that popped up off the soil surface instead of lying flat, since a raised section waters the air more than the root zone underneath it. Leave the end caps somewhere you can reach without crawling through the plants, because you will want to flush the line again later in the season.
After the first real watering cycle, walk the bed again once the soil has had time to absorb it and look for dry patches instead of digging around to check. A dry strip next to a plant usually means a stake shifted or a line drifted slightly out of place, and that is a five-minute fix while the routing is still fresh in your mind. Catching it now is a lot easier than tracing the problem back weeks later once the canopy has filled in over the lines.

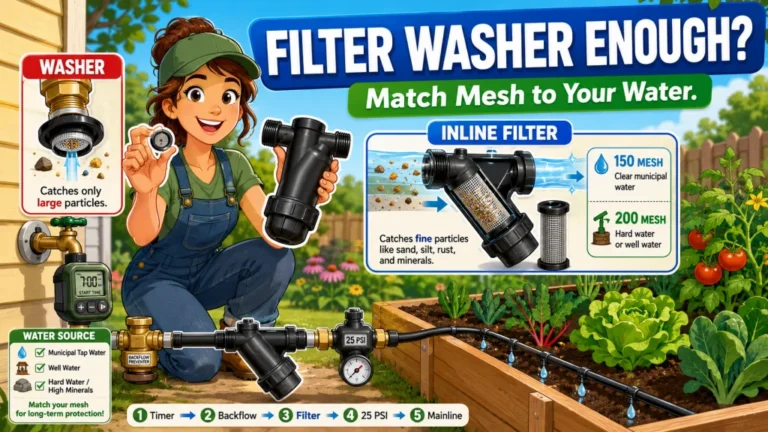
This inline filter protects downstream drip components from debris using a pre-installed 200 mesh stainless steel filter element rated to catch particles as small as 75 microns. The glass-filled polypropylene body handles up to 150 psi and fits any standard three-quarter inch irrigation valve via male pipe thread connections on both ends. The cap unthreads quickly for easy filter cleaning without tools.
Check On AmazonIf you click this link and buy, we earn a commission at no additional cost to you.
Final Thoughts: Work With the Roots, Not Around a Deadline
Adding drip irrigation to a bed that is already planted is a different job than building it into a new bed, but it is not a harder job once you stop trying to force straight lines through root zones. Route the mainline over the frame, keep the dripline on the soil surface, and let the planting density decide whether you use a straight run, a lane-based route, or an S pattern. If the bed is too packed to do cleanly right now, hand watering for a few more weeks until harvest is a better trade than disturbing roots that are already established.
The gardeners who get the smoothest results are the ones who pick their window instead of forcing the install on a random Saturday because that is when they had time. A few weeks of patience often saves an afternoon of frustration and a sulking plant.

This drip tubing works like a soaker hose but without the clogging or maintenance, thanks to pressure-compensating emitters that water evenly from one end of the line to the other. Built-in 0.8 gallon per hour emitters are spaced 12 inches apart with dual outlets positioned 180 degrees apart for even coverage. The tubing measures 0.25 inches outside diameter and connects with 1/4 inch barbed fittings, operating across a wide pressure range of 8.5 to 60 psi. Its micro-porous construction creates a tight, reliable connection that holds up over time.
Check On AmazonIf you click this link and buy, we earn a commission at no additional cost to you.
FAQs
💧 Can I add drip irrigation to a raised bed that is already planted?
Yes. Route the mainline over the top of the frame instead of through the soil, then lay dripline on the surface around the existing plants instead of underground.
🌱 Will installing drip irrigation damage my established plant roots?
Not if you avoid digging through root zones. Established vegetable roots usually extend 6 to 12 inches from the stem, and dripline laid on the surface around that zone does not disturb them.
⏱️ What is the best time of year to retrofit drip irrigation into a raised bed?
Right after harvest, while the bed is empty, is the easiest window. Early season with small plants is the second easiest. Mid-season works too in row crop layouts with clear lanes between plants.
🧩 How do I run dripline through a packed square foot garden bed?
Use an S pattern along the soil surface instead of straight parallel lines. It bends around overlapping root clusters instead of forcing a path directly through them.
🚿 Do I need to remove plants to add a drip mainline?
No. The mainline enters through a corner riser and runs over the top of the frame, then down the inside edge as the header. None of that requires lifting a plant out of the ground.
❄️ Should I wait until after harvest to install drip irrigation?
If your schedule allows it, waiting until after harvest gives you an empty bed and the cleanest possible install. If you need water sooner, a mid-season retrofit around the roots is still realistic, just slower.