Tomatoes are the crop I get the most drip irrigation questions about, and most of those questions come from the same root problem: the system was set up like a generic vegetable bed instead of a bed built around what a fruiting tomato plant actually needs. In this piece I’ll walk through emitter placement for indeterminate tomatoes, the flow rate difference that matters once plants start fruiting, and why dry corners show up in tomato beds more than in beds full of greens. None of this requires tearing out your current setup, but it does require checking a few specifics most kits don’t explain.
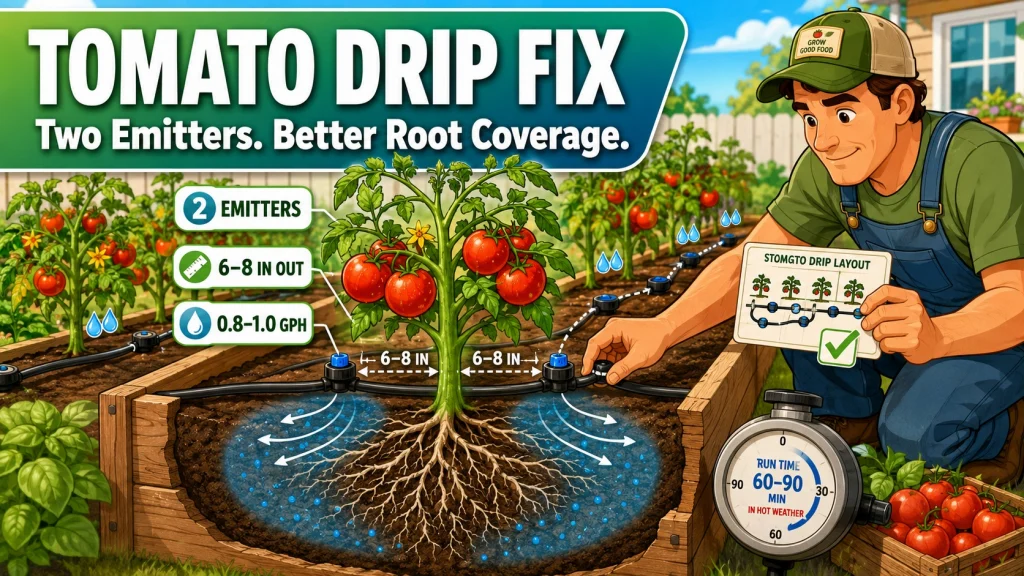
Why Drip Irrigation for Tomatoes in a Raised Bed Works Differently Than for Other Crops
Tomatoes benefit from raised bed drip irrigation more than almost any crop I install it for, and there’s a real reason for that beyond “tomatoes like consistent water.” Tomato foliage is highly prone to fungal disease when it stays wet, and blossom end rot is often triggered by inconsistent soil moisture, since those moisture swings affect how well calcium moves into the fruit, not just whether calcium is present in the soil. UGA Extension’s guidance on vegetable irrigation backs this up: overhead watering is a recognized driver of foliar disease in vegetable gardens, and keeping water at the root zone instead of on the leaves is one of the more reliable ways to cut that risk down.
That’s the case for drip over hand watering or a sprinkler attachment in general. But once you accept that tomatoes need root-zone watering, the next question is whether your current emitter setup actually delivers it the way a tomato plant needs, or the way a packet of lettuce seedlings needs. Those are not the same requirement, and that’s where I see the bigger gap.
Emitter Placement for Indeterminate Tomatoes
An indeterminate tomato plant is going to fill out to a 2 to 4 foot canopy by midsummer, and the root system spreads to match that. A single emitter dropped right at the base of the stem made sense back when the plant was a transplant, but it stops being enough once the roots push outward looking for moisture. I usually see this show up as a plant that looks fine in June and starts wilting on hot afternoons in July, even though the emitter is still running on schedule.
The fix is straightforward once you know to look for it. Put two emitters per plant, one on each side of the stem, set 6 to 8 inches out. That spacing follows the root spread without putting water right against the stem, which also helps keep crown rot risk down in a raised bed where drainage can already be slower than in-ground soil. A single center emitter will not maintain even moisture once the roots have spread past it, no matter how long you run it.
If you’re setting up a new bed, it’s worth deciding on this two-emitter spacing before you plant rather than trying to retrofit it once the canopy fills in and the tubing is harder to reach.

These self-piercing emitters deliver a consistent 1 gallon per hour from the start to the end of a tubing run, allowing soil to absorb water slowly and thoroughly at the root zone. Compatible with quarter-inch drip tubing or insertable directly into half-inch and larger supply tubing. Large internal water passages and a self-flushing design reduce clogging, and UV and chemical-resistant construction ensures long-term outdoor durability.
Check On AmazonIf you click this link and buy, we earn a commission at no additional cost to you.
Flow Rate: What a Fruiting Tomato Actually Pulls in Hot Weather
A fruiting tomato plant in peak summer heat can use 1 to 2 gallons of water a day, and that number is the second piece people miss. The best tomato drip setups account for this by matching emitter flow rate to run time in a way that’s realistic for a daily watering window, not just whatever the kit shipped with.
Here’s how that plays out with two flow rates I see often in raised bed kits. A 1.0 GPH emitter running 1 to 2 hours delivers that 1 to 2 gallon daily target directly. A 0.5 GPH emitter needs 2 to 4 hours to deliver the same amount, which is fine if your timer and schedule support that, but it catches people off guard when they’re used to a 30 minute run time that worked for a bed of herbs or lettuce. When planning tomato drip spacing in a raised bed, you have to factor in this run time difference, because spacing and flow rate work together, not separately.
| Emitter Flow Rate | Approx. Run Time for 1 to 2 Gallons | Best Fit For |
|---|---|---|
| 0.5 GPH | 2 to 4 hours | Beds with longer available watering windows or cooler microclimates |
| 1.0 GPH | 1 to 2 hours | Peak summer heat, fruiting plants, shorter watering windows |
Neither flow rate is wrong on its own. The mistake is running a 0.5 GPH setup on the same short schedule you’d use for greens and assuming the tomato plant is getting equivalent water. It isn’t, and that gap is usually invisible until a hot, dry stretch exposes it.

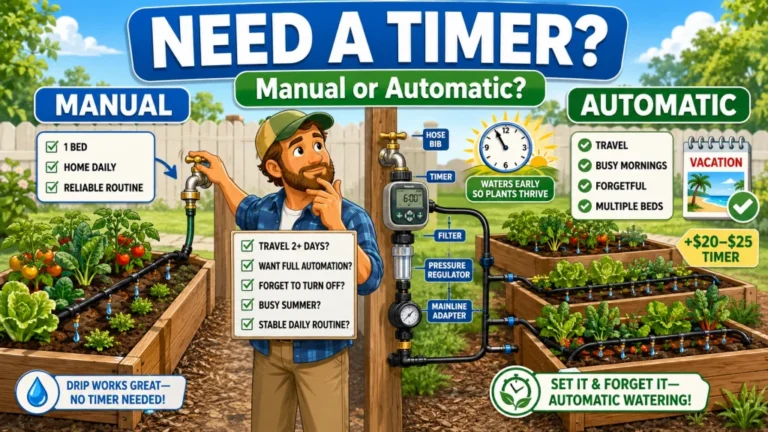
This robust hose-end timer works with sprinklers, drip irrigation, and soaker hoses, offering simple automatic programming with full 7 day scheduling for worry-free watering. An extra-large dial and readout screen make setup and schedule review easy, while one-touch buttons allow quick cancellation, a rain delay of up to 96 hours, or manual watering on demand. The display also shows the next scheduled cycle and time remaining on the current one.
Check On AmazonIf you click this link and buy, we earn a commission at no additional cost to you.
Why Straight Emitter Lines Leave Dry Patches Between Plants
There’s a pattern I’ve also seen documented outside my own installs that matches what I run into in tomato beds specifically. A longtime drip irrigation practitioner who writes the Gardenbasics Substack documented that emitters aligned in straight rows created dry patches between the lines once the bed filled in with tomato plants, and the fix was staggering the emitter placement instead of running everything in a perfectly parallel grid.
This tracks with what I see on the ground. Tomato roots fill in unevenly compared to shallow-rooted greens, and a dry strip between two straight lines doesn’t matter much for lettuce roots sitting close to the surface, but it matters a lot for a tomato plant trying to pull moisture from a wider, deeper area. Staggering the emitter pattern, even slightly, closes that gap and keeps the wetted zones overlapping instead of leaving a dry seam down the middle of the bed.
- Check whether your current emitters sit in one perfectly straight line down the bed.
- If they do, and you’re seeing dry soil between plants, offset alternating emitters by a few inches rather than re-running the whole line.
- Re-check moisture at the dry spot a few days after adjusting, since raised bed mix can take a little time to redistribute moisture laterally.
Once the lines are staggered, the next thing worth double-checking is whether the emitters themselves are even rated for what a tomato bed needs, which is really a flow rate question more than a brand question.
Choosing the Right Setup Without Overcomplicating It
I’m not going to tell you a tomato bed needs a complicated multi-zone setup, because most don’t. What I will say is that a raised bed drip system for tomatoes usually leans toward higher-flow emitters, generally in the 0.8 to 1.0 GPH range, over the lower 0.5 GPH emitters that work fine for herbs and leafy greens. If your bed is mixed crops, that doesn’t mean you need two separate systems, it usually means adjusting run time per zone or grouping tomatoes on their own line so you’re not compromising between two very different water demands.
A 4×8 bed planted heavily with tomatoes and peppers doesn’t need the same spacing or flow rate as a 4×8 bed packed with lettuce and spinach, and I’d rather see someone adjust the layout before planting than try to chase dry strips once the canopy has filled in and the tubing is buried under leaves. That one decision, made early, saves more troubleshooting later than almost anything else I get asked about.

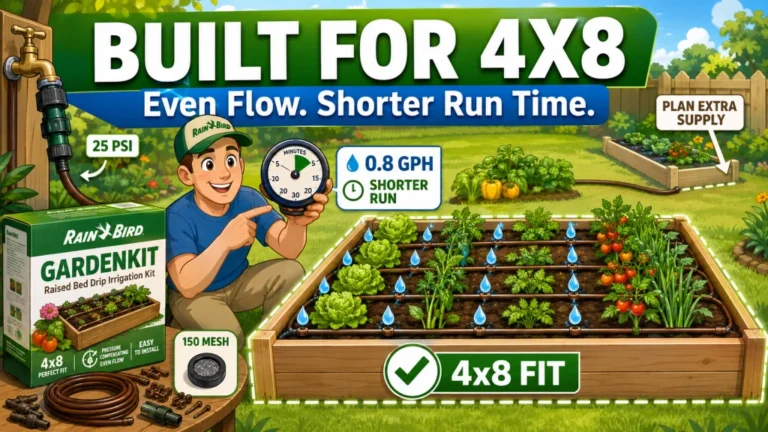
This kit includes everything needed to water a raised bed up to 4 by 8 feet, with professional-grade components built for repeated seasonal use. It features 35 feet of emitter tubing with 70 built-in, pressure-compensating emitters spaced every 6 inches for even watering near the roots, plus 25 feet of easy-to-handle 1/4 inch distribution tubing. This low-volume design can save up to 80% on water while supporting healthier plants and better yields. Installation is straightforward thanks to an illustrated manual covering multiple layout options, and the system can be automated with a compatible Rain Bird hose-end timer sold separately.
Check On AmazonIf you click this link and buy, we earn a commission at no additional cost to you.
A Quick Pre-Buy Check for Tomato Drip Setups
Before you buy a new kit or commit to reworking the one you already have, it helps to check it against what tomatoes actually need rather than what the package promises. A kit can look perfectly capable on the shelf and still fall short once it’s running on a bed full of fruiting plants in July. The kit comparison guide is useful when you need to compare those limits across different raised bed setups.
- Can you place two emitters per tomato plant without rebuilding the whole line, or does the tubing layout box you into one emitter per plant?
- Does the emitter flow rate fit the watering window you realistically have, whether that’s a quick morning check or a longer overnight run?
- Can the layout be adjusted as the plant grows from a small transplant to a full canopy, or are the emitters fixed in a spot that only made sense early on?
- Will tomatoes end up sharing a schedule with lettuce, herbs, or other shallow-rooted crops just because they’re on the same line?
If the answer to any of those is “not easily,” that’s usually a sign the setup was built for a generic vegetable bed rather than for tomatoes specifically, and it’s worth adjusting before the season gets busy rather than mid-July when the plants are already stressed.

This portable kit packs 100 feet of self-dispensing quarter-inch blank distribution tubing alongside 40 pressure-compensating emitters in three flow rates, 0.5, 1.0, and 2.0 gallons per hour, plus 20 barbed couplers, 20 barbed tees, 10 tubing stakes with bug caps, and 10 tubing plugs. Rain Bird's patented emitter installation and removal tool is included, making it easy to punch in or swap out emitters and quarter-inch fittings. Everything stores in a compact plastic pouch with individually organized bags.
Check On AmazonIf you click this link and buy, we earn a commission at no additional cost to you.
Final Thoughts: Match the System to the Plant, Not the Other Way Around
If there’s one thing worth taking away here, it’s that tomatoes don’t need a fundamentally different drip system, they need a few specific adjustments most generic raised bed setups skip: two emitters per plant instead of one, a flow rate that actually covers 1 to 2 gallons a day in hot weather, and emitter placement that’s staggered rather than perfectly straight. None of that requires replacing your whole layout, but it does mean checking these three things before you assume a struggling tomato plant is a soil or disease problem. For a broader look at how to plan a full raised bed drip kit around bed size and crop mix, how to choose a raised bed drip irrigation kit by garden size walks through that decision in more depth, and what to look for in a raised bed drip irrigation kit covers the broader buying picture if you’re starting from scratch.

This all-in-one kit waters up to 10 tomato, pepper, eggplant, or other vegetable plants using precision drip technology that delivers moisture directly to the root zone, using up to 70% less water than traditional watering methods. Push-connect fittings require no special tools, and the included adapters attach directly to any standard hose faucet or garden hose for setup in under an hour. Durable components are built for reuse season after season.
Check On AmazonIf you click this link and buy, we earn a commission at no additional cost to you.
FAQs
🍅 How many drip emitters does a tomato plant need in a raised bed?
Two emitters per plant, placed on each side of the stem about 6 to 8 inches out, works better than one center emitter once the plant’s root system spreads past the seedling stage.
💧 What GPH emitter is best for tomatoes in a raised bed?
A 0.8 to 1.0 GPH emitter generally fits tomato water demand better than a 0.5 GPH emitter, since it delivers the daily 1 to 2 gallons a fruiting plant needs in a shorter run time during hot weather.
⏱️ How long should I run drip irrigation for tomatoes?
It depends on emitter flow rate. A 1.0 GPH emitter typically needs 1 to 2 hours to deliver 1 to 2 gallons, while a 0.5 GPH emitter needs roughly 2 to 4 hours for the same amount.
🌱 Why do my tomatoes have dry patches between plants with drip irrigation?
Straight, perfectly parallel emitter lines often leave dry seams between plants in tomato beds. Staggering emitter placement instead of running them in a single straight line usually closes that gap.
🧱 Does drip irrigation help prevent blossom end rot in tomatoes?
Consistent root-zone watering from drip irrigation reduces the soil moisture swings linked to blossom end rot, though soil calcium levels and bed depth still play a role.
🌿 Should tomatoes be on a different drip schedule than lettuce or herbs?
Usually yes. Tomatoes need higher flow and deeper root-zone coverage than shallow-rooted greens, so grouping them on their own line or adjusting run time separately works better than one shared schedule for a mixed bed.